Windows are the single biggest source of heat loss in most UK homes, accounting for 25–30% of total heating energy use. That figure means a poorly sealed window is costing you money every day the heating runs. Knowing how to winterproof windows properly, using a combination of air sealing, insulation film, and thermal curtains, gives you a practical way to cut those losses without a major renovation. The good news is that basic DIY winterisation typically costs under £40 per window and takes 30–60 minutes to complete.
What tools and materials do you need to winterproof windows?
Gathering the right supplies before you start saves time and prevents half-finished jobs. The core tools are a putty knife, a caulking gun, scissors, and a blow dryer. You will also need cleaning cloths, rubbing alcohol, and a bucket of warm soapy water to prepare surfaces properly.
The materials you choose depend on which part of the window you are treating. Here is a quick breakdown:
- Exterior-grade caulk: seals fixed, stationary joints around the window frame permanently
- Removable rope caulk: fills gaps temporarily and peels away cleanly in spring
- Foam weatherstrip tape: fits around movable sashes and casements to block drafts
- Shrink-film insulation kits: create a secondary air barrier across the entire pane
- Thermal or cellular curtains: add a layer of insulation against cold glass
- Draft stoppers: sit along the windowsill to block low-level cold air
| Material | Approx. cost | Durability | Ease of application |
|---|---|---|---|
| Foam weatherstrip tape | £3–£8 per roll | 1–3 seasons | Very easy |
| Removable rope caulk | £4–£7 per roll | 1 season | Easy |
| Exterior-grade caulk | £5–£10 per tube | 5–10 years | Moderate |
| Shrink-film kit | £8–£15 per pack | 1 season | Easy with blow dryer |
| Thermal curtains | £20–£60 per pair | Several years | Very easy |
Pro Tip: Clean every surface with rubbing alcohol before applying double-sided tape or film kits. Grease and dust cause adhesives to fail within days, wasting both materials and effort.
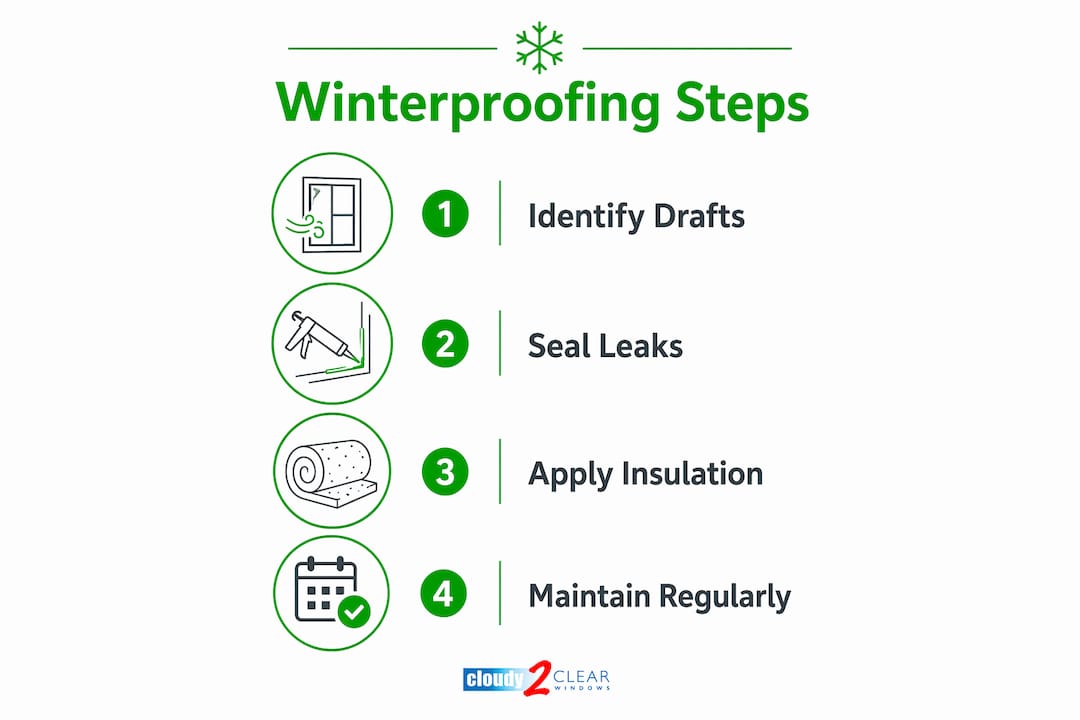
How to identify and seal window leaks properly
Sealing is the most effective single step you can take to reduce heat loss through windows. Air infiltration and thermal conduction are two separate problems, and sealing tackles the first one directly.
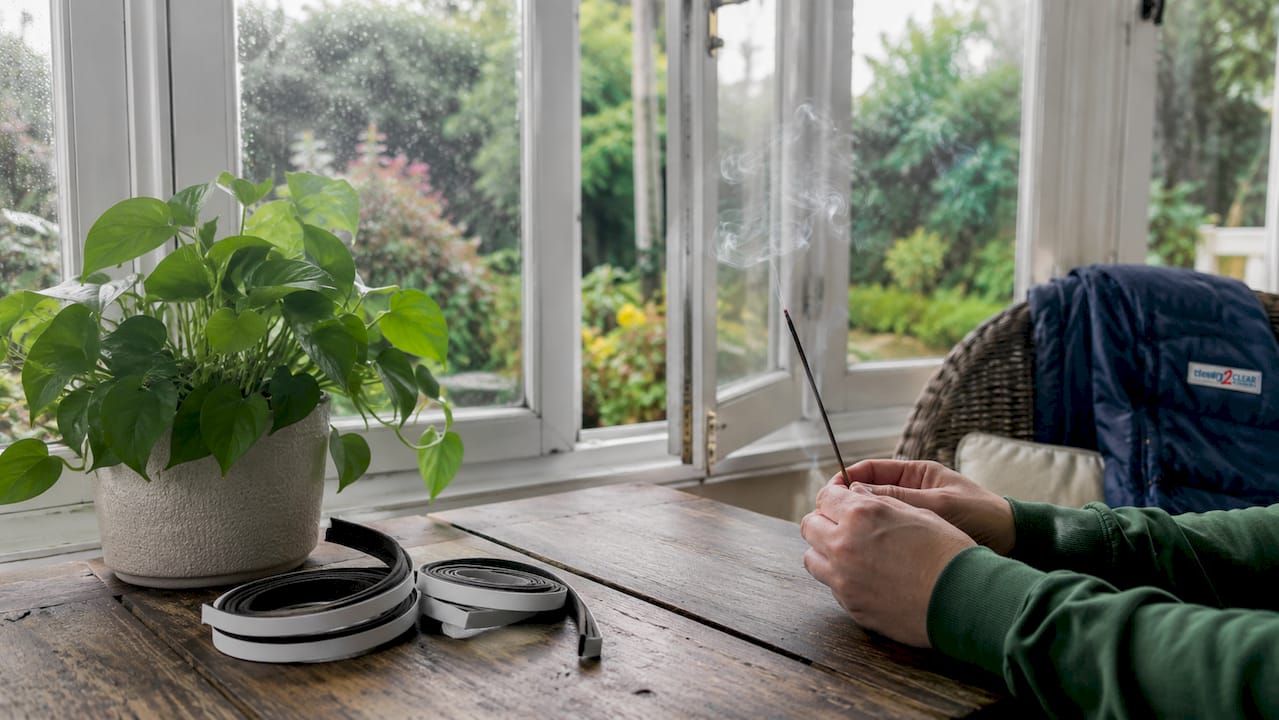
Finding drafts
Hold a lit candle or incense stick close to the window frame on a cold, windy day. A flickering flame or drifting smoke reveals exactly where cold air is entering. Work around the entire frame, including the corners and the meeting rail where two sashes overlap.
Sealing step by step
Follow this sequence for the best result:
- Clean the surface. Wipe the frame and sill with warm soapy water, then dry thoroughly. Finish with a wipe of rubbing alcohol on any area where adhesive will be applied.
- Apply exterior-grade caulk to fixed joints. Run a steady bead along the join between the window frame and the wall. Smooth it with a damp finger and leave it to cure fully before painting over it.
- Apply removable rope caulk to gaps in the frame. Press it into cracks with your finger. It stays flexible in cold weather and peels away without damage when spring arrives.
- Fit foam weatherstrip tape to movable sashes. Cut the tape to length, peel the backing, and press it firmly into the channel where the sash meets the frame. Close the window to compress the seal.
- Lock the window. Locking after fitting weatherstrip compresses the seal tighter, creating a firmer barrier against drafts.
- Recheck with the candle test. Run the flame around the frame again to confirm all leaks are closed.
The most common mistake here is applying permanent caulk to a movable sash. Doing so seals the window shut and can block emergency egress. Always use removable rope caulk or foam tape on any part of the window that opens.
Pro Tip: Use clear, removable weatherstrip caulk on movable parts rather than standard silicone. It stays flexible, does not yellow, and comes away cleanly without leaving residue on the frame.
What insulation options add thermal protection to windows?
Sealing stops air movement, but cold still conducts through the glass itself. Combining sealing with insulation addresses both heat loss modes and produces noticeably warmer rooms. The following methods are the most practical for UK homeowners and tenants.
Window insulation film kits
Shrink-film kits attach a clear plastic sheet across the interior of the window frame using double-sided tape. You then apply heat from a blow dryer to shrink the film taut and remove wrinkles. The result is a secondary glazing effect that traps a layer of still air between the film and the glass.
The main advantage is cost: a kit covering two standard windows typically costs under £15. The drawback is that the film reduces ventilation entirely, so you should not apply it to windows you need to open regularly during winter.
Thermal and cellular curtains
Thermal curtains use a dense, layered fabric to slow heat transfer through the glass. Cellular or honeycomb curtains trap air in small pockets within the fabric, which adds extra insulation value. For best results, hang curtains as close to the glass as possible and let them reach the floor or windowsill. Open them fully during daylight hours to allow solar gain, then close them at dusk to retain warmth.
You can find more detail on improving window insulation in our dedicated guide for UK homeowners.
Draft stoppers and bubble wrap
Draft stoppers placed along the windowsill block cold air that pools at floor level. They are inexpensive, reusable, and require no tools.
Bubble wrap is sometimes suggested as a free insulation layer, but it carries a real risk. Bubble wrap traps moisture against the glass and frame, which can cause mould on timber frames and condensation damage. Restrict its use to basement or utility windows where appearance and moisture risk are lower.
How to maintain winterproofing measures throughout the cold season
Applying seals and insulation in autumn is only half the job. Maintenance keeps those measures working through the coldest months.
Key checks to carry out regularly:
- Inspect seals every few weeks. Adhesive foam and weatherstrip tape can become brittle after sharp temperature swings. Seals that shrink or lift need replacing promptly to prevent heat loss returning.
- Recheck after severe weather. High winds and driving rain stress adhesive bonds. Run the candle test again after any storm to catch new gaps.
- Keep windows locked. A locked window compresses the weatherstrip continuously, maintaining the seal without any extra effort.
- Remove winterproofing safely in spring. Peel rope caulk and film kits away slowly and at room temperature. Pulling too fast or in cold conditions can lift paint from timber frames.
- Check for condensation between panes. Misting inside double glazing indicates a failed seal in the unit itself, which no amount of DIY weatherstripping will fix.
For a full routine on maintaining window seals effectively, our detailed guide covers what to look for and when to act.
What common mistakes should you avoid when winterproofing windows?
Even well-intentioned efforts can go wrong. These are the errors that reduce effectiveness or cause damage:
- Applying permanent caulk to movable sashes. This locks the window shut and can prevent emergency exit. Use removable products on any part that opens.
- Skipping surface preparation. Adhesives applied to dusty or greasy frames fail quickly. Always clean and dry surfaces before applying any tape, caulk, or film.
- Starting too late in the season. The best time to winterproof is early autumn when temperatures remain mild. Caulk and adhesive strips applied in freezing conditions bond poorly and may peel within weeks.
- Ignoring maintenance checks. Fitting weatherstrip in october and never checking it again means you may be heating through gaps from november onwards without realising it.
- Using bubble wrap on visible windows. Beyond the moisture risk, it blocks light and looks unsightly. Reserve it for out-of-sight utility glazing only.
- Sealing without checking for existing damage. Applying tape over a cracked frame or broken seal in the glazing unit wastes effort. Fix underlying problems first.
Pro Tip: Set a reminder on your phone for the first week of september each year. That gives you time to buy materials, apply them in mild weather, and still have weeks of autumn left to check the results before the cold sets in.
What we have learned from years of window winterproofing advice
After nearly two decades working with homeowners and tenants across the UK, the pattern is clear: the people who get the best results combine methods rather than relying on one fix. Weatherstripping alone reduces drafts but does nothing for the cold radiating off the glass. Film kits alone help with conduction but leave gaps around the frame untouched. The combination of sealing and insulation is what actually makes a room feel warmer.
The other thing I would stress is timing. Homeowners who wait until the first frost are already fighting the problem. Applying adhesives in cold weather is genuinely harder, and the bonds are weaker. A calm afternoon in september or early october, when you can open the window to clean the frame and still have the heating off, is the ideal moment.
Finally, DIY measures have real limits. If your double glazing has misted up between the panes, or the frame has visible rot or cracks, no amount of film or tape will compensate. That is the point where professional repair adds lasting value rather than just seasonal comfort.
— Cloudy2Clear Windows
How Cloudy2Clear Windows can help beyond DIY
DIY winterproofing handles drafts and surface insulation well. When the problem runs deeper, such as failed double glazing units, damaged frames, or persistent condensation, professional repair is the more reliable solution.

Cloudy2Clear Windows has been repairing and replacing double glazed windows across the UK since 2005. Local teams cover areas including Milton Keynes, Oxford, and Leicester, with the expertise to restore your glazing to full efficiency. A repaired window retains heat far better than one held together with weatherstrip tape, and the improvement lasts for years rather than one season.
FAQ
How much heat do windows lose in a typical home?
Windows account for 25–30% of residential heat loss. Sealing and insulating them is one of the most cost-effective ways to reduce heating bills.
When is the best time to seal windows for winter?
Early autumn is the best time. Applying caulk or adhesive strips in freezing temperatures causes poor adhesion, so aim to complete the work before the first cold snap.
Can I winterproof windows as a tenant without causing damage?
Yes. Temporary products such as removable rope caulk, foam weatherstrip tape, and shrink-film kits leave no damage to frames and peel away cleanly in spring.
Do I need to combine sealing and insulation methods?
Combining both methods produces the best result. Caulk and weatherstripping stop air infiltration, while film kits and thermal curtains reduce heat conducting through the glass itself.
How do I know if my double glazing needs professional repair?
Misting or condensation between the panes indicates a failed glazing seal that DIY products cannot fix. A professional repair restores the insulating gas layer and eliminates the problem at its source.