Waking up to foggy windows or noticing persistent moisture on your glass surfaces signals more than just a minor annoyance. Window condensation affects countless homes and businesses across England and Scotland, creating discomfort, damaging property, and diminishing the appeal of your space. Left unchecked, this moisture can lead to mould growth, structural deterioration, and increased heating costs. This comprehensive guide walks you through understanding why condensation occurs, preparing for effective removal, executing proven techniques step by step, and maintaining condensation-free windows year round. You’ll gain practical knowledge to tackle this common problem confidently and protect your investment.
Understanding why window condensation occurs
Condensation occurs when warm, moist air encounters a cold surface, such as a window pane. The science behind this phenomenon is straightforward yet crucial to grasp. Warm air holds significantly more moisture vapour than cold air. When heated indoor air contacts a chilled window surface, the air temperature drops rapidly at that contact point.
This temperature drop forces the air to release excess moisture it can no longer hold. The water vapour transforms into liquid droplets that accumulate on the glass. You’ll notice this most frequently during winter months when indoor heating creates warm, humid conditions whilst outdoor temperatures plummet, making window surfaces exceptionally cold.
Several factors intensify condensation formation:
- High indoor humidity from cooking, bathing, or drying clothes indoors
- Poor ventilation that traps moist air inside
- Single-glazed or poorly insulated windows that remain colder
- Inadequate heating that creates temperature extremes
The consequences extend far beyond aesthetic concerns. Persistent moisture creates ideal conditions for mould spores to colonise window frames, surrounding walls, and soft furnishings. This biological growth releases allergens and irritants that compromise indoor air quality, particularly affecting those with respiratory conditions. Water pooling on sills can rot wooden frames, corrode metal components, and stain plaster or wallpaper.
“Condensation left unaddressed transforms from a cosmetic nuisance into a structural threat, degrading your property’s condition and value whilst creating health hazards for occupants.”
Understanding these mechanisms helps you recognise that effective condensation removal requires addressing both the symptom (water on glass) and the root causes (temperature differential and excess moisture). This knowledge forms the foundation for the targeted strategies outlined in subsequent sections, enabling you to tackle common causes of window damage prevention systematically.
Preparing for the condensation removal process
Successful condensation removal begins well before you touch the affected windows. Proper preparation ensures you work safely, efficiently, and address underlying issues that DIY cleaning alone cannot resolve. Start by assembling essential supplies that facilitate thorough moisture removal without damaging glass or frames.
Gather these materials before beginning:
- Clean, absorbent microfibre cloths or lint-free towels
- Spray bottle filled with warm water and mild detergent
- Squeegee for efficient water removal from large panes
- White vinegar solution (50/50 mix) for mould treatment
- Portable dehumidifier if available
- Step ladder for safely reaching upper windows
Next, conduct a detailed inspection of each affected window. Look beyond the obvious moisture to identify potential structural problems. Check window seals for cracks, gaps, or deterioration that might allow air infiltration. Press gently around the frame perimeter to detect soft spots indicating rot. Examine the glazing compound or rubber gaskets securing the glass for signs of failure.

Persistent condensation can lead to mould and damp, structural damage, poor indoor air quality, and colder indoor temperatures. Identifying these risks early allows you to determine whether simple cleaning suffices or professional intervention becomes necessary. Internal condensation between double-glazed panes, for instance, signals seal failure requiring specialist repair rather than surface cleaning.
Pro Tip: Photograph affected windows before starting removal work. These images document the extent of condensation, help you track improvement over time, and provide valuable reference if you need to consult professionals about persistent issues.
Consider timing your removal efforts strategically. Address condensation promptly when you notice it rather than allowing moisture to accumulate for days or weeks. Morning typically presents the heaviest condensation after overnight temperature drops, making it an ideal time to assess severity whilst planning removal for slightly warmer midday hours when ventilation proves more effective.
| Preparation Task | Purpose | Time Required |
|---|---|---|
| Gather cleaning supplies | Ensures efficient, damage-free removal | 10 minutes |
| Inspect window condition | Identifies structural issues needing repair | 15 minutes |
| Check weather forecast | Plans optimal ventilation timing | 5 minutes |
| Review safety precautions | Prevents accidents during cleaning | 5 minutes |
Safety deserves particular attention when working with cleaning chemicals and ladders. Ensure adequate ventilation before applying any cleaning solutions, especially those containing bleach or ammonia. Wear protective gloves to shield skin from prolonged moisture exposure and cleaning agents. Position ladders on stable, level surfaces and maintain three points of contact when climbing.
Understanding how to prevent condensation in double-glazed windows informs your preparation by highlighting which preventive measures to implement alongside removal efforts. This dual approach tackles existing moisture whilst reducing future occurrence, maximising the effectiveness of your work.
Step-by-step guide to removing window condensation
With preparation complete, you’re ready to execute systematic condensation removal that delivers lasting results. This process combines immediate moisture elimination with environmental adjustments that prevent rapid reformation. Follow these steps in sequence for optimal effectiveness.
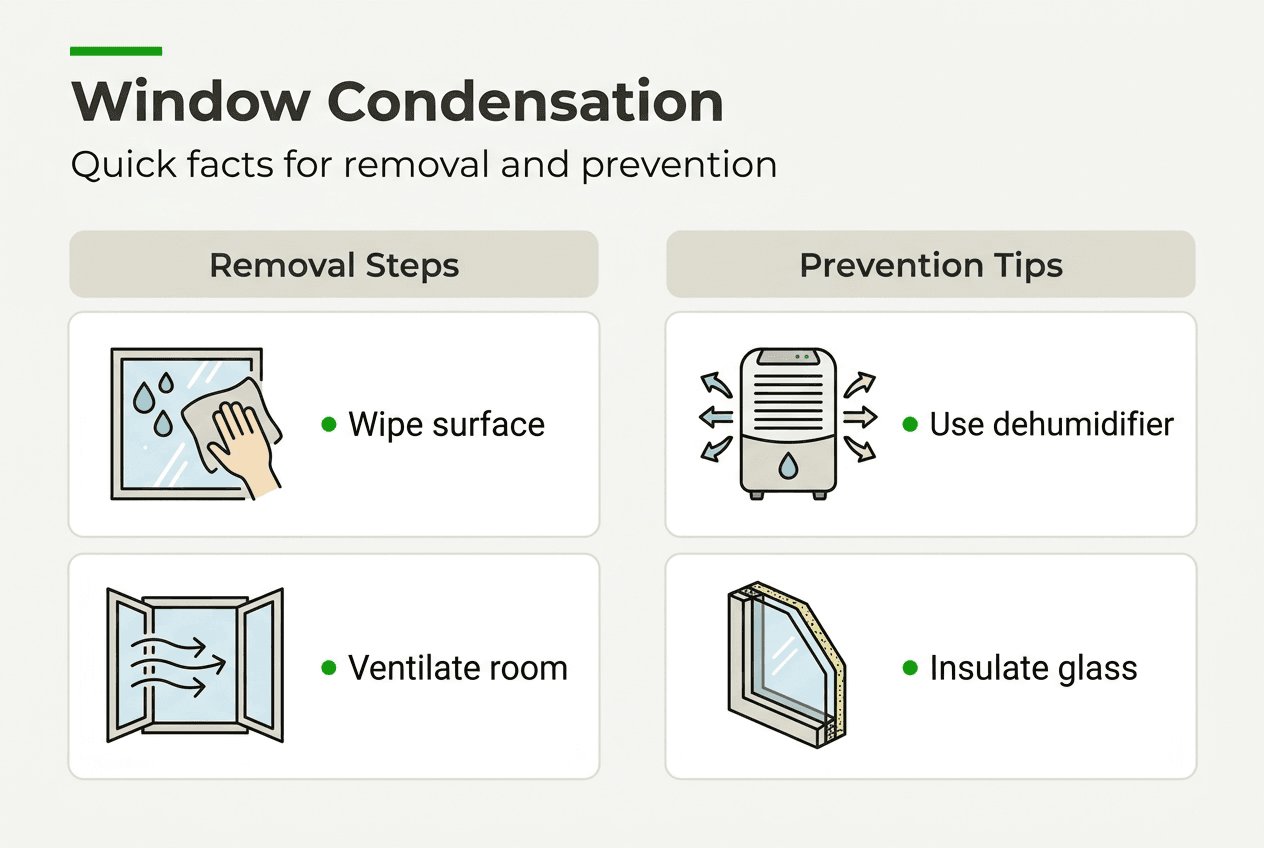
- Wipe down affected surfaces thoroughly. Start at the top of each window pane and work downwards using clean, dry microfibre cloths. Apply gentle pressure to absorb condensation without scratching glass. Replace saturated cloths frequently to maintain absorption efficiency. For heavily condensed windows, use a squeegee to remove bulk moisture before cloth drying. Pay special attention to corners and edges where water accumulates.
- Clean glass and frames with appropriate solutions. After removing visible moisture, spray your detergent solution lightly onto the glass. Wipe clean with fresh cloths using circular motions. This removes any residue, dirt, or early-stage mould that condensation may have deposited. For frames showing mould growth, apply diluted white vinegar solution, allow it to sit for five minutes, then wipe clean. This natural treatment kills mould spores without harsh chemicals.
- Increase immediate ventilation. Open windows in the affected room for at least 15 minutes, weather permitting. This exchanges humid indoor air with drier outdoor air, reducing moisture levels rapidly. If outdoor conditions prevent window opening, activate extractor fans in kitchens and bathrooms. Position a portable dehumidifier near affected windows to actively remove airborne moisture.
- Inspect and address seal integrity. Examine window seals closely for gaps, cracks, or deterioration discovered during preparation. Minor gaps can be temporarily sealed with weatherstripping tape as an immediate fix. However, significant seal failure requires professional attention. Internal condensation between double-glazed panes indicates complete seal breakdown that DIY methods cannot resolve.
- Implement moisture source control. Identify activities generating excess humidity in the affected space. Move indoor clothes drying to well-ventilated areas or outdoors. Use lids when cooking to contain steam. Run extractor fans during and for 20 minutes after bathing. These simple adjustments reduce the moisture load your windows must contend with.
Getting rid of condensation requires reducing moisture in the air and stopping surfaces from getting cold enough to reach the dew point. This dual approach addresses both sides of the condensation equation, delivering more sustainable results than cleaning alone.
Pro Tip: Create a daily condensation check routine during winter months. Each morning, quickly inspect windows for new moisture formation. Early detection allows immediate wiping before water pools on sills or frames, preventing the cumulative damage that develops when condensation persists unaddressed for extended periods.
| Removal Step | Frequency | Expected Result |
|---|---|---|
| Surface wiping | Daily during cold weather | Immediate moisture removal |
| Deep cleaning | Weekly | Mould prevention and clarity |
| Ventilation boost | After moisture-generating activities | Reduced humidity levels |
| Seal inspection | Monthly | Early damage detection |
For persistent condensation despite following these steps, professional intervention becomes necessary. Failed window seals, inadequate insulation, or structural issues require specialist diagnosis and repair. Understanding how to fix window leaks guide helps you recognise when DIY efforts should transition to professional solutions that address underlying problems your removal efforts cannot resolve.
Monitor results over several days after implementing these steps. Successful removal should show progressively less condensation formation each morning, indicating your environmental adjustments are working. If condensation returns immediately or worsens, this signals deeper issues requiring expert assessment.
Maintaining condensation-free windows and preventing recurrence
Removing existing condensation solves only half the challenge. Preventing its return requires ongoing environmental management and strategic upgrades that address root causes. These maintenance strategies protect your investment whilst enhancing comfort and energy efficiency.
Ventilation forms your primary defence against condensation recurrence. Adequate air circulation prevents moisture accumulation that leads to condensation formation. Install trickle vents in window frames if not already present. These small, controllable openings allow continuous air exchange without fully opening windows. Open windows for at least 10 minutes twice daily, even during cold weather, to refresh indoor air. This brief ventilation has minimal heating cost impact whilst significantly reducing humidity.
Implement these ventilation practices:
- Run extractor fans during cooking and bathing, continuing for 20 minutes afterwards
- Keep internal doors open to promote air circulation between rooms
- Avoid blocking air vents or radiators with furniture or curtains
- Use window vents on the leeward side of buildings to prevent drafts whilst maintaining airflow
Humidity control complements ventilation by directly reducing moisture available for condensation. Portable dehumidifiers prove particularly effective in rooms prone to dampness, such as bathrooms, kitchens, and poorly ventilated bedrooms. Position these devices centrally for optimal coverage. Empty collection tanks regularly and clean filters monthly to maintain efficiency. Moisture-absorbing products like silica gel containers offer passive humidity reduction in smaller spaces like windowsills.
Temperature management plays an equally crucial role. Maintaining consistent, moderate heating prevents the extreme temperature differentials that trigger condensation. Avoid turning heating completely off overnight, as this allows surfaces to become extremely cold. Instead, set thermostats to maintain minimum temperatures around 15-17°C during unoccupied periods. This strategy proves more energy-efficient than allowing spaces to cool completely then reheating, whilst keeping window surfaces above dew point temperatures.
Pro Tip: During winter months, close curtains and blinds only after windows have warmed from daytime heating. Covering cold glass traps frigid air against the pane, creating ideal condensation conditions. Allow windows to warm for at least an hour after sunset before closing coverings.
| Prevention Method | Effectiveness | Cost | Maintenance |
|---|---|---|---|
| Regular ventilation | High | Free | Daily attention |
| Dehumidifier use | Very high | Moderate (£100-300) | Weekly emptying |
| Trickle vent installation | High | Low (£50-150) | Minimal |
| Secondary glazing | Very high | Moderate (£200-500/window) | Annual cleaning |
| Full window replacement | Highest | High (£400-1000/window) | Minimal |
For properties with persistent condensation despite diligent maintenance, glazing upgrades offer permanent solutions. Secondary glazing adds an insulating air layer that raises internal pane temperatures above dew point. This retrofit solution suits listed buildings or properties where full replacement proves impractical. Modern double or triple glazing provides superior insulation, dramatically reducing cold surface areas where condensation forms.
Reducing moisture and preventing cold surfaces are key to avoiding condensation recurrence. Understanding how to prevent condensation in a conservatory demonstrates these principles in challenging environments with extensive glazing, offering insights applicable to standard windows.
Monitor indoor humidity levels using an inexpensive hygrometer. Ideal relative humidity ranges between 40-60%. Levels consistently above 60% indicate inadequate ventilation or excessive moisture generation requiring intervention. Adjust your prevention strategies based on these measurements rather than waiting for visible condensation to appear.
Seasonal adjustments optimise prevention efforts. Winter demands increased vigilance with heating, ventilation balance, and humidity control. Summer typically presents fewer condensation challenges but requires attention to preventing excess humidity from outdoor air entering through open windows during humid weather. Learning to identify window condensation issues helps you distinguish between different condensation types requiring varied prevention approaches.
Explore expert double glazing repairs and window glass replacement
When condensation persists despite your best DIY efforts, professional intervention becomes essential. Failed window seals, structural damage, and internal condensation between double-glazed panes require specialist expertise and equipment beyond typical homeowner capabilities. Cloudy2Clear Windows brings over two decades of experience resolving condensation issues for homes and businesses throughout England and Scotland.

Professional repairs restore window seal integrity, replace failed glazing units, and upgrade insulation performance. These interventions eliminate condensation at its source rather than merely managing symptoms. Expert assessment identifies whether repair or full replacement offers the most cost-effective, long-lasting solution for your specific situation. Modern replacement glazing significantly outperforms older units, reducing condensation risk whilst improving energy efficiency and comfort. If you’ve followed this guide yet condensation continues affecting your property, explore double glazing repairs and window glass replacement options that deliver permanent solutions.
Frequently asked questions
What causes condensation to form between double-glazed window panes?
Internal condensation between double-glazed panes indicates seal failure allowing moisture to enter the hermetically sealed space. The desiccant material designed to absorb residual moisture becomes saturated, permitting water vapour to condense on interior glass surfaces. This damage cannot be repaired through cleaning and requires professional glazing unit replacement to restore performance.
Can I use household products to remove mould caused by window condensation?
Yes, diluted white vinegar or mild bleach solutions effectively kill mould spores on window frames and surrounding surfaces. Mix one part bleach to four parts water or use undiluted white vinegar. Apply with a cloth, allow five minutes contact time, then wipe clean. Always wear gloves, ensure adequate ventilation, and never mix bleach with other cleaning products as this creates dangerous fumes.
How often should I check my windows for signs of condensation or damage?
Inspect windows monthly during autumn and winter when condensation risk peaks. Conduct thorough checks after severe weather events that may compromise seals or frames. Daily quick visual inspections during cold snaps allow immediate moisture removal before damage develops. Annual professional assessments identify deterioration requiring repair before minor issues escalate into costly replacements.