Drafty windows can turn your comfortable home into a cold, unwelcoming space whilst driving up heating bills throughout winter months. You probably notice the chill creeping in around window frames or feel a persistent breeze near the glass even when everything looks closed. Learning practical sealing methods transforms these problem areas into efficient barriers against the cold, cutting energy waste and improving indoor comfort without requiring professional help for every situation. This guide walks you through identifying draft sources, selecting appropriate materials, and executing effective sealing techniques that deliver lasting results.
Understanding the causes and preparation for sealing drafty windows
Window seal failures and draftiness often arise from degraded seals and gaps that develop over time. The rubber gaskets around double glazing units deteriorate from UV exposure and temperature fluctuations, whilst frame joints separate as buildings settle. Poor initial installation creates immediate draft problems that only worsen with age. You might also discover gaps where the window frame meets the wall, particularly in older properties where original sealant has cracked and fallen away.

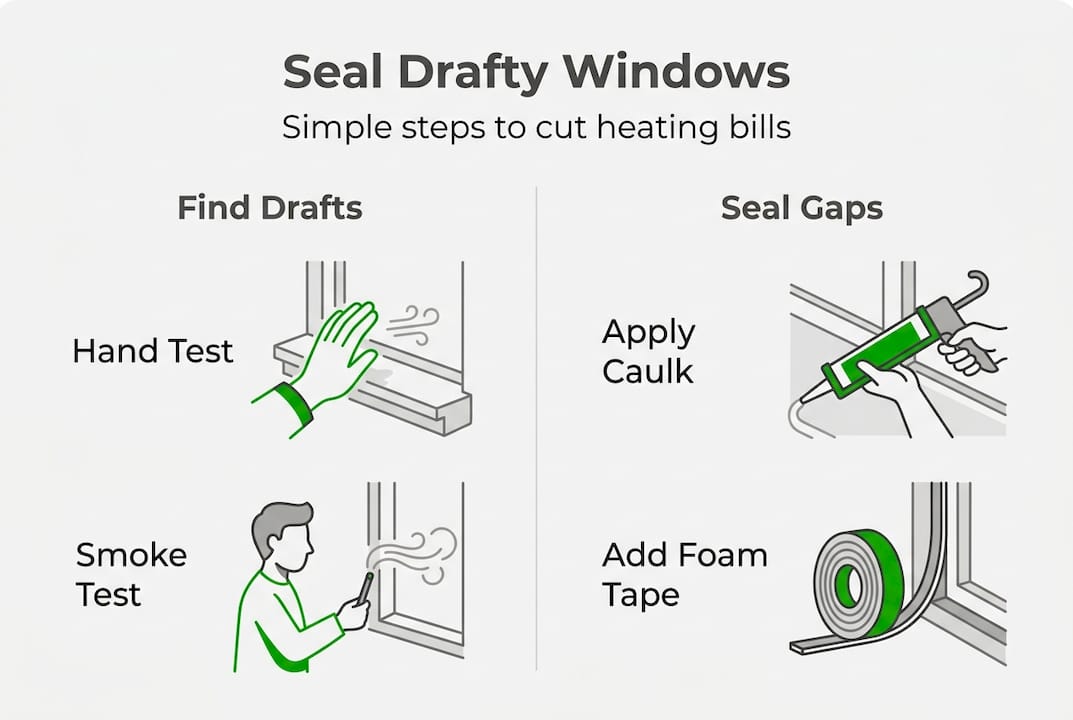
Detecting drafts requires simple but effective testing methods. Hold a lit candle or incense stick near window edges on a windy day and watch for flame movement or smoke disturbance. Alternatively, close a thin strip of paper in the window and try pulling it out whilst the window remains shut. If the paper slides out easily, you have found a draft source. Run these tests around the entire window perimeter, checking all four sides plus the meeting rails where sashes come together. Proper assessment and preparation improve sealing outcomes significantly.
Gathering the right tools and materials before starting prevents frustrating mid-project trips to the hardware shop. You will need weatherstripping in foam or rubber varieties, exterior-grade sealant suitable for your window material, a caulking gun, utility knife, cleaning supplies including methylated spirits, lint-free cloths, and possibly a putty knife for removing old sealant. Consider purchasing a few extra metres of weatherstripping since cutting to exact lengths often results in some waste.
| Sealing material | Best use case | Typical lifespan |
|---|---|---|
| Foam tape weatherstripping | Movable joints, easy application | 1-3 years |
| Rubber gasket weatherstripping | High-traffic windows, better durability | 3-5 years |
| Silicone sealant | Permanent gaps, exterior use | 10-20 years |
| Acrylic latex caulk | Interior gaps, paintable finish | 5-10 years |
| Rope caulk | Temporary seasonal sealing | Single season |
Pro Tip: Wear protective gloves when handling sealants and clean window surfaces thoroughly with methylated spirits before applying any sealing materials. Dust, moisture, and old residue prevent proper adhesion, causing new seals to fail within weeks rather than lasting years.
Step-by-step guide to sealing drafty windows effectively
Draught proofing extends window life and saves energy when executed properly. Follow this systematic approach for professional-quality results without hiring contractors.
- Clean window frames and surrounding areas thoroughly using methylated spirits and lint-free cloths. Remove all dust, grease, old sealant fragments, and loose paint. Allow surfaces to dry completely before proceeding, which typically takes 15-30 minutes depending on humidity levels. This preparation step determines whether your sealing materials bond properly or peel away within months.
- Apply weatherstripping or foam tape to movable joints where window sashes meet frames. Measure each section carefully and cut weatherstripping slightly longer than needed, then trim to exact length during installation. Press firmly along the entire length to ensure complete contact with the surface. For sliding windows, apply weatherstripping to both vertical channels. For casement windows, focus on the frame areas where the window closes against the seal.
- Use sealant or caulk to fill larger gaps and cracks between window frames and walls. Cut the sealant tube nozzle at a 45-degree angle to create a bead width matching your gap size. Apply steady pressure whilst moving the caulking gun smoothly along the gap. For deep cracks exceeding 6mm, use foam backer rod first to reduce sealant consumption and improve flexibility. Smooth the bead with a wetted finger or smoothing tool within five minutes of application before a skin forms.
- For secondary defence against drafts, consider applying insulating window film to the interior glass surface. This transparent plastic shrinks tight when heated with a hairdryer, creating an additional air barrier. Whilst not a permanent solution, window film provides extra insulation during particularly cold months and costs considerably less than replacement windows.
- Check for missed spots by running your hand around sealed areas whilst someone else creates air pressure differences by opening and closing interior doors. Mark any remaining draft sources with tape and repeat the sealing process in those specific locations. Multiple thin applications often work better than one thick bead that may not cure properly.
Pro Tip: Avoid over-applying sealant, which creates messy excess that requires cleanup and may prevent windows from opening smoothly. Apply just enough to fill the gap, then smooth immediately for a professional appearance and proper function.
Always ensure adequate ventilation when using chemical sealants indoors, and exercise caution when working on ladders to reach upper-floor windows. Some sealants release strong fumes during curing that can cause headaches or respiratory irritation in enclosed spaces.
Common issues, troubleshooting, and maintenance tips for sealed windows
Even properly sealed windows can develop problems over time. Sealant cracks appear as materials age and building movement stresses the bonds. Adhesive failure occurs when weatherstripping loses its grip, often because surface preparation was inadequate or the wrong adhesive type was used for the material. Condensation despite sealing typically indicates ventilation problems rather than seal failure, though it can damage seals over time if moisture becomes trapped.
When sealant cracks develop, remove the damaged section completely rather than sealing over it. Use a utility knife or putty scraper to extract old material, clean the area thoroughly, and apply fresh sealant. For weatherstripping that has come loose, remove it entirely and clean away residual adhesive before installing new strips. If condensation appears between double glazing panes, the sealed unit itself has failed and requires professional window maintenance or replacement since no amount of external sealing will resolve internal moisture.
Regular maintenance extends the life of your sealing work significantly. Inspect seals every autumn before heating season begins, looking for cracks, gaps, or areas where weatherstripping has compressed and lost effectiveness. Clean window frames and seals gently with mild soap solution, avoiding harsh chemicals that degrade rubber and silicone materials. During severe weather, check that wind-driven rain has not compromised exterior sealant, particularly around the bottom rails where water accumulates.
| Sealant type | Average durability | Maintenance frequency | Weather resistance |
|---|---|---|---|
| Silicone | 15-20 years | Inspect annually | Excellent |
| Acrylic latex | 5-10 years | Inspect annually | Good for interior |
| Butyl rubber | 10-15 years | Inspect every 2 years | Excellent |
| Foam tape | 1-3 years | Replace as needed | Fair |
Maintaining sealed windows effectively requires following several key practices:
- Clean seals gently without using abrasive materials that damage surfaces
- Inspect weatherstripping compression and replace when gaps appear
- Avoid painting over weatherstripping, which reduces flexibility
- Check exterior sealant after storms for weather damage
- Lubricate moving window parts to prevent stress on seals
- Never force stuck windows, which can tear weatherstripping
- Remove and reapply temporary sealing materials seasonally
- Address building settlement cracks promptly before they enlarge
Verifying sealing success and when to call professional repairs
Testing your sealing work confirms effectiveness before winter cold arrives. The smoke test using incense or a candle remains the simplest verification method. Pass the smoke source slowly around all sealed areas whilst watching for disturbance. Any movement indicates remaining drafts requiring additional attention. Monitor your energy bills over the following months. Properly sealed windows should reduce heating costs noticeably, though the exact amount depends on how drafty they were initially and your overall home insulation.
Thermal imaging cameras, increasingly available as smartphone attachments, reveal temperature differences that indicate air leakage. These devices show cold spots in false colour, making draft sources visually obvious even when you cannot feel them. Some energy suppliers offer free thermal imaging assessments that identify problem areas throughout your home, not just windows.
Several signs indicate sealing alone will not solve your window problems:
- Persistent drafts after thorough sealing attempts
- Condensation appearing between double glazing panes
- Visible frame damage including rot or severe warping
- Increasing energy bills despite sealing efforts
- Windows that no longer open or close properly
- Cracked or broken glass requiring replacement
Knowing when DIY fixes suffice versus requiring professional help saves money and frustration. Weatherstripping replacement and basic gap sealing work well as DIY projects for most homeowners. However, failed double glazing units, structural frame damage, and persistent moisture problems need expert diagnosis. Professional double glazing repairs improve energy efficiency significantly when DIY is insufficient, addressing underlying problems that surface treatments cannot fix.
Homeowners who invest in professional double glazing repairs typically see energy savings of 15-25% compared to leaving damaged windows unsealed, with payback periods of 3-5 years depending on window size and local energy costs.
Enhance your window sealing with expert repairs and services
Whilst DIY sealing methods work brilliantly for minor drafts and maintenance, some window problems require professional expertise to resolve properly. Cloudy2Clear Windows offers comprehensive double glazing repairs in Oxford, Leicester and Loughborough, and throughout England and Scotland. Our specialists diagnose underlying causes of persistent drafts, failed seals, and condensation issues that DIY approaches cannot address.

With nearly two decades of experience since our establishment in 2005, we understand exactly how window problems affect both residential comfort and commercial building efficiency. Our broken window repair services restore windows to peak performance, combining expert repairs with high-quality replacement components when necessary. Whether you need failed seal replacement, frame restoration, or complete glazing unit renewal, our team delivers solutions that enhance comfort whilst reducing energy waste for years to come.
How to seal drafty windows: frequently asked questions
What is the easiest way to stop window drafts?
Foam tape weatherstripping provides the quickest and easiest draft solution for most homeowners. Simply clean the window frame, cut the tape to length, and press it firmly into place where the window meets the frame. This method requires no special tools and works immediately, though it needs replacement every few years as the foam compresses.
How long does window draught proofing last?
Draught proofing longevity varies by material type and installation quality. Foam weatherstripping typically lasts 1-3 years, rubber gaskets endure 3-5 years, whilst properly applied silicone sealant can perform effectively for 10-20 years. Regular inspection and maintenance extend the life of all sealing materials significantly.
Can sealing drafty windows reduce my heating bills?
Yes, sealing drafty windows typically reduces heating costs by 10-20% depending on how severe the drafts were initially. The savings accumulate over time, often paying back your material costs within a single heating season whilst improving comfort immediately. Combining window sealing with other insulation improvements delivers even greater energy savings.
When should I replace my window instead of sealing it?
Replace windows when frames show structural damage like rot or severe warping, when double glazing units have failed with condensation between panes, or when repeated sealing attempts fail to stop persistent drafts. Windows over 20 years old often benefit from replacement rather than continued repairs, particularly if energy efficiency has degraded significantly.
Are DIY draught-proofing products effective?
DIY draught-proofing products work excellently for straightforward sealing tasks when applied correctly to properly prepared surfaces. Weatherstripping, foam tape, and caulk deliver professional-quality results for minor to moderate draft problems. However, structural issues, failed glazing units, and severe frame damage require professional assessment and repair for lasting solutions.