Cracked or failed window glazing costs UK homeowners far more than most people realise. Beyond the draughts and rattling frames, poorly glazed windows can add hundreds of pounds to annual heating bills, undermine your property’s kerb appeal, and cause ongoing damp problems. Whether you own a Victorian terrace in Edinburgh or a commercial unit in Manchester, knowing how to reglaze windows correctly is a genuinely useful skill. This guide walks you through when reglazing is the right choice, what you will need, how to carry out the work step by step, and how to finish it properly so the result lasts for years.
Understanding when and why to reglaze windows
Now that you understand the risks of leaving damaged windows untreated, let’s clarify when reglazing is the right approach.
Reglazing means replacing the glass pane within an existing frame, leaving the frame itself in place. It is not the same as full window replacement, which involves removing the entire frame and fitting a new unit. That distinction matters enormously, particularly in older properties across England and Scotland where conservation laws protect the original fabric of buildings.
Common signs your windows need reglazing include:
- Persistent draughts even when the window is fully closed
- Rattling glass in the frame, especially in windy weather
- Condensation forming between panes in a sealed double-glazed unit
- Cracked, chipped, or broken glass
- Visible gaps where putty has shrunk, cracked, or fallen away
- Discolouration or fogging that will not clean off
If your windows show any of these signs, reglazing can restore their thermal performance and appearance without the cost or disruption of full replacement.
For period and listed properties, reglazing is often the only legally acceptable option. As the Glasgow Design Guide explains, reglazing improves insulation and aesthetics without full replacement, which is ideal for period properties, since full replacement may violate heritage rules. If your property sits within a conservation area or is listed, you should check with your local planning authority before ordering new glass.
Energy efficiency is another key driver. Window energy regulations set minimum U-values (a measure of how much heat passes through a material per square metre) for replacement glazing. In England, that threshold is 1.6 W/m²K; in Scotland, the standard is tighter at 1.4 W/m²K. Reglazing with a modern sealed unit or specialist slim double-glazed unit can bring even older frames up to these standards.
Reglazing is often the smarter investment. You preserve original joinery, avoid planning complications, and still achieve meaningful energy savings at a fraction of the cost of new windows.
If you are considering reglazing older windows in a period property, getting the glazing choice right from the outset avoids repeat work and potential compliance problems later.
What you need: Tools, materials, and compliance essentials
With a clear understanding of why and when to reglaze, let’s move on to what you’ll need before starting.
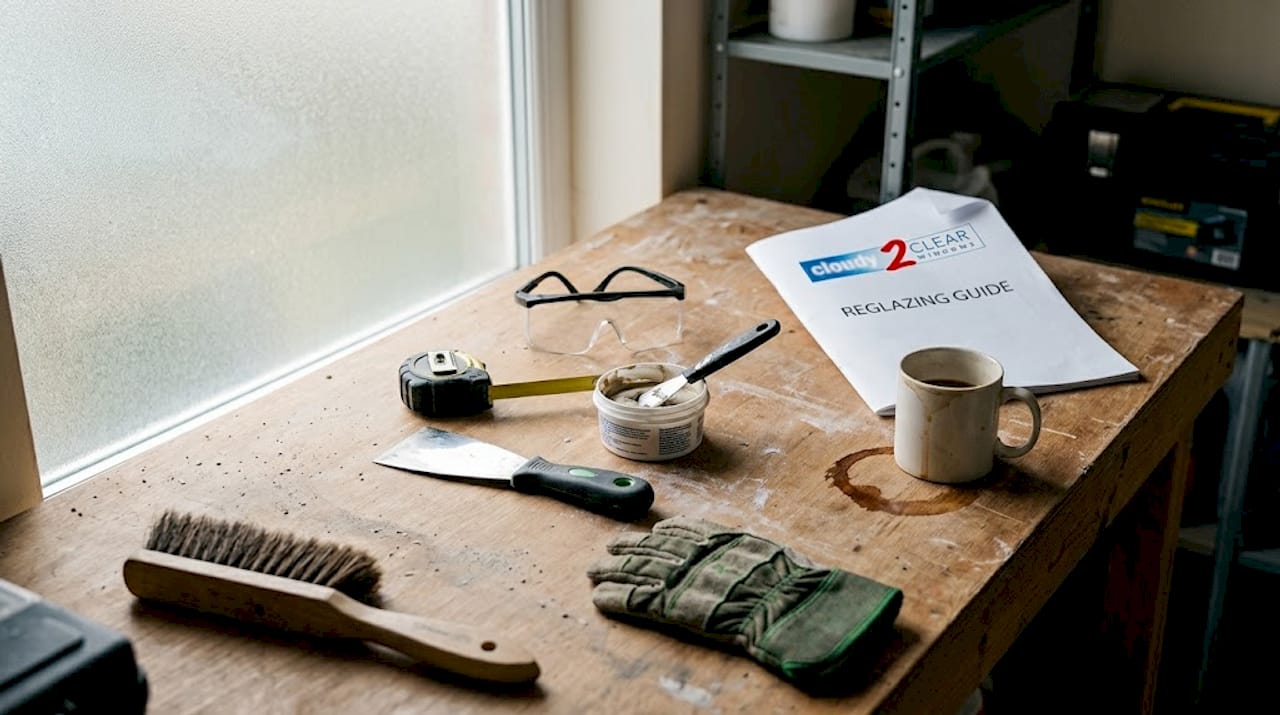
As flolondon.co.uk explains, reglazing windows involves replacing the glass pane in an existing frame, typically a timber sash or casement, using glazing putty and points for single glazing or sealed units for modern upgrades. Your exact toolkit will depend on which method you are using.
| Item | Timber/single glazing | Modern sealed unit |
|---|---|---|
| Glass or sealed unit | Single pane, measured to rebate | Slim double or triple glazed unit |
| Glazing putty | Linseed oil putty | Neutral-cure silicone sealant |
| Glazing points or sprigs | Yes, to pin glass in frame | Glazing beads (plastic or timber) |
| Putty knife or hacking knife | Yes | Useful for bead removal |
| Glass cutter | If cutting to size on site | Rarely needed (factory cut) |
| Suction cups | Helpful for larger panes | Essential for heavier units |
| Tape measure and pencil | Always | Always |
| Safety gloves and goggles | Essential | Essential |
Compliance checklist before you begin:
- Safety glass (toughened or laminated) is required for any pane below 800mm from floor level, in doors, and in side panels next to doors
- If your property is listed, you may need listed building consent before changing the glazing specification
- Replacement glazing must meet current U-value requirements: 1.6 W/m²K in England, 1.4 W/m²K in Scotland
- Work in conservation areas may also require prior approval, so always check with your local authority
For detailed guidance on the regulatory side, understanding building regulations before you buy your glass will save you considerable trouble later.
Pro Tip: Always measure the glass rebate (the channel inside the frame that holds the glass) in at least three places. Timber frames can distort over time, so the top, middle, and bottom measurements may all differ slightly. Order glass to the smallest dimension and leave a 2mm gap all round for expansion.
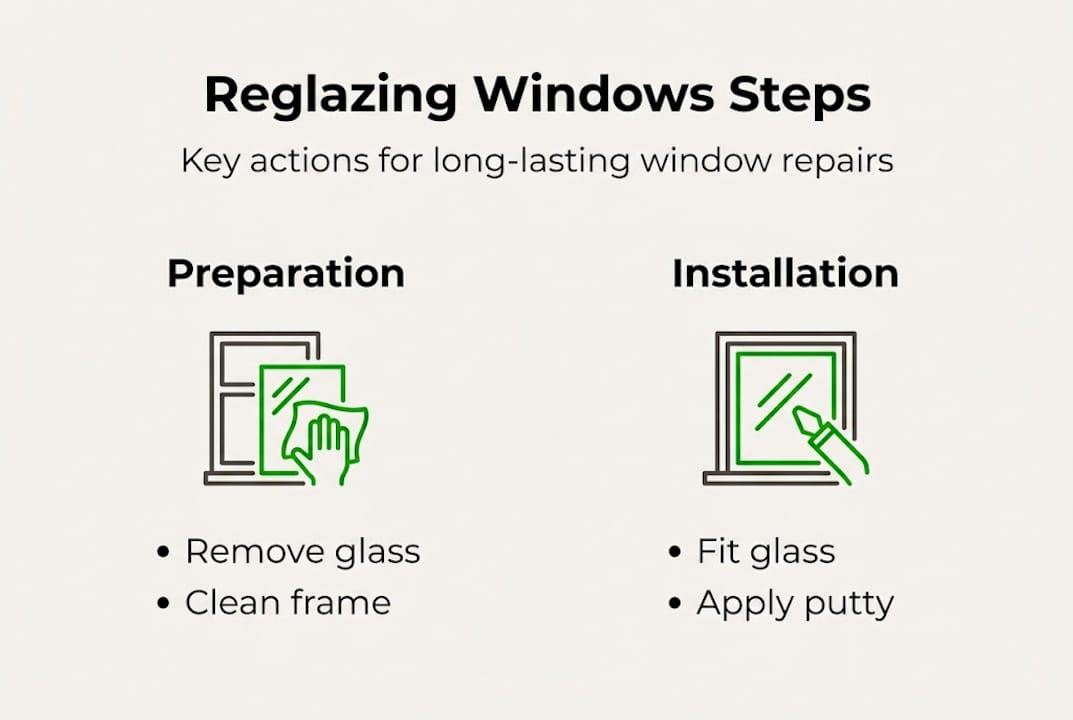
How to reglaze: Step-by-step process
Once you have your materials and compliance factors ready, it’s time to start the reglazing itself.
The process varies slightly between the traditional putty-and-points method and the modern sealed-unit approach. Here is a comparison to help you choose:
| Stage | Traditional (putty and points) | Modern (sealed unit) |
|---|---|---|
| Glass type | Single pane | Factory-made sealed unit |
| Fixing method | Glazing points hammered into frame | Timber or plastic glazing beads |
| Sealing | Linseed oil putty, shaped and painted | Silicone sealant around beads |
| Drying/curing time | 2 to 4 weeks before painting | 24 hours for silicone |
| Best for | Period timber frames, listed properties | Modern frames, energy upgrades |
As described by flolondon.co.uk, the traditional method uses linseed oil putty while the modern method uses slim double glazing units. Both are valid, but choosing the wrong one for your frame type can cause premature failure.
Step-by-step reglazing process:
- Protect your workspace. Lay a dust sheet below the window and wear safety gloves and goggles throughout.
- Remove the old glass. Score around the old putty with a hacking knife, then carefully lever out the glass. Remove all old glazing points with pliers.
- Clean the rebate. Scrape away all remaining putty and paint flakes. Sand the rebate smooth and apply a coat of primer if the timber is bare. Let it dry fully.
- Inspect and repair the frame. This is your opportunity to fix minor rot with a suitable wood filler, add draught-proofing strips to the sash or casement, and reinforce any loose joints.
- Bed the glass. For putty glazing, press a thin layer of putty into the rebate first. For sealed units, fit plastic setting blocks at the bottom of the rebate to support the unit’s weight.
- Place the new glass. Press the pane firmly into the putty bed or onto the setting blocks. For single panes, hammer in glazing points every 150 to 200mm to secure the glass.
- Apply finish putty or beads. Angle the putty at 45 degrees using a putty knife for a clean, weather-shedding profile. For sealed units, click or pin the glazing beads into place and seal with silicone.
- Clean excess putty or sealant. Dampen your finger or a cloth to smooth silicone. Trim excess putty cleanly with the knife.
Pro Tip: When upgrading to double glazing units in a timber sash, always order slim-profile sealed units (typically 14mm to 20mm overall thickness) to ensure they fit within the original rebate depth without requiring frame alteration.
Finishing touches and troubleshooting common issues
After placing the new glass and securing your window, proper finishing makes all the difference.
For putty-glazed windows, allow the putty to skin over for at least 14 days before applying an oil-based primer and then a topcoat. Painting over fresh putty traps moisture and causes cracking. For silicone-sealed units, you can paint the beads after 24 hours, though always check the sealant manufacturer’s guidance.
Finishing checklist:
- Check the glass sits flush and level in the rebate, with no rocking
- Ensure putty or sealant forms a continuous, unbroken seal on all four sides
- Open and close the window several times to confirm it moves freely without binding
- Inspect from outside for any visible gaps where weather could enter
- Wipe the glass clean with a lint-free cloth
Common DIY mistakes and how to fix them:
- Putty cracks after drying: Usually caused by applying putty over bare, unpainted timber that absorbed the oil. Strip the putty back, prime the rebate, and re-apply.
- Glass feels loose or rattles: Add extra glazing points or check that beads are fully seated and clipped in.
- Sash sticks after reglazing: The frame may have swollen due to moisture absorbed during work. Allow it to dry out, then lightly sand and repaint.
- Condensation returns between panes: The sealed unit has failed and needs replacing. This cannot be fixed by resealing externally.
As noted by flolondon.co.uk, rotten timber must be repaired before reglazing, draught-proofing should be added during the reglaze, heritage properties may require like-for-like single glass or slimlite double, and safety glass is mandatory for panes below 800mm from floor level.
If your work reveals significant frame rot, major structural movement, or complex listed building requirements, carry out your final compliance checks and consider calling a specialist rather than proceeding alone.
Expert perspective: Why frame integrity and the right glazing method matter most
Stepping back, here is what years of restoration experience reveal about reglazing priorities.
Most beginners fixate on sourcing the right glass. That is understandable but slightly misguided. In our experience, the vast majority of reglazing failures trace back to the frame, not the glass. Skipping the primer coat, ignoring a soft timber corner, or forcing an oversized unit into a shallow rebate will undo even perfect glazing work within a season or two.
The choice between putty and sealed units is not purely a technical one. It is a question of character. A slim sealed unit can sit beautifully in a Victorian sash and deliver modern performance without altering the window’s appearance. But fit an over-thick modern unit and you change the sight lines, the weight balance, and the feel of the original window entirely.
Careful preparation genuinely prevents repeat repairs. An hour spent cleaning, priming, and inspecting saves you from redoing the job in three years. And sometimes, the savviest move is to bring in a specialist. If your frames need structural work or if your reglazing double glazing project falls under listed building rules, professional expertise is not a cost. It is a safeguard.
Need help or professional reglazing? We’re here
If you are still weighing DIY against hiring a specialist, here is how expert support can help.
At Cloudy2Clear Windows, we have been repairing, reglazing, and upgrading windows for homeowners and businesses across England and Scotland since 2005. Whether you need a straightforward glass replacement or specialist support for a listed property, our teams are equipped to handle it properly and in compliance with current regulations.

For situations where compliance, heritage, or structural concerns make DIY too risky, our broken window repair services cover everything from single pane replacements to full sealed unit upgrades. If you are based in Oxfordshire, our team offering double glazing repairs in Oxford is ready to help. Get in touch and we will make sure the job is done right the first time.
Frequently asked questions
Can I reglaze my windows myself or do I need a professional?
Confident homeowners can manage ground-floor reglazing using the right tools and materials, but heritage properties and upper floors are best left to professionals with the relevant safety equipment and compliance knowledge.
What regulations apply to window reglazing in England and Scotland?
In England, replacement glazing must achieve a U-value of 1.6 W/m²K or better; in Scotland, the requirement is 1.4 W/m²K. Safety glass is mandatory for low-level panes, and listed buildings may require consent before any glazing changes.
What’s the difference between using putty and sealed units for reglazing?
Glazing putty and sprigs are the traditional single-glazing method, suited to period timber frames, while factory-made sealed units deliver better insulation and are fixed with glazing beads rather than putty.
Do I need to completely remove rotten timber before reglazing?
Yes. Any rotten or soft timber must be properly repaired before the new glass goes in, because rotten timber undermines the fix and causes the glazing to work loose well before its expected lifespan.