Damaged windows can quietly push your energy bills up and create real safety risks, yet many home and business owners in England and Scotland never notice until the problem becomes serious. Heat loss through windows accounts for 25 to 30% of energy costs, which means a few simple checks twice a year could save you hundreds of pounds. Whether you manage a Victorian terrace in Edinburgh or a modern office in Manchester, understanding how to spot and assess window damage is one of the smartest things you can do for your property. This guide walks you through everything, from the first visual clues to knowing when to call in a professional.
Signs your windows may be damaged
Let’s begin by understanding the classic indicators that your windows are not performing as they should.
Some signs are immediately visible, while others only reveal themselves through how your property feels or sounds. Getting familiar with both types means you catch problems early, before they become costly.
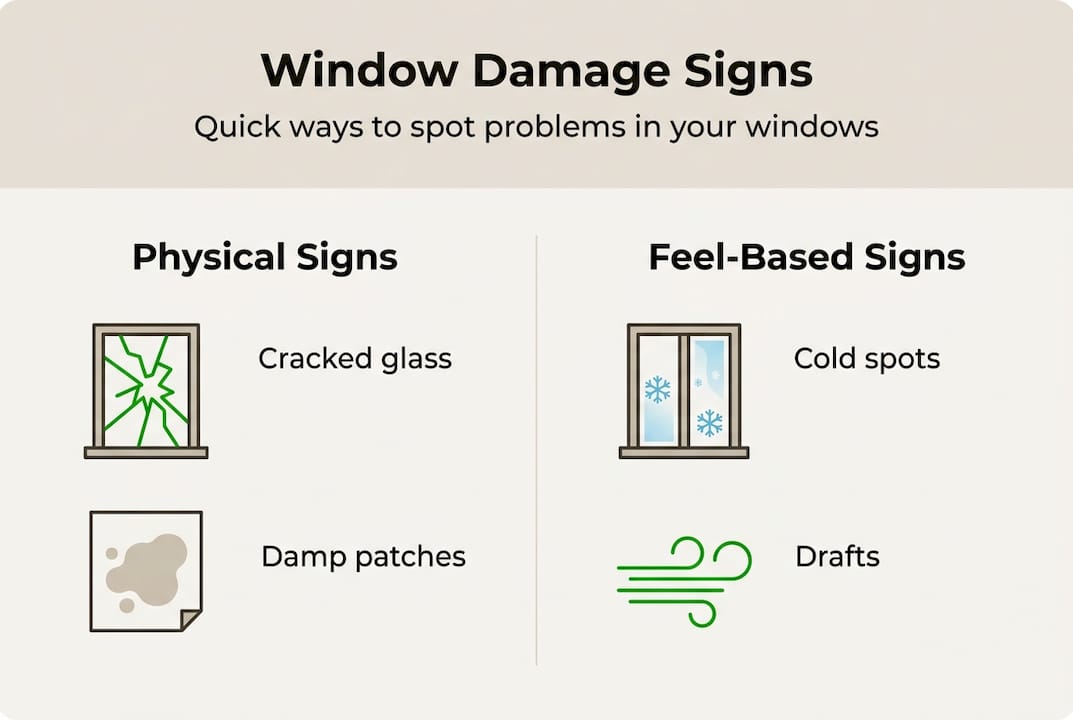
Physical and visual signs to look for:
- Cracks or chips in the glass, even hairline ones
- Condensation or misting between the panes of double glazing (a clear sign the seal has failed)
- Rotting or swollen timber frames, or crumbling uPVC corners
- Peeling or blistering paint around the frame
- Visible gaps between the frame and the surrounding wall
- Cloudy or permanently fogged glass that does not clear
Performance-based signs:
Beyond what you can see, spotting damage signs often comes down to how your space feels. Noticeable draughts, cold spots near windows in winter, increased outside noise filtering through, and unexplained rises in your heating bills are all reliable warning signs. You can test for draughts simply by holding a lit candle or a strip of tissue near the frame edge on a windy day. Any flicker or movement tells you air is getting in.
Window leak detection is another useful check. After heavy rain, look for water stains, damp patches, or softening plasterwork on the interior wall directly below or beside the window. These point to window leak detection issues that worsen if left unaddressed.
| Sign | What it may indicate | Urgency |
|---|---|---|
| Condensation between panes | Failed double glazing seal | Moderate |
| Draughts around frame | Gaps, worn seals, or frame damage | High |
| Cracked glass | Structural or impact damage | High |
| Rotting timber frame | Moisture ingress, long-term neglect | High |
| Peeling paint | Moisture trapped in frame | Moderate |
| Increased noise | Seal failure or single glazing | Low to moderate |
Understanding common causes of damage helps you make sense of what you find and decide what action to take next.
Tools and materials you need for a window check
Once you know what to look for, gather some basic tools to make your window checks thorough and efficient.
You do not need expensive equipment. Most of what you need is already in your home or available for a few pounds at a hardware shop. Having everything ready before you start means you move methodically through each window without missing anything.
Your window inspection kit:
- Torch: Essential for checking dark corners of frames, sills, and any areas where light does not reach naturally
- Tissue or candle: For testing draughts around seals and frame edges. As noted, detecting draughts with a candle or tissue is one of the most reliable field tests
- Tape measure or ruler: To check gap widths and, importantly, to verify escape window dimensions against legal requirements
- Notepad or phone: Record what you find at each window, including its location and the nature of the fault
- Camera or smartphone: Photograph every defect you spot. Close-up images in good natural light are invaluable when describing problems to a glazing specialist
- Ladder (where safe): For reaching upper-floor external frames, but only use one if you have the right support and feel confident
| Tool | Purpose | Cost |
|---|---|---|
| Torch | Inspecting dark areas of frames | Under £10 |
| Tissue or candle | Draught testing | Under £2 |
| Tape measure | Measuring gaps and escape window dimensions | Under £5 |
| Notepad | Recording faults by location | Minimal |
| Smartphone camera | Photographing defects for professionals | Free |
Pro Tip: Take your photos in daylight, ideally on an overcast day when glare is reduced. Direct sunlight can wash out fine cracks and subtle condensation. Clear, well-lit photos help any specialist give you an accurate quote without needing an immediate visit.
If you find draughts during your check, reading up on draught proofing methods can help you understand your short-term options while you arrange a professional assessment.
Step-by-step guide to inspecting your windows
With your tools ready, here’s how to conduct a full window assessment step by step.
- Start with an exterior walkround. View each window from outside. Look for obvious cracks, gaps between the frame and masonry, discolouration, or signs of rot. Note the condition of any external sealant (mastic) around the frame edges.
- Move to the interior. Check the glass for cracks and look carefully for any misting or condensation trapped between the panes. Run your fingers along the inner frame edges to feel for cold spots or dampness.
- Conduct the draught test. On a breezy day, hold a lit candle or tissue near every edge of the frame and around the opening sash. Watch for any movement. Mark positive results on your notepad.
- Test the hardware. Open and close each window fully. Handles, hinges, and locking mechanisms should all operate smoothly. A stiff or misaligned sash often means frame warping or hinge failure.
- Check for safety hazards. Look for any panes that feel loose, frames that have shifted, or glass that appears stressed. These are immediate concerns, particularly in rooms where children are present.
- Verify escape window function. In bedrooms, make sure the window can open wide enough to allow escape in an emergency (more on the legal dimensions shortly). A window that sticks or does not open fully is a safety issue.
- Document everything. Write down the location of each window inspected, what you found, and photograph any defect. This record is useful for a professional and for insurance purposes.
Inspect your windows at least twice a year to catch problems before they become expensive. Before and after winter are the most valuable times to check.
Pro Tip: If you notice a window is consistently cold even when closed, it may be worth reading about energy efficient windows to understand whether a repair or an upgrade would serve you better long-term.
Understanding legal and safety standards for windows
Assessing window damage is not just about comfort or cost; it also means ensuring your property meets key safety standards.
British building regulations set clear requirements for windows in specific locations and uses. Knowing these helps you spot a legal shortfall during your inspection.
Key safety requirements to check:
- Safety glazing is required in any glazed area below 800mm from floor level. This applies to low-level panels, patio doors, and sidelights. The glass must be toughened or laminated to reduce injury risk in a breakage
- Escape windows in habitable rooms (typically bedrooms) must open to at least 0.33 square metres, with a minimum height and width of 450mm, and a sill height no greater than 1,100mm from the floor, in line with Part B of the Building Regulations
- Windows in bathrooms and kitchens must meet ventilation standards under Part F
- Any replacement window installed since 2002 should have been notified to Building Control, and you can request evidence of this from previous owners
Special considerations for older and historic properties:
If your property is listed or sits within a conservation area, you face additional rules. Historic England’s position is clear: repair is preferred over replacement for historic buildings, with conserving original material the guiding principle. This matters enormously in parts of Scotland and England where Victorian and Georgian windows remain common.
In Scotland, sash and case windows are a defining feature of the built environment. Before assuming a draught or rattling sash needs replacing, always investigate whether targeted repair and draught-proofing will address the issue adequately.
Always cross-reference your findings with the building regulations for windows relevant to your property type and location. Understanding the sash window heritage value can also guide your decision-making if you own an older property.
When to call the professionals: assessing, repairing, or replacing
Finally, after checking your windows, you’ll need to decide whether you can DIY or if specialist help is necessary.
Not every window fault needs a full replacement. In fact, according to Historic England’s principles, repair over replacement is generally the preferred approach, especially for historic windows. A professional survey before any major works can save you significant money and preserve your property’s character.
Signs you need a professional without delay:
- Cracked or broken glass in any pane
- Failed double glazing seals (persistent misting between panes)
- Visible rot in timber frames that extends beyond the surface
- Windows that cannot be locked or secured
- Any safety glazing concern below 800mm floor level
- Escape windows that no longer open to the required dimensions
| Issue | Likely solution | DIY possible? |
|---|---|---|
| Minor draught around seal | Draught strip or sealant | Yes |
| Surface paint peeling | Strip, treat, and repaint | Yes |
| Failed double glazing unit | Glass unit replacement | No, specialist needed |
| Cracked pane | Glass replacement | No, specialist needed |
| Rotted frame section | Epoxy repair or section replacement | Partial, specialist advised |
| Frame warping or misalignment | Adjustment or full frame replacement | No, specialist needed |
For decisions around sash window repair, the balance between preserving original fabric and improving performance is delicate. A qualified glazing specialist can assess this and give you honest, cost-effective advice rather than defaulting to a full replacement.
Why routine window checks pay off: hard-won lessons and local insights
Stepping back, what have years of experience and local knowledge taught us about managing window damage?
The honest answer is that most window problems we encounter at Cloudy2Clear were preventable. Homeowners and business managers often wait until a problem is severe, then face a large bill that could have been avoided with a simple biannual check. There is a tendency to associate window maintenance with inconvenience, but in practice, a proper inspection takes under an hour and costs nothing but time.
In Scotland particularly, we see neglected sash and case windows that have deteriorated over decades. Yet strip the paint back, replace the draught seals, and re-cord the weights, and many of these windows perform remarkably well again. Full replacement was never necessary. The visual and heritage appeal is preserved, and the owner saves money.
Our view is straightforward: treating energy saving window checks as a regular part of your property maintenance routine is one of the most cost-effective habits you can adopt. Original window fabric, when properly maintained, often outlasts modern replacements.
Need help with a window issue?
If your own checks reveal problems you’re unsure how to solve, help is easy to find.
At Cloudy2Clear, we have been supporting home and business owners across England and Scotland since 2005. Our local specialists can assess window damage quickly and honestly, recommending repair where possible and replacement only when it is genuinely the right call.

Whether you need double glazing replacement, a straightforward broken window repair, or a full survey of your commercial property, our team is ready to help. Visit our window repair services page to find your nearest specialist and book an assessment. No pressure, no guesswork, just practical advice from people who know windows inside and out.
Frequently asked questions
What is the quickest way to spot window damage?
Hold a tissue or lit candle near the frame edges to detect draughts, check for condensation between panes, and look for any unexplained rise in your heating bills. These three checks together cover the most common failure points.
How often should I inspect my windows for damage?
You should check your windows at least twice a year, ideally before winter sets in and again in spring. This schedule catches seasonal damage early and prevents small issues from escalating.
Are repairs better than replacing windows?
In most cases, yes. Historic England recommends repair over replacement to conserve original fabric, and even modern windows often only need seal or hardware work rather than full replacement. A specialist survey will give you a clear recommendation.
What safety rules should my windows meet?
British regulations require safety glazing below 800mm from floor level, and escape windows must open to at least 0.33 square metres with a sill height no greater than 1,100mm. Check these dimensions during your inspection, particularly in bedrooms.
Recommended
- Spot signs of window damage: save £100s on energy bills
- Why Window Maintenance Saves 15% Energy & Prevents Repairs
- Common Window And Door Faults To Watch For – Cloudy2Clear Windows
- Building Regulations for Windows: 15% Energy Savings Guide
- Winter car care checklist: Prepare your car for safety | GWC Wipers