• USP Logo Icon
    25 Year Guarantee
  • USP Leaf Icon
    Latest ECO Friendly Technology
  • USP Pointer Icon
    National Coverage
Get a FREE quote

Condensation vs damp: what UK homeowners need to know

Condensation is the most common form of damp in UK homes, yet it is regularly confused with penetrating or rising damp. Getting that distinction wrong leads to expensive repairs that fix nothing. Condensation forms when warm, moisture-laden indoor air meets a cold surface and water droplets appear. Damp, by contrast, enters a property from outside or rises from the ground through the building fabric itself.

Here is a quick comparison to help you tell them apart:

Feature Condensation Rising damp Penetrating damp
Source Indoor moisture Ground moisture External water ingress
Location Windows, corners, behind furniture Low wall levels, ground floor only Any wall or ceiling near a defect
Visual signs Water droplets, black mould Tidemark up to 1–1.2 metres, salt deposits Damp patches worsening after rain
Smell Musty near affected areas Musty with salt staining Musty, often localised
Fix Ventilation, heating balance, behaviour Damp-proof course repair Structural repair to building fabric


Infographic comparing condensation and damp causes and features


Misdiagnosing these problems is surprisingly easy, and the consequences can be costly. A rising damp misdiagnosis can send you down the path of unnecessary damp-proofing work when the real culprit is condensation or a structural bridge. Knowing which you are dealing with is the first step to solving it properly.

Close-up of rising damp damage on interior wall

What causes condensation in your home?

Condensation forms when three factors combine: too much indoor moisture, surfaces that are cold enough for water to settle on, and insufficient ventilation to carry that moisture away. Everyday activities generate more moisture than most people realise. Cooking, showering, and drying laundry indoors all push water vapour into the air, and without a way out, it settles on the coldest surfaces it can find.

Common signs of condensation include:

  • Water droplets on windows, mirrors, or cold water pipes, particularly in the morning
  • Black mould growing in corners, behind wardrobes or sofas, or around window frames
  • A persistent musty smell in rooms with poor airflow
  • Peeling wallpaper or deteriorating plasterwork near external walls
  • Condensation worsening noticeably during colder months

Thermal bridging makes things worse; according to the Emergency Steps for Water Leaks: NJ Homeowner Guide, insulating and upgrading windows can help mitigate condensation-related problems. Where window frames, wall ties, or poorly insulated sections create a cold spot, moisture gravitates there first. Energy efficiency upgrades such as airtight double glazing can actually increase condensation risk if ventilation is not improved at the same time, because the home retains more moisture with fewer natural air gaps.

Pro Tip: If your condensation appears mainly on external walls and in corners rather than just on windows, thermal bridging is likely involved. Check whether insulation is consistent across those wall sections before assuming ventilation alone is the answer.

How to prevent condensation effectively

Prevention comes down to balancing three things: the amount of moisture you produce indoors, the temperature of your home, and how well air circulates. No single measure works in isolation. Turning the heating up without improving ventilation, for example, simply creates warmer damp air rather than drier air.

Condensation prevention checklist:

  1. Open windows in kitchens and bathrooms during and after cooking or showering.
  2. Use extractor fans consistently, not just occasionally, in high-moisture rooms.
  3. Avoid drying clothes on radiators indoors; use a vented tumble dryer or dry outside when possible.
  4. Keep indoor temperatures above 16°C at a minimum, with an ideal range of 18°C–21°C.
  5. Leave a small gap between furniture and external walls to allow air to circulate.
  6. Fit trickle vents on windows to allow background ventilation without draughts.
  7. Address thermal bridging by improving insulation at wall junctions and around window frames.

Mechanical extraction is particularly effective in kitchens and bathrooms, where moisture production is highest. Opening windows may not be enough on its own, especially in winter when people are reluctant to let cold air in. A whole-house ventilation approach that combines trickle vents, extractor fans, and consistent background heating tends to produce the best results.

Heating increases the air’s capacity to hold moisture, but only combined with ventilation and reduced moisture production does it actually control condensation sustainably. Relying on the boiler alone is one of the most common mistakes homeowners make.

How to treat mould caused by condensation and damp

Mould is a fungus, not a type of damp. It grows wherever moisture sits long enough on a surface, whether that moisture comes from condensation or from penetrating or rising damp. Treating mould with a spray alone is a temporary fix. Without resolving the underlying moisture source, it will return within weeks.

Safe mould removal steps:

  • Wear gloves, a face mask, and eye protection before cleaning.
  • Work in a ventilated space; open windows and close internal doors to contain spores.
  • Use a fungicidal wash rather than bleach, which can damage surfaces without killing the root.
  • Bag and dispose of any soft furnishings or materials that cannot be cleaned thoroughly.
  • Dry the area completely after cleaning and monitor for regrowth.

Pro Tip: Check behind large furniture pieces and inside built-in wardrobes against external walls. These are the spots where mould establishes itself quietly for months before becoming visible on the surface you can see.

Mould poses real health risks, particularly for people with asthma, respiratory conditions, or weakened immune systems. The GOV.UK guidance on damp and mould health risks is clear: visible mould or a mould odour is sufficient reason to act, not to wait and monitor. Structural damage follows too. Left untreated, persistent moisture causes woodwork to rot and plasterwork to deteriorate over time.

Rising damp and penetrating damp: what sets them apart?

These two damp types are less common than condensation but more damaging to the building fabric, and they require structural repairs rather than changes to ventilation or behaviour.

Rising damp:

  • Ground moisture wicks upward through brickwork and masonry, typically in older properties without a functioning damp-proof course.
  • The characteristic tidemark appears up to 1–1.2 metres from the floor.
  • Salt deposits and flaking plaster at low wall levels are strong indicators.
  • Affects ground floor rooms only; never appears above the first floor.
  • True damp-proof course failure is rarer than commonly assumed; what looks like rising damp is often condensation or structural bridging.

Penetrating damp:

  • Water enters through defects in the building envelope: damaged guttering, cracked render, loose roof tiles, or gaps around windows and doors.
  • Damp patches worsen noticeably after heavy rain, which is the clearest diagnostic clue.
  • Can appear at any height on a wall or ceiling, unlike rising damp.
  • Common causes include leaking pipes, failed pointing, and poorly sealed window frames.
  • Requires repair of the specific building defect, not damp-proofing treatments.

Both types can occur alongside condensation, which complicates diagnosis. A professional assessment is advisable when you cannot confidently identify the source, particularly before committing to any remedial work.

Using dehumidifiers and moisture meters to manage indoor humidity

Dehumidifiers can reduce indoor humidity where ventilation alone is insufficient, particularly in rooms that are difficult to ventilate, such as basements or north-facing bedrooms. They work by drawing air over a cold coil, collecting the condensed water in a reservoir. Used consistently, they can make a noticeable difference to comfort and reduce the risk of mould forming.

Moisture meters are a useful diagnostic tool, but they require careful interpretation. Surface salts and hygroscopic materials can produce false positive readings, making a wall appear wetter than it actually is internally. A reliable assessment compares surface readings with internal wall readings and considers the building context.

Practical guidance on using these tools:

  • Use a dehumidifier in rooms where condensation is persistent and ventilation options are limited.
  • Empty the reservoir regularly; a full tank stops the unit working.
  • When using a moisture meter, take multiple readings at different depths and locations rather than relying on a single surface reading.
  • Treat a high moisture meter reading as a prompt for further investigation, not a definitive diagnosis.
  • Consult a professional surveyor when readings are ambiguous or when you suspect penetrating or rising damp rather than condensation.

Moisture meters are a starting point, not a conclusion. A professional will compare readings with visible signs, building history, and construction type before recommending any treatment.

What Cloudy2Clear Windows recommends for window condensation

Windows are the most visible site of condensation in most homes, and they are also one of the most manageable. Cloudy2Clear Windows has been advising homeowners on window condensation prevention since 2005, and the consistent finding is that thermal bridging at the frame is the primary culprit in properties with persistent window condensation.

Well-maintained double glazing significantly reduces the cold surface area available for moisture to settle on. When the seal between panes fails, the insulating gas escapes and the inner pane becomes much colder, creating exactly the conditions condensation needs. Addressing common window faults early prevents a minor issue from becoming a recurring moisture problem.

Cloudy2Clear Windows recommends the following steps for homeowners dealing with window condensation:

  • Inspect window seals annually for signs of failure, such as fogging between panes or water ingress at the frame.
  • Ensure trickle vents are open and unobstructed; many homeowners block them unknowingly.
  • Choose frames with thermally broken profiles, which reduce the transfer of cold from outside to inside.
  • Wipe condensation from window surfaces promptly to prevent water tracking down into the frame and causing rot.
  • Consider upgrading single-glazed or failed double-glazed units to modern double glazing replacement units with low-emissivity glass.

Pro Tip: Condensation on the outside of a window is actually a sign that your glazing is working well. It means the inner pane is retaining heat effectively. Condensation on the inside surface, or between the panes, is the problem to address.

If you are dealing with persistent steamed-up windows, the issue is rarely the glass alone. Frame condition, ventilation, and indoor humidity all play a part, and addressing them together produces lasting results.

The mistake most homeowners make with condensation and damp

Most homeowners reach for the heating dial first. It feels logical: a warmer home should be a drier home. But heating increases the air’s capacity to hold moisture without removing any of it. Without ventilation, you simply create a warmer, more humid environment that still condenses on cold surfaces.

The other common error is treating the symptom rather than the cause. Wiping condensation off windows every morning helps prevent mould in the short term, but it does not address why the moisture is there. The same applies to mould sprays: they remove the visible growth but leave the conditions that produced it entirely intact.

A few lessons that come up repeatedly in real cases:

  • Blaming lifestyle alone is rarely fair or accurate. Building deficiencies, poor insulation, and inadequate ventilation are usually the primary drivers.
  • Diagnosing rising damp without professional assessment leads to unnecessary and expensive damp-proofing treatments that do not resolve the actual problem.
  • Condensation and penetrating damp can occur simultaneously, which means fixing one without investigating the other leaves the property vulnerable.
  • Consistent, moderate heating combined with background ventilation outperforms intermittent high heat every time.

Successful moisture management is a balance, not a single fix. The properties that stay dry are the ones where ventilation, heating, and moisture control work together rather than in isolation.

Is your window condensation a sign of a bigger problem?

If condensation around your windows is persistent or you are seeing signs of damp in your walls, Cloudy2Clear Windows can help you identify whether your glazing is contributing to the problem. With over two decades of experience in double glazing repairs and replacement across the UK, the team can assess your windows and recommend the right solution, whether that is a seal repair, unit replacement, or frame upgrade.

https://www.cloudy2clearwindows.co.uk


Cloudy2Clear Windows serves homeowners across the country, including Watford and the surrounding area. Get in touch to arrange an assessment and take the guesswork out of your moisture problems.

FAQ

How do I know if it’s damp or condensation?

Condensation typically appears on cold surfaces such as windows and external walls, worsens in winter, and is linked to indoor activities like cooking and showering. Damp from penetrating or rising sources tends to appear in fixed locations regardless of season, often with tidemarks, salt deposits, or patches that worsen after rain.

Is black mould caused by damp or condensation?

Black mould is caused by persistent moisture on surfaces, which can come from either condensation or damp. It is a fungus that grows wherever humidity remains high enough for long enough, and treating it requires fixing the underlying moisture source, not just removing the visible growth.

Does putting the heating on get rid of condensation?

Heating alone rarely solves condensation. Indoor temperatures between 18°C and 21°C help, but only when combined with adequate ventilation and reduced moisture production. Heating without ventilation simply creates warmer humid air that still condenses on cold surfaces.

Should you wipe off condensation?

Yes, wiping condensation promptly helps prevent mould from forming on that surface. It is a useful short-term measure, but it does not address the cause. Improving ventilation and reducing indoor moisture production are the steps that produce lasting results.

What are window sightlines? A UK homeowner’s guide

Window sightlines are defined as the total visible width of the frame and sash components when you look directly at a closed window. They shape both the appearance of your property and its thermal performance. Slim sightlines create a cleaner, more open look, while wider frames can make windows feel heavy and block more light. Under the 2026 UK Building Regulations Part L, sightlines also carry real compliance weight, because the frame-to-glass ratio directly affects a window’s U-value. Understanding sightlines is the first step to making better decisions about your windows.

What are window sightlines and why do they matter?

Window sightlines are the visible widths of the frame and sash when you view a window straight on. The smaller that measurement, the more glass you see and the less frame interrupts your view. Modern minimalist aluminium systems achieve sightlines under 100mm, compared to around 120mm for typical frames. That 17% reduction sounds modest, but the visual difference on a facade is striking.

Sightlines matter for three reasons: aesthetics, light, and energy compliance. A window with narrow sightlines admits more daylight, feels less bulky on the wall, and often reads as more contemporary. A window with wide sightlines can look dated or out of proportion, particularly on properties where the original frames were slimmer.

Fitter inspecting slim window frame sightlines


The industry term you will encounter alongside “sightlines” is frame-to-glass ratio. This is the proportion of the window opening taken up by the frame rather than the glazed unit. The two concepts are directly linked: slimmer sightlines mean a lower frame-to-glass ratio, which means more glass and better thermal performance.

How do window sightlines influence the look of a property?

Sightlines influence the visual rhythm and design coherence of a building’s facade. Experts argue that proportions matter more than frame colour when it comes to aesthetic integration. A white uPVC frame with wide sightlines can look just as intrusive as a dark one if the proportions are wrong.

Slim, equal sightlines create a modern, minimalist appearance. They suit contemporary extensions, new builds, and properties where the goal is to maximise glass area. Unequal sightlines, where the bottom rail is noticeably deeper than the top or sides, can look unbalanced and draw the eye for the wrong reasons.

Heritage and listed buildings present a specific challenge. The original single-glazed windows in Victorian and Edwardian properties typically had very slim timber sightlines. Replacing them with standard double-glazed units often means wider frames, which alters the character of the building. Local planning authorities and Historic England both assess whether replacement windows preserve the original sightline proportions.

Key aesthetic considerations for sightlines include:

  • Equal sightlines on all four sides of the frame create visual balance and a professional finish.
  • Slim top rails maximise the sense of height in a room and suit period properties.
  • Deep bottom rails are sometimes used for structural reasons but can make a window look heavy.
  • Consistent sightlines across multiple windows on the same elevation create visual rhythm and coherence.
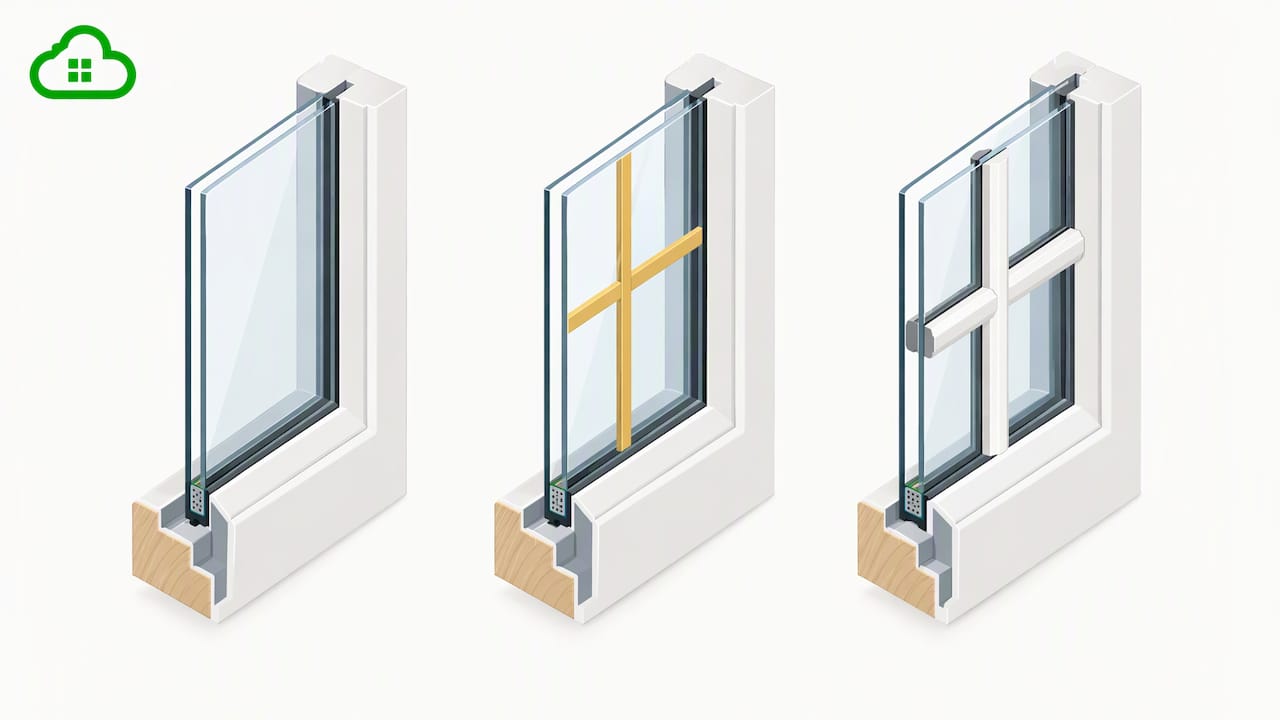
  • Decorative glazing bars such as Georgian bars add visual detail but increase the apparent frame area.

Pro Tip: If you are replacing windows on a heritage property, ask your installer to provide a sightline comparison between the existing frames and the proposed replacement. A difference of even 20mm can be visible and may require planning consent.

What impact do sightlines have on energy efficiency and UK building regulations?

The relationship between sightlines and energy performance is direct and measurable. Wider sightlines increase the frame-to-glass ratio, and frames conduct heat differently from glazed units. Under the 2026 UK Building Regulations Part L, the frame-to-glass ratio including sashes and decorative bars directly affects the window’s U-value. Added bars can push U-values above 1.6 W/m²K, risking compliance failure under SAP 10.3.

The U-value measures how much heat a window loses per square metre per degree of temperature difference. Lower is better. The table below shows how sightline width and glazing type interact to affect U-value performance.

Frame type Typical sightline Glazing cavity Approximate U-value
Slim aluminium Under 100mm 24–28mm 1.2–1.4 W/m²K
Standard uPVC 120mm 24–28mm 1.4–1.6 W/m²K
Slim heritage unit 60–80mm 12–14mm 1.7–1.9 W/m²K
Standard with Georgian bars 120mm+ 24–28mm Above 1.6 W/m²K


Infographic showing window sightlines and energy efficiency stats


Slim double-glazing units with 12–14mm cavities replicate historic sightlines but deliver U-values of 1.7–1.9 W/m²K. Standard 24–28mm units achieve 1.2–1.4 W/m²K. That gap is significant when you are trying to meet Part L targets.

The 2026 SAP 10.3 methodology makes sightlines a critical technical factor, particularly for properties with multiple small windows. Each window is now assessed individually, so a poor sightline specification on several units can fail a whole building’s energy rating. You can read more about how this affects your project in our window U-value guide.

Decorative features like Georgian glazing bars add visual appeal but fragment the glazed area and reduce thermal performance. If compliance is your priority, discuss the U-value impact of any decorative bars with your installer before committing to a specification.

How do frame materials affect sightlines and window performance?

Frame material is the single biggest factor in how slim your sightlines can be. Aluminium, uPVC, and timber each have different structural properties, and those properties set the minimum frame width needed to hold the glazed unit safely.

Modern aluminium frames can achieve slimmer sightlines than uPVC while maintaining structural strength. Security depends more on hardware and system engineering than on frame width. This is a point that surprises many homeowners, who assume a thicker frame means a stronger window. It does not. A well-engineered slim aluminium system with quality multipoint locking hardware outperforms a wide uPVC frame with basic locks.

Glass itself provides significant rigidity in minimalist window systems, enabling slimmer frames without structural compromise. However, this requires engineering verification for larger glass loads. Ultra-slim profiles must be tested specifically for their configuration. You cannot simply take a standard slim frame and scale it up to a large opening without recalculating the structural requirements.

Timber frames sit between aluminium and uPVC in terms of achievable sightline width. Hardwood timber can be machined to slimmer profiles than softwood, but both require more maintenance than aluminium or uPVC. For heritage properties, slim hardwood or engineered timber frames often represent the best balance between authentic appearance and practical performance. Our window materials guide covers these trade-offs in detail.

Pro Tip: When comparing frame options, ask for the actual sightline measurement in millimetres rather than a general description like “slim” or “standard.” Manufacturers use these terms inconsistently, and a 10mm difference in sightline can change both the look and the U-value of the finished window.

How can you measure and optimise window sightlines?

Measuring sightlines accurately is straightforward. You need a steel tape measure and a clear view of the window from directly in front.

  1. Measure the top rail. Place the tape at the top of the visible glass and measure up to the top of the frame. Record this figure in millimetres.
  2. Measure the bottom rail. Repeat from the bottom of the visible glass down to the bottom of the frame.
  3. Measure the left and right stiles. Measure from the edge of the glass to the outer edge of the frame on each side.
  4. Note any sash overlap. On casement windows, the sash sits inside the outer frame. Measure the sash width separately, as this adds to the total visible frame area when the window is closed.
  5. Compare your measurements. Equal sightlines on all four sides indicate a well-proportioned window. Significant differences suggest either a design choice or a fitting issue worth investigating.

Measuring sightlines accurately involves gauging visible frame widths directly on the window facade, then balancing those measurements against your thermal and aesthetic targets. Once you have your figures, you can compare them against the specification sheets for replacement windows to see whether a new unit will look similar or noticeably different.

Common pitfalls to avoid:

  • Selecting a replacement window based on overall frame size rather than sightline measurement.
  • Assuming all slim-profile windows perform equally. Always request the U-value certificate for the specific configuration you are ordering.
  • Overlooking the sash width when calculating total visible frame area on casement windows.
  • Failing to check planning requirements before ordering windows for listed buildings or conservation areas.

Consulting a specialist before you order saves both money and time. Cloudy2Clear Windows can assess your existing frames, advise on sightline options that meet Part L 2026 requirements, and recommend products that balance appearance with performance. Our building regulations guide explains the compliance process in plain terms.

What I have learned about sightlines after two decades in the industry

Most homeowners come to us focused on glass. They want to know about double versus triple glazing, gas fills, and low-E coatings. Sightlines rarely come up in the first conversation. That is a mistake, and it is one I have seen cost people real money.

The frame is not just a border around the glass. It defines how the window reads on the building, how much light enters the room, and whether the installation passes a Part L assessment. Planning for sightlines at the design phase saves cost and consent delays. Changing a specification after ordering can mean restarting the planning process entirely on a listed building.

The other misconception I encounter regularly is that slim frames are fragile. Homeowners see a narrow aluminium profile and worry about security. The reality is that security depends on hardware and system engineering, not frame width. A slim, well-engineered system is not a compromise. It is often the better product.

My advice is to treat sightlines as a design decision, not an afterthought. Measure your existing frames before you speak to any installer. Know your numbers. A 20mm difference in sightline can change the character of a room and the compliance status of a building. Get that right first, and the rest of the specification follows naturally.

How Cloudy2Clear Windows can help with your window sightlines

Choosing the right sightline specification takes experience, and getting it wrong affects both how your property looks and how it performs.

https://www.cloudy2clearwindows.co.uk


Cloudy2Clear Windows has been installing, replacing, and repairing double-glazed windows across the UK since 2005. Our specialists can assess your existing frames, recommend products that achieve slim sightlines without sacrificing thermal performance, and confirm compliance with 2026 Part L requirements. Whether you need a full double glazing replacement or advice on upgrading specific windows, our local branches cover a wide area. Homeowners in the Milton Keynes area can contact our Milton Keynes branch directly for a no-obligation assessment.

FAQ

What are window sightlines in simple terms?

Window sightlines are the visible widths of the window frame and sash when you look directly at a closed window. Slimmer sightlines mean more glass and less frame.

Do slim sightlines affect window security?

Security depends on hardware and system engineering, not frame width. A well-engineered slim aluminium system with quality multipoint locking is as secure as a wider frame.

How do sightlines affect U-values and Part L compliance?

Wider sightlines increase the frame-to-glass ratio, which raises the window’s U-value. Under 2026 UK Building Regulations Part L, decorative bars and wide frames can push U-values above 1.6 W/m²K and risk compliance failure under SAP 10.3.

What is the typical sightline for a modern aluminium window?

Modern minimalist aluminium systems achieve sightlines under 100mm, compared to around 120mm for standard frames. That difference is visible on a facade and affects both aesthetics and energy performance.

Do I need planning permission if I change my window sightlines?

On listed buildings and in conservation areas, replacement windows must preserve the original sightline proportions. Changing sightline dimensions without consent can constitute a planning breach, so always check with your local authority before ordering.

Cost-saving tips for windows: UK homeowner’s guide

Cost-saving tips for windows are practical actions that reduce your heating bills and extend the life of your glazing by sealing draughts, maintaining hardware, and choosing upgrades wisely. The Energy Saving Trust estimates that draught-proofing alone can save around £60 per year on heating costs for a typical household. Whether you own your home or rent it, the strategies below cover everything from a £3 foam strip to a phased double glazing replacement, giving you a clear path to lower bills without unnecessary expense.

1. Which DIY draught-proofing methods offer the best savings?

Draught-proofing is the fastest and cheapest way to cut heat loss through your windows. The Energy Saving Trust confirms it can reduce heating costs by 10–20%, which adds up quickly over a full winter. Start with the largest gaps first, as these deliver the greatest return for the least effort.

The most effective DIY options are:

  • Silicone or acrylic sealant for frame-to-wall gaps. A tube costs £5–£10 and can cut heat loss by up to 20%. Apply it along the external perimeter where the frame meets the brickwork.
  • Self-adhesive foam strips for sash and casement windows. At £3–£8 per window, they pay for themselves within one heating season by compressing to form a tight seal when the window closes.
  • Brush seals for sash windows. These fit into the channel where the two sashes meet and stop cold air passing through the gap without restricting movement.
  • Secondary glazing film for single-glazed windows. A shrink-fit film applied with a hairdryer creates a still-air layer that mimics the effect of double glazing at a fraction of the cost.

Pro Tip: Seal the largest, most draughty gaps first. Run your hand around the frame on a cold day to find them, or hold a lit incense stick near the edge and watch for smoke movement.

For a full walkthrough of sealing methods, the guide on draught-proofing your windows covers product choices and step-by-step fitting.

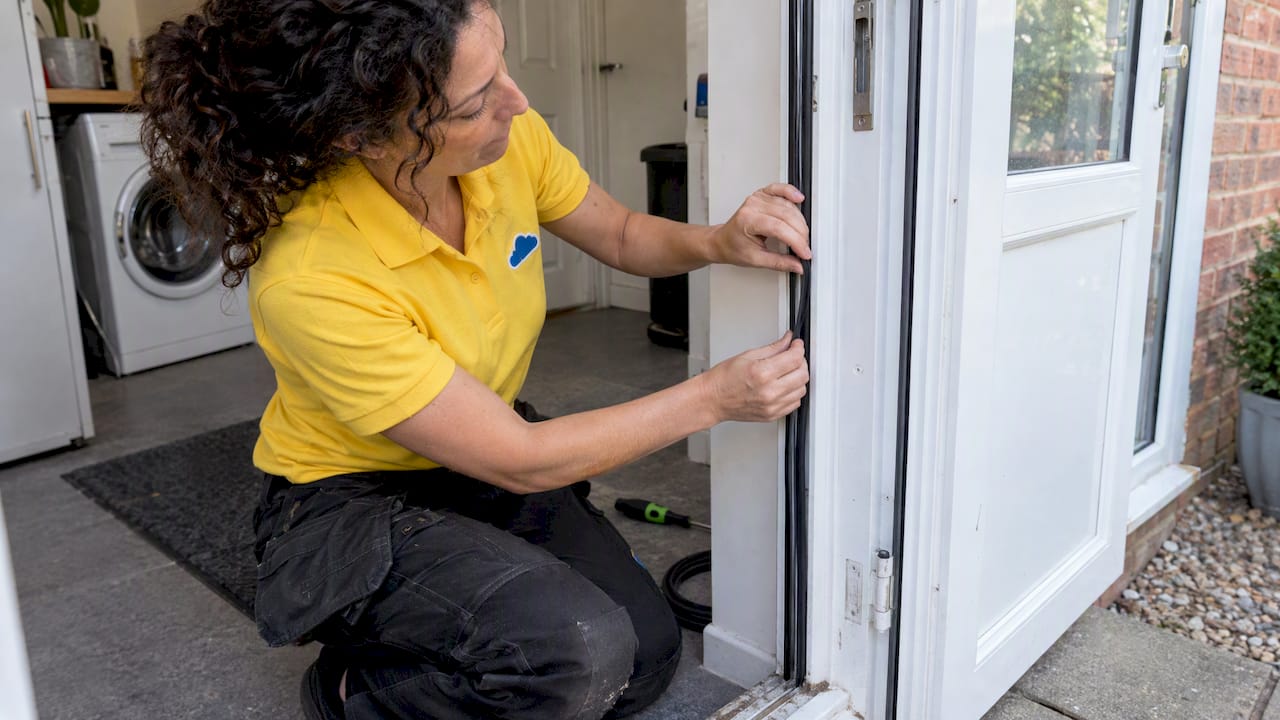
Hands applying draught-proofing strips on window

2. How does regular window maintenance save money?

Annual maintenance is the single most overlooked cost-saving habit for windows. The Glass and Glazing Federation recommends 90–120 minutes of inspection each spring or autumn to catch problems before they become expensive repairs. A failed seal or a blocked drainage channel left untreated can lead to misted glass, water ingress, or a seized hinge, all of which cost far more to fix than to prevent.

A basic annual check should cover:

  • Cleaning the tracks and frames with warm soapy water to remove grit that wears down seals
  • Inspecting rubber gaskets for cracks or shrinkage
  • Lubricating hinges and handles with a light oil or silicone spray
  • Clearing weep holes (the small slots at the bottom of the outer frame) to allow condensation to drain

Replacement parts are inexpensive. Gaskets, hinges, and seals typically cost £3–£35 for parts, with labour on top if you use a professional. Catching a failing gasket early means a £10 fix rather than a £200 sealed unit replacement.

Pro Tip: Schedule your annual check in early autumn before the heating season begins. You will spot any gaps or failing seals while there is still time to fix them before cold weather arrives.

Pairing window care with broader exterior maintenance, such as the seasonal siding checks recommended for other parts of the building envelope, keeps the whole structure performing well.

3. When should you repair rather than replace your windows?

Repair is almost always the right first step when a window is structurally sound. Window repairs cost £50–£300, while full replacements run from £400 to over £1,200 per window depending on size, material, and specification. That gap is significant, and many homeowners replace windows unnecessarily.

Common repairs and their typical costs:

Repair type Typical cost
Replacing a failed sealed unit (misted glass) £80–£200
New hinges or handles £50–£120 including fitting
Resealing the frame perimeter £30–£80
Replacing a damaged gasket £20–£60


Choose repair when:

  • The frame is structurally intact with no rot, warping, or cracking
  • Only one component has failed (a single hinge, a blown sealed unit)
  • The window is less than 15 years old

Choose replacement when:

  • The frame is warped, rotten, or cracked beyond repair
  • Multiple components have failed at the same time
  • The window is single-glazed and energy performance is the priority

Always get at least two quotes before committing to replacement. A certified installer will tell you honestly whether repair is viable. You can read more about the financial comparison in this guide to double glazing replacement costs.

4. What are the most budget-friendly ways to upgrade to energy-efficient windows?

Energy-efficient double glazing can save £100–£200 per year on heating bills for a typical UK home. That saving makes replacement worthwhile, but the upfront cost puts many homeowners off. A phased approach solves this: replace the worst-performing windows first, bank the energy savings, and use them to fund the next phase.

When choosing new windows on a budget, focus on these factors:

  • Energy rating. A-rated and B-rated windows deliver the best thermal performance for the money. C-rated units cost less upfront but save less over time.
  • Frame material. uPVC is the most affordable option and requires little maintenance. Timber costs more but suits period properties. Aluminium sits between the two on price and offers a slimmer profile.
  • Glazing specification. Standard double glazing suits most homes. Triple glazing costs more and delivers marginal additional savings in most UK climates unless you live in a particularly exposed location.
Frame material Approximate cost per window Maintenance requirement
uPVC £400–£700 Low
Timber £700–£1,500 Moderate
Aluminium £600–£1,200 Low


Government grant schemes such as the Great British Insulation Scheme may cover part of the cost for eligible households, particularly those in lower council tax bands or with lower incomes. Eligibility criteria change, so check the current rules on the GOV.UK website before budgeting. For a detailed comparison of frame materials, the guide on timber versus uPVC windows sets out the trade-offs clearly.

5. How can renters reduce window costs without permanent changes?

Renters face a real constraint: most tenancy agreements prohibit permanent alterations to windows. The good news is that the most effective low-cost insulation methods are entirely removable. DIY window insulation kits cost £10–£50 per window and can reduce heat loss by 10–20% without leaving any trace when removed.

Practical options for renters:

  • Secondary glazing film applied with double-sided tape. It peels off cleanly at the end of a tenancy and leaves no damage.
  • Draught excluder strips fitted to the inside of the frame. These are self-adhesive and removable.
  • Heavy thermal curtains hung close to the glass. They are not a window fix, but they reduce radiant heat loss significantly and move with you when you leave.
  • Temporary foam strips pressed into gaps around sashes. They compress and seal without adhesive damage.

If you notice a significant draught or a failed seal, report it to your landlord in writing. Landlords have a legal obligation to maintain windows in good repair under the Landlord and Tenant Act 1985. A professional assessment can support your case if the landlord is slow to act.

Pro Tip: Combine secondary glazing film on the coldest-facing windows with thermal curtains for the greatest warmth gain at the lowest cost. North and east-facing windows lose the most heat in winter.

Small habits compound into meaningful savings when practised consistently. Keeping window tracks clean stops grit from grinding down seals prematurely. Wiping condensation from internal glass each morning reduces moisture damage to frames and sills. Checking external sealant every two years and reapplying where it has cracked costs under £10 and prevents water ingress that can rot timber frames or cause mould inside uPVC.

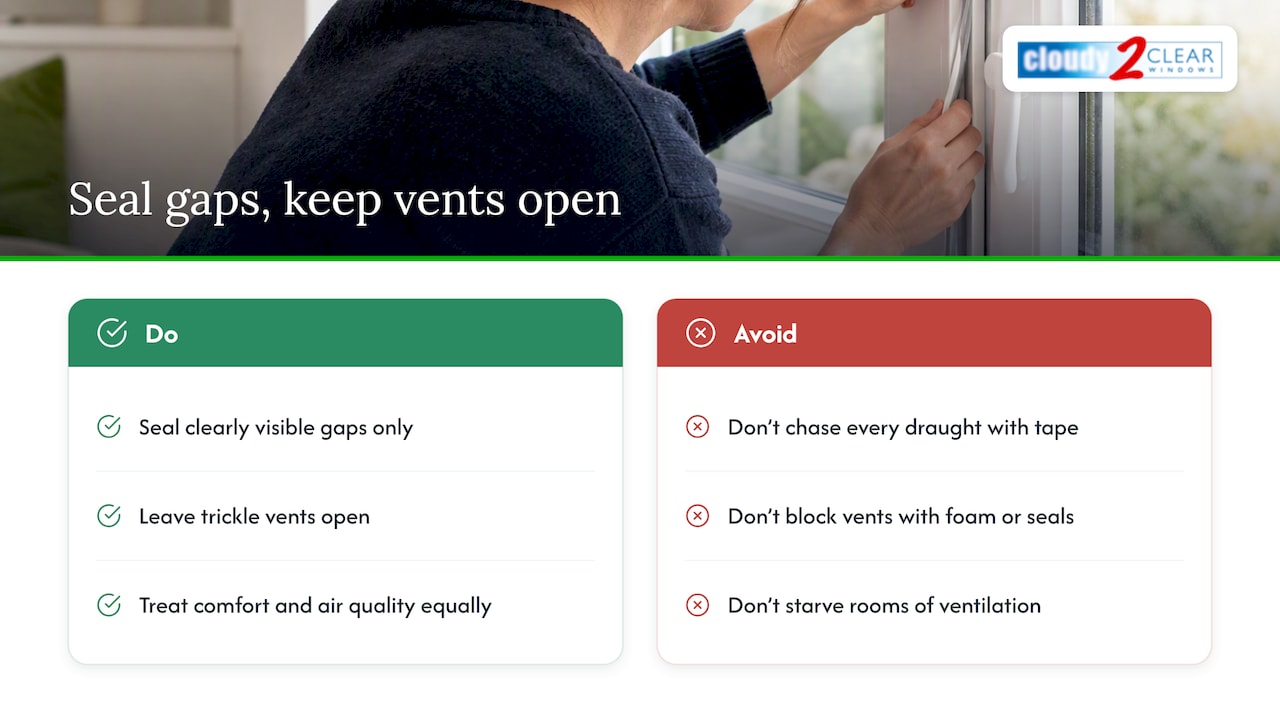
Ventilating rooms properly also matters. Trickle vents, the small slots built into modern window frames, exist to allow controlled airflow and prevent condensation. Blocking them to reduce draughts is counterproductive. It traps moisture inside the room, which damages seals and frames faster than the draught itself would. Leave trickle vents open and address draughts through the methods described above instead.

Pairing these habits with a broader home maintenance routine, including the kind of preventive exterior checks that extend the life of roofing and cladding, keeps repair bills low across the whole property.

What we have learned from two decades of window repairs

After more than 20 years of repairing and replacing double glazing across the UK, the pattern we see most often is this: homeowners wait too long. A small draught becomes a failed seal. A failed seal becomes misted glass. Misted glass becomes a full unit replacement that could have been avoided with a £10 tube of sealant two years earlier.

The other common mistake is replacing windows that did not need replacing. We regularly visit properties where a homeowner has spent £800 on a new window when a £90 sealed unit swap would have solved the problem entirely. The repair versus replacement decision deserves careful thought, not a quick sale.

Phased upgrades genuinely work. Replacing the two or three worst-performing windows in your home delivers most of the energy saving at a fraction of the whole-house cost. You feel the difference in your heating bills within the first winter, and that saving helps fund the next phase. Comfort and financial sense point in the same direction here.

The most important thing you can do today costs almost nothing. Spend 90 minutes checking your windows this autumn. Clean the tracks, inspect the seals, and seal any gaps you find. That single habit, done every year, prevents the majority of the costly repairs we are called out to fix.

How Cloudy2Clear Windows can help you save on window costs

Cloudy2Clear Windows has been repairing and replacing double glazed windows across the UK since 2005. Our engineers assess whether repair or replacement is the right call before any work begins, which means you never pay for more than you need.

https://www.cloudy2clearwindows.co.uk


Whether you need a sealed unit replacement in Milton Keynes, a repair service in Watford, or advice on upgrading to energy-efficient glazing, our local teams are ready to help. We work with both homeowners and renters, and we provide clear, honest quotes so you can make the right decision for your budget. Contact your nearest Cloudy2Clear Windows branch to arrange an assessment.

FAQ

How much can draught-proofing windows save per year?

The Energy Saving Trust estimates draught-proofing saves around £60 per year on heating for a typical household. The exact saving depends on the size of the gaps and how well-insulated the rest of the property is.

Is it cheaper to repair or replace a double glazed window?

Repairs typically cost £50–£300, while full replacements cost £400–£1,200 or more per window. Repair is the better choice when the frame is intact and only one component has failed.

Can renters insulate their windows without landlord permission?

Yes, using removable methods such as secondary glazing film and self-adhesive draught strips. These require no drilling or permanent fixing and can be removed without damage at the end of a tenancy.

How often should windows be inspected and maintained?

The Glass and Glazing Federation recommends an annual inspection of around 90–120 minutes, ideally in spring or autumn. This covers seals, hinges, tracks, and drainage weep holes.

What energy rating should I look for in replacement windows?

A-rated or B-rated windows offer the best balance of thermal performance and cost for most UK homes. C-rated windows cost less upfront but deliver smaller long-term savings on heating bills.

Best Window Seal Replacement Service for Leaking Double Glazing

When double glazing leaks or mists up between the panes, the fault is almost always the seal, not the glass itself and not the frame. Cloudy2Clear replaces failed window seals across the UK for £150 to £500 per window, restoring insulation and stopping draughts without touching the frame. We’ve worked this way since 2005, under our own line: Replace the Pane, not the Frame!

Key Takeaways

  • A properly sealed unit keeps argon gas trapped between the panes; once the seal fails, roughly 30% of that unit’s insulating value is lost.
  • Seals normally last 10 to 20 years before they need attention.
  • Full seal replacement is a job for professionals, both for correct installation and for warranty protection.
  • Our double glazing replacement comes with a 25-year guarantee on the glass itself, separate from any frame guarantee.

Why Is My Double Glazing Leaking?

Leaking double glazing almost always traces back to a failed seal rather than a cracked pane. The seal’s job is to keep insulating gas trapped and moisture out; once it splits or shrinks, air and water get in and the unit starts to fail from the inside.

A double glazed unit is built around a sealed air gap, usually filled with argon gas, held in place by a spacer bar and a perimeter seal. That seal is doing two jobs at once: keeping the gas in, and keeping weather out. Once it fails, you lose both. We put the loss at roughly 30% of that window’s insulating value once the seal is compromised, which is why a leaking window often runs alongside a jump in your heating bill rather than sitting as a separate problem.

Seals typically last 10 to 20 years under normal UK weather. Coastal exposure, south-facing aspects, and older uPVC frames tend to shorten that lifespan. If your windows are approaching that age and you’re starting to notice fogging or draughts, the seal is the first place to look, not the glass. We’ve written more on what actually happens inside a glazing unit if you want the full picture of how the components work together.

How Do I Know My Window Seals Have Failed?

The clearest sign is condensation trapped between the panes rather than on the inside surface of the glass. Other signs include persistent draughts around the frame, mould or black spotting on the sill, and discolouration or a cloudy haze that won’t clean off.

Building Science Education, a U.S. Department of Energy resource, notes that insulated glass unit failure is identified specifically by condensation forming between the inner and outer panes, which matches what we see across the units we inspect in England and Scotland. If you wipe the glass and the mist doesn’t shift, that’s the tell. Wiping the outside won’t help either, because the moisture is sealed inside the unit, not sitting on a surface you can reach.

Signs worth checking for, room by room:

  • Condensation or a persistent haze between the panes, not on either surface.
  • A cold draught you can feel near the frame edge even with the window shut.
  • Mould or discolouration building up on the sill or frame corners.
  • A visible gap or gone brittle sealant strip around the perimeter.

If you’re chasing a leak rather than fogging, our guide on how to fix window leaks walks through checking frame joints, the sill, and the wall-frame connection before you assume the seal is at fault.

Should I Repair the Seal or Replace the Whole Unit?

Whether to repair or replace depends on how far the failure has progressed and what condition the frame is still in. A seal that’s just started to let in moisture is often worth replacing on its own. A unit with heavy internal staining, warping, or a cracked pane usually needs the whole glazing unit swapped out.

Option Typical cost per window What actually changes

  • Window seal replacement £120 upwards depending on size. Just the failed seal; frame and existing glass stay in place
  • Double glazing replacement £120 upwards depending on size. The glazing unit or pane; the frame itself stays untouched

Both sit in the same price band, which is why the decision usually comes down to condition rather than cost. If the seal has only just started to go, a seal replacement gets you back to full insulation for less disruption. If the unit itself has clouded permanently or the pane is cracked, replacing the whole glazing unit makes more sense, and it’s still a pane swap, not a full frame job. Our page on why replacing window seals matters goes into the energy and comfort side of that decision in more depth.

DIY vs Professional Seal Replacement

While minor repairs can be DIY, full seal replacements are best handled by professionals to ensure proper installation and warranty protection.

Small jobs, like re-sealing a hairline gap in exterior sealant with 100 percent silicone and a sealant gun, are within reach for a confident homeowner. A full seal replacement is a different job entirely. It means breaking the airtight seal on the whole unit and rebuilding it correctly, with the right gas fill and spacer, so it holds for another 10 to 20 years rather than failing again within months. Get that wrong and you can void any warranty on the unit.

If you want to confirm a leak before booking anyone out, our guidance on fixing window leaks covers a simple test: pour water slowly along the exterior frame and seals while someone watches from inside for drips, which tells you whether the fault sits in the seal, the sill, or the frame joint before any work starts.

How Cloudy2Clear Replaces a Failing Window Seal

A Cloudy2Clear engineer starts with a free consultation and gives you a no-obligation quote, usually turned around in under 20 minutes once the survey is done. That survey covers the affected windows, taking accurate measurements before any glass is ordered.

Installation is built to be quick and clean, with minimal disruption to the room you’re standing in. We’re replacing the pane and its seal, not the whole window, so there’s no ripping out frames or replastering. Replacement glass carries a 25-year guarantee on the glass itself, separate from whatever guarantee applies to the PVC frame. One customer, Terryb, left this review after a job at our Gatwick branch: “Excellent service received from Cloudy2ClearWidows Gatwick – Ben gave a good price and just 1 week later the replacement double glazed units were installed by Adi and Phil who were friendly, tidy and very efficient so if your d/g windows are misting up I can thoroughly recommend cloudy2clearwindows Gatwick for great service from start to finish.

We work across the United Kingdom, including England, Scotland, London, the North West, and the North East & Yorkshire, on both private homes and commercial premises.

Keeping Your Windows Sealed After the Repair

Regular care prevents these issues from building up again once a new seal is in.

Routine maintenance can reduce energy losses by up to 15% and prevent expensive repairs later, so it’s worth a look at your windows once a year, particularly before winter. Proper care extends window lifespan by years, saving thousands on premature replacements down the line. That’s the same logic behind our double glazing care tips, and it’s worth pairing with a look at how long double glazing actually lasts so you know roughly where your own windows sit in their lifespan.

Frequently Asked Questions

  • How quickly can I get a quote for a leaking double glazed window? Our engineers give a no-obligation quote in under 20 minutes once they’ve surveyed the affected windows and taken accurate measurements. The free consultation happens first, so there’s no cost to finding out whether you need a seal replacement or a full pane swap.
  • Will a new seal or replacement pane come with any guarantee? Replacement glass carries a 25-year guarantee on the glass itself, separate from any guarantee on the PVC frame. That guarantee protection depends on professional installation, which is part of why full seal replacements are handled by our engineers rather than as a DIY job.
  • Can I fix just the leaking pane instead of replacing the whole window? Yes. Replacing the pane rather than the frame is our core approach and has been since 2005. If one unit has failed while the rest of the window and frame are sound, we replace that pane or seal and leave the frame in place.
  • Do you repair leaking double glazing in Scotland as well as England? Yes. We cover the United Kingdom, including England, Scotland, London, the North West, and the North East & Yorkshire, for both homeowners and commercial premises.
  • Is condensation between the panes always caused by a failed seal? Building Science Education, a U.S. Department of Energy resource, identifies condensation between the inner and outer panes as the marker of insulated glass unit failure specifically. If the moisture sits between the panes rather than on either glass surface, the seal has failed and the unit needs attention.


If your double glazing is leaking, misting up between the panes, or letting in a draught you can’t place, tell us what’s happening using the Send an Enquiry form below this article and we’ll help you work out whether it’s a seal replacement or a pane swap you need.

Steamed up windows: causes, fixes, and prevention

Steamed up windows occur when warm, moist indoor air meets cold glass, causing water vapour to condense into droplets on the surface. This process, known technically as surface condensation, is one of the most common complaints in UK homes, particularly during the colder months from october through to march. Poor ventilation, high indoor humidity, and temperature differences between inside and outside are the three main drivers. The good news is that most cases respond well to simple, low-cost changes you can make today.

What causes windows to steam up inside UK homes?

Window condensation forms when indoor air holds more moisture than the cold glass surface can support. The air releases that moisture as water droplets the moment it touches the glass. Understanding where that moisture comes from is the first step to fixing the problem.

The most common sources of indoor moisture include:

  • Cooking without lids. A boiling pan releases a significant amount of steam into the air within minutes.
  • Showering and bathing. Hot showers generate large volumes of water vapour that spread quickly through an unventilated home.
  • Drying clothes indoors. Hanging laundry on radiators or airers pushes moisture directly into the room air.
  • Breathing. Each person in a home releases moisture overnight. Persistent overnight condensation is mainly caused by moisture from occupants and poor bedroom ventilation. That explains why bedroom windows are often the worst affected by morning.
  • Poor ventilation. When humid air cannot escape, it builds up and settles against cold surfaces.
  • Single glazing and poorly insulated frames. These allow glass surfaces to drop much closer to outdoor temperatures, making condensation far more likely.

Temperature fluctuations make the problem worse. Rooms that cool down significantly overnight create ideal conditions for moisture to settle on glass. Bedrooms with closed doors and no trickle vents are particularly vulnerable. If your home has older window frames with gaps or failing seals, cold air enters and chills the glass further, lowering the temperature at which condensation forms.

How to improve ventilation to prevent steamed up windows

Ventilation is the single most effective tool for reducing window condensation. Moving moist air out of the home before it reaches cold glass breaks the cycle at its source.

  1. Open windows briefly each morning. Even 5–10 minutes of fresh air circulation reduces moisture buildup significantly. This is especially useful in bedrooms, where overnight breathing raises humidity levels.
  2. Keep trickle vents open. Trickle vents are the small slots built into modern window frames. Many homeowners close them to keep warm, but keeping them open allows a gentle, continuous exchange of air that prevents moisture from accumulating.
  3. Use extractor fans during cooking and showering. Run the fan for at least 15 minutes after you finish. This removes moisture before it spreads to other rooms.
  4. Leave internal doors open occasionally. Closed doors trap humid air in kitchens and bathrooms. Opening them allows air to circulate and moisture to disperse more evenly, reducing the concentration near cold glass.
  5. Check that air bricks and vents are not blocked. Furniture, insulation, or debris can obstruct these, reducing the natural airflow your home relies on.

For a more detailed daily routine, Cloudy2Clear Windows has published a step-by-step condensation guide that covers ventilation habits alongside other practical measures.

Pro Tip: Open the window in the kitchen or bathroom for just a few minutes while cooking or showering, rather than waiting until the room is already full of steam. Acting early removes moisture before it spreads through the rest of the house.

Infographic outlining prevention steps for steamed windows

Managing indoor humidity and moisture sources

Reducing the amount of moisture you produce indoors is just as important as improving ventilation. Small behavioural changes have a measurable impact on how often your windows fog up.

  • Avoid drying clothes indoors or on radiators. Indoor drying is one of the leading causes of high indoor humidity. Use a tumble dryer where possible, or dry clothes outside when the weather allows.
  • Use lids on pans when cooking. A lid traps steam inside the pan rather than releasing it into the kitchen air.
  • Close the bathroom door when showering. This contains moisture in one room, where the extractor fan can deal with it directly.
  • Remove damp towels and wet laundry promptly. Leaving them in a room adds moisture to the air for hours.
  • Consider a dehumidifier in problem areas. Dehumidifiers are effective in homes with limited ventilation or persistent condensation, particularly in poorly ventilated flats or rooms used for indoor drying.

The principle here is straightforward. Every litre of moisture you prevent from entering the air is one less litre that can settle on your windows. You do not need to make dramatic changes. Consistent small habits, applied daily, produce a noticeable reduction in condensation within a few weeks.

Pro Tip: Place a hygrometer (a simple humidity monitor, available from most hardware shops) in the rooms most affected by condensation. Aim to keep indoor humidity between 40% and 60%. If it regularly exceeds that range, you know exactly where to focus your efforts.

Woman placing hygrometer near sealed window indoors

Maintaining consistent heating and sealing window frames

How you heat your home affects condensation as much as ventilation does. Steady, even room temperature reduces condensation more effectively than intermittent heating. When a room cools down sharply overnight and then heats up quickly in the morning, the glass surface spends more time below the dew point, which is the temperature at which moisture in the air turns to liquid.

The table below summarises the key structural and heating measures, along with their effect on condensation risk:

Measure How it helps Difficulty
Consistent background heating Keeps glass above dew point overnight Low
Sealing gaps around frames Blocks cold air ingress, warms glass surface Low to medium
Replacing failed window seals Restores insulation, removes cold spots Medium
Fitting thermal curtains or blinds Adds insulation layer without blocking airflow Low
Upgrading to double or triple glazing Significantly raises glass surface temperature High


A few practical points on each of these:

  • Keep room temperature steady. A low background heat overnight, rather than switching heating off entirely, keeps surfaces warmer and reduces the risk of condensation forming.
  • Use curtains or blinds for added insulation. Keep them open slightly at the bottom so air can still circulate around the glass. Trapping air between a closed curtain and the window can actually make condensation worse.
  • Inspect and seal gaps around window frames. Sealing cracks around frames blocks cold air ingress and prevents the glass from cooling excessively. Use a silicone sealant or draught-excluding tape for a quick fix.
  • Check window seals regularly. Failed or perished seals create cold spots on the glass that attract condensation. Replacing them is a straightforward repair that Cloudy2Clear Windows carries out as part of its double glazing service.

Good home insulation also plays a supporting role. A better-insulated home retains heat more evenly, which means glass surfaces stay warmer for longer.

Simple tricks and tools to defog windows quickly

When condensation has already formed, you need a fast way to clear it and protect the glass and frame from moisture damage.

  • Wipe windows down each morning. Removing moisture daily prevents mould growth and protects window frames and paintwork from damp-related damage. A microfibre cloth works well and leaves no streaks.
  • Use a window vacuum. These handheld devices suck up condensation quickly and are particularly useful on large panes or in rooms with heavy overnight moisture.
  • Apply shaving foam to the glass. A thin layer of shaving foam, buffed off with a clean cloth, leaves an invisible film on glass that stops water droplets from clinging to the surface. It is a temporary measure, but it works well between deeper cleaning sessions.
  • Monitor humidity with a hygrometer. Placing one in each affected room helps you identify which spaces need more ventilation or heating attention.
  • Consider professional glass replacement if condensation appears between panes. Misting between the two panes of a double-glazed unit means the sealed unit has failed. No amount of wiping or ventilation will fix this. It requires a professional repair or replacement.

For guidance on preventing condensation in double glazing specifically, Cloudy2Clear Windows covers the topic in detail, including when a repair is the right call versus a full replacement.

Pro Tip: Rub a small amount of washing-up liquid onto the glass with a damp cloth, then buff it dry. Like shaving foam, it creates a thin barrier that reduces how quickly moisture clings to the surface. It is a useful daily habit during the winter months.

What I have learned from years of dealing with condensation in UK homes

After nearly two decades working with homeowners across the UK, the pattern I see most often is this: people focus on the symptom rather than the cause. They wipe the windows every morning, which is the right thing to do, but they never address why the moisture is there in the first place.

The homes with the worst condensation problems are almost always the ones where heating is switched off overnight and clothes are dried on radiators. Those two habits alone create conditions that no amount of wiping can fully overcome. When we advise clients to keep a low background heat running and move laundry outside or to a tumble dryer, the improvement is usually visible within a week.

I also think the role of trickle vents is underestimated. Homeowners close them because they feel draughty, which is understandable. But a small, controlled flow of fresh air is far less damaging than the mould and frame rot that follows persistent condensation. Keeping trickle vents open, even in winter, is one of the simplest and most effective changes you can make.

Finally, if you see misting between the panes of a double-glazed unit, do not delay getting it assessed. That is a failed seal, and it will not improve on its own. Early repair is always cheaper than leaving it until the frame or surrounding wall is affected by damp.

— Cloudy2Clear Windows

When to call in professional help for persistent condensation

If you have tried the ventilation and humidity measures above and condensation keeps returning, the problem may lie with the windows themselves.

https://www.cloudy2clearwindows.co.uk


Cloudy2Clear Windows has been repairing and replacing double glazed units since 2005, helping homeowners across the UK restore clarity and seal integrity without the cost of a full window replacement. Whether you are in Milton Keynes, Watford, Oxford, Leicester, or further afield, the team offers free assessments and honest advice on whether a repair or a glass replacement is the right solution. Failed sealed units, perished seals, and cold-spot frames are all straightforward repairs when caught early. Get in touch with Cloudy2Clear Windows for a free quote and take the first step towards clearer, drier windows.

FAQ

Why do my windows steam up every morning?

Overnight condensation forms because breathing releases moisture into a closed room, and cool glass surfaces cause that moisture to settle as water droplets by morning. Improving bedroom ventilation, such as leaving a trickle vent open, reduces this significantly.

Does drying clothes indoors make window condensation worse?

Yes. Drying clothes indoors or on radiators is one of the leading causes of high indoor humidity, which directly increases condensation on windows. Using a tumble dryer or drying clothes outside removes this moisture source entirely.

What is the quickest way to defog windows?

Wipe the glass with a microfibre cloth to remove moisture immediately, then run an extractor fan or open a window briefly to reduce humidity in the room. Applying a thin layer of shaving foam and buffing it off creates a temporary barrier that slows future fogging.

Should I keep my heating on overnight to prevent condensation?

A low, steady background temperature overnight is more effective than switching heating off entirely. Consistent heating keeps glass surfaces above the dew point, which is the temperature at which moisture in the air turns to liquid on cold surfaces.

When does condensation mean my double glazing needs replacing?

Condensation on the inside surface of a room is a ventilation and humidity issue. Condensation appearing between the two panes of a double-glazed unit means the sealed unit has failed and requires professional repair or replacement.