• USP Logo Icon
    25 Year Guarantee
  • USP Leaf Icon
    Latest ECO Friendly Technology
  • USP Pointer Icon
    National Coverage
Get a FREE quote

How to remove window condensation effectively in 2026

Waking up to foggy windows or noticing persistent moisture on your glass surfaces signals more than just a minor annoyance. Window condensation affects countless homes and businesses across England and Scotland, creating discomfort, damaging property, and diminishing the appeal of your space. Left unchecked, this moisture can lead to mould growth, structural deterioration, and increased heating costs. This comprehensive guide walks you through understanding why condensation occurs, preparing for effective removal, executing proven techniques step by step, and maintaining condensation-free windows year round. You’ll gain practical knowledge to tackle this common problem confidently and protect your investment.

Understanding why window condensation occurs

Condensation occurs when warm, moist air encounters a cold surface, such as a window pane. The science behind this phenomenon is straightforward yet crucial to grasp. Warm air holds significantly more moisture vapour than cold air. When heated indoor air contacts a chilled window surface, the air temperature drops rapidly at that contact point.

This temperature drop forces the air to release excess moisture it can no longer hold. The water vapour transforms into liquid droplets that accumulate on the glass. You’ll notice this most frequently during winter months when indoor heating creates warm, humid conditions whilst outdoor temperatures plummet, making window surfaces exceptionally cold.

Several factors intensify condensation formation:

  • High indoor humidity from cooking, bathing, or drying clothes indoors
  • Poor ventilation that traps moist air inside
  • Single-glazed or poorly insulated windows that remain colder
  • Inadequate heating that creates temperature extremes

The consequences extend far beyond aesthetic concerns. Persistent moisture creates ideal conditions for mould spores to colonise window frames, surrounding walls, and soft furnishings. This biological growth releases allergens and irritants that compromise indoor air quality, particularly affecting those with respiratory conditions. Water pooling on sills can rot wooden frames, corrode metal components, and stain plaster or wallpaper.

“Condensation left unaddressed transforms from a cosmetic nuisance into a structural threat, degrading your property’s condition and value whilst creating health hazards for occupants.”

Understanding these mechanisms helps you recognise that effective condensation removal requires addressing both the symptom (water on glass) and the root causes (temperature differential and excess moisture). This knowledge forms the foundation for the targeted strategies outlined in subsequent sections, enabling you to tackle common causes of window damage prevention systematically.

Infographic showing removal and prevention steps

Preparing for the condensation removal process

Successful condensation removal begins well before you touch the affected windows. Proper preparation ensures you work safely, efficiently, and address underlying issues that DIY cleaning alone cannot resolve. Start by assembling essential supplies that facilitate thorough moisture removal without damaging glass or frames.

Gather these materials before beginning:

  • Clean, absorbent microfibre cloths or lint-free towels
  • Spray bottle filled with warm water and mild detergent
  • Squeegee for efficient water removal from large panes
  • White vinegar solution (50/50 mix) for mould treatment
  • Portable dehumidifier if available
  • Step ladder for safely reaching upper windows

Next, conduct a detailed inspection of each affected window. Look beyond the obvious moisture to identify potential structural problems. Check window seals for cracks, gaps, or deterioration that might allow air infiltration. Press gently around the frame perimeter to detect soft spots indicating rot. Examine the glazing compound or rubber gaskets securing the glass for signs of failure.

Inspecting condensation and moisture damage


Persistent condensation can lead to mould and damp, structural damage, poor indoor air quality, and colder indoor temperatures. Identifying these risks early allows you to determine whether simple cleaning suffices or professional intervention becomes necessary. Internal condensation between double-glazed panes, for instance, signals seal failure requiring specialist repair rather than surface cleaning.

Pro Tip: Photograph affected windows before starting removal work. These images document the extent of condensation, help you track improvement over time, and provide valuable reference if you need to consult professionals about persistent issues.

Consider timing your removal efforts strategically. Address condensation promptly when you notice it rather than allowing moisture to accumulate for days or weeks. Morning typically presents the heaviest condensation after overnight temperature drops, making it an ideal time to assess severity whilst planning removal for slightly warmer midday hours when ventilation proves more effective.


Preparation Task Purpose Time Required
Gather cleaning supplies Ensures efficient, damage-free removal 10 minutes
Inspect window condition Identifies structural issues needing repair 15 minutes
Check weather forecast Plans optimal ventilation timing 5 minutes
Review safety precautions Prevents accidents during cleaning 5 minutes


Safety deserves particular attention when working with cleaning chemicals and ladders. Ensure adequate ventilation before applying any cleaning solutions, especially those containing bleach or ammonia. Wear protective gloves to shield skin from prolonged moisture exposure and cleaning agents. Position ladders on stable, level surfaces and maintain three points of contact when climbing.

Understanding how to prevent condensation in double-glazed windows informs your preparation by highlighting which preventive measures to implement alongside removal efforts. This dual approach tackles existing moisture whilst reducing future occurrence, maximising the effectiveness of your work.

Step-by-step guide to removing window condensation

With preparation complete, you’re ready to execute systematic condensation removal that delivers lasting results. This process combines immediate moisture elimination with environmental adjustments that prevent rapid reformation. Follow these steps in sequence for optimal effectiveness.

  1. Wipe down affected surfaces thoroughly. Start at the top of each window pane and work downwards using clean, dry microfibre cloths. Apply gentle pressure to absorb condensation without scratching glass. Replace saturated cloths frequently to maintain absorption efficiency. For heavily condensed windows, use a squeegee to remove bulk moisture before cloth drying. Pay special attention to corners and edges where water accumulates.
  2. Clean glass and frames with appropriate solutions. After removing visible moisture, spray your detergent solution lightly onto the glass. Wipe clean with fresh cloths using circular motions. This removes any residue, dirt, or early-stage mould that condensation may have deposited. For frames showing mould growth, apply diluted white vinegar solution, allow it to sit for five minutes, then wipe clean. This natural treatment kills mould spores without harsh chemicals.
  3. Increase immediate ventilation. Open windows in the affected room for at least 15 minutes, weather permitting. This exchanges humid indoor air with drier outdoor air, reducing moisture levels rapidly. If outdoor conditions prevent window opening, activate extractor fans in kitchens and bathrooms. Position a portable dehumidifier near affected windows to actively remove airborne moisture.
  4. Inspect and address seal integrity. Examine window seals closely for gaps, cracks, or deterioration discovered during preparation. Minor gaps can be temporarily sealed with weatherstripping tape as an immediate fix. However, significant seal failure requires professional attention. Internal condensation between double-glazed panes indicates complete seal breakdown that DIY methods cannot resolve.
  5. Implement moisture source control. Identify activities generating excess humidity in the affected space. Move indoor clothes drying to well-ventilated areas or outdoors. Use lids when cooking to contain steam. Run extractor fans during and for 20 minutes after bathing. These simple adjustments reduce the moisture load your windows must contend with.

Getting rid of condensation requires reducing moisture in the air and stopping surfaces from getting cold enough to reach the dew point. This dual approach addresses both sides of the condensation equation, delivering more sustainable results than cleaning alone.

Pro Tip: Create a daily condensation check routine during winter months. Each morning, quickly inspect windows for new moisture formation. Early detection allows immediate wiping before water pools on sills or frames, preventing the cumulative damage that develops when condensation persists unaddressed for extended periods.


Removal Step Frequency Expected Result
Surface wiping Daily during cold weather Immediate moisture removal
Deep cleaning Weekly Mould prevention and clarity
Ventilation boost After moisture-generating activities Reduced humidity levels
Seal inspection Monthly Early damage detection


For persistent condensation despite following these steps, professional intervention becomes necessary. Failed window seals, inadequate insulation, or structural issues require specialist diagnosis and repair. Understanding how to fix window leaks guide helps you recognise when DIY efforts should transition to professional solutions that address underlying problems your removal efforts cannot resolve.

Monitor results over several days after implementing these steps. Successful removal should show progressively less condensation formation each morning, indicating your environmental adjustments are working. If condensation returns immediately or worsens, this signals deeper issues requiring expert assessment.

Maintaining condensation-free windows and preventing recurrence

Removing existing condensation solves only half the challenge. Preventing its return requires ongoing environmental management and strategic upgrades that address root causes. These maintenance strategies protect your investment whilst enhancing comfort and energy efficiency.

Ventilation forms your primary defence against condensation recurrence. Adequate air circulation prevents moisture accumulation that leads to condensation formation. Install trickle vents in window frames if not already present. These small, controllable openings allow continuous air exchange without fully opening windows. Open windows for at least 10 minutes twice daily, even during cold weather, to refresh indoor air. This brief ventilation has minimal heating cost impact whilst significantly reducing humidity.

Implement these ventilation practices:

  • Run extractor fans during cooking and bathing, continuing for 20 minutes afterwards
  • Keep internal doors open to promote air circulation between rooms
  • Avoid blocking air vents or radiators with furniture or curtains
  • Use window vents on the leeward side of buildings to prevent drafts whilst maintaining airflow

Humidity control complements ventilation by directly reducing moisture available for condensation. Portable dehumidifiers prove particularly effective in rooms prone to dampness, such as bathrooms, kitchens, and poorly ventilated bedrooms. Position these devices centrally for optimal coverage. Empty collection tanks regularly and clean filters monthly to maintain efficiency. Moisture-absorbing products like silica gel containers offer passive humidity reduction in smaller spaces like windowsills.

Temperature management plays an equally crucial role. Maintaining consistent, moderate heating prevents the extreme temperature differentials that trigger condensation. Avoid turning heating completely off overnight, as this allows surfaces to become extremely cold. Instead, set thermostats to maintain minimum temperatures around 15-17°C during unoccupied periods. This strategy proves more energy-efficient than allowing spaces to cool completely then reheating, whilst keeping window surfaces above dew point temperatures.

Pro Tip: During winter months, close curtains and blinds only after windows have warmed from daytime heating. Covering cold glass traps frigid air against the pane, creating ideal condensation conditions. Allow windows to warm for at least an hour after sunset before closing coverings.


Prevention Method Effectiveness Cost Maintenance
Regular ventilation High Free Daily attention
Dehumidifier use Very high Moderate (£100-300) Weekly emptying
Trickle vent installation High Low (£50-150) Minimal
Secondary glazing Very high Moderate (£200-500/window) Annual cleaning
Full window replacement Highest High (£400-1000/window) Minimal


For properties with persistent condensation despite diligent maintenance, glazing upgrades offer permanent solutions. Secondary glazing adds an insulating air layer that raises internal pane temperatures above dew point. This retrofit solution suits listed buildings or properties where full replacement proves impractical. Modern double or triple glazing provides superior insulation, dramatically reducing cold surface areas where condensation forms.

Reducing moisture and preventing cold surfaces are key to avoiding condensation recurrence. Understanding how to prevent condensation in a conservatory demonstrates these principles in challenging environments with extensive glazing, offering insights applicable to standard windows.

Monitor indoor humidity levels using an inexpensive hygrometer. Ideal relative humidity ranges between 40-60%. Levels consistently above 60% indicate inadequate ventilation or excessive moisture generation requiring intervention. Adjust your prevention strategies based on these measurements rather than waiting for visible condensation to appear.

Seasonal adjustments optimise prevention efforts. Winter demands increased vigilance with heating, ventilation balance, and humidity control. Summer typically presents fewer condensation challenges but requires attention to preventing excess humidity from outdoor air entering through open windows during humid weather. Learning to identify window condensation issues helps you distinguish between different condensation types requiring varied prevention approaches.

Explore expert double glazing repairs and window glass replacement

When condensation persists despite your best DIY efforts, professional intervention becomes essential. Failed window seals, structural damage, and internal condensation between double-glazed panes require specialist expertise and equipment beyond typical homeowner capabilities. Cloudy2Clear Windows brings over two decades of experience resolving condensation issues for homes and businesses throughout England and Scotland.

https://www.cloudy2clearwindows.co.uk


Professional repairs restore window seal integrity, replace failed glazing units, and upgrade insulation performance. These interventions eliminate condensation at its source rather than merely managing symptoms. Expert assessment identifies whether repair or full replacement offers the most cost-effective, long-lasting solution for your specific situation. Modern replacement glazing significantly outperforms older units, reducing condensation risk whilst improving energy efficiency and comfort. If you’ve followed this guide yet condensation continues affecting your property, explore double glazing repairs and window glass replacement options that deliver permanent solutions.

Frequently asked questions

What causes condensation to form between double-glazed window panes?

Internal condensation between double-glazed panes indicates seal failure allowing moisture to enter the hermetically sealed space. The desiccant material designed to absorb residual moisture becomes saturated, permitting water vapour to condense on interior glass surfaces. This damage cannot be repaired through cleaning and requires professional glazing unit replacement to restore performance.

Can I use household products to remove mould caused by window condensation?

Yes, diluted white vinegar or mild bleach solutions effectively kill mould spores on window frames and surrounding surfaces. Mix one part bleach to four parts water or use undiluted white vinegar. Apply with a cloth, allow five minutes contact time, then wipe clean. Always wear gloves, ensure adequate ventilation, and never mix bleach with other cleaning products as this creates dangerous fumes.

How often should I check my windows for signs of condensation or damage?

Inspect windows monthly during autumn and winter when condensation risk peaks. Conduct thorough checks after severe weather events that may compromise seals or frames. Daily quick visual inspections during cold snaps allow immediate moisture removal before damage develops. Annual professional assessments identify deterioration requiring repair before minor issues escalate into costly replacements.

Why glazed units mist up: causes and solutions 2026

Misted double glazed windows frustrate homeowners and property managers across England and Scotland every day. Many assume the problem is simple condensation, but the real culprit lies hidden within the sealed unit itself. This article clarifies why glazing units mist up, how to spot the warning signs early, and what practical steps you can take to prevent or address these issues effectively.

What causes glazed units to mist up?

Moisture trapped between window panes signals that the hermetic seal has failed. Double glazed units rely on airtight seals to keep the space between panes dry and insulated. When sealant degrades, humid air enters this space and condenses on the cooler inner surfaces.

Thermal cycling, solar radiation, and manufacturing defects create the primary pathways for seal breakdown. Temperature swings make the glass expand and contract repeatedly, stressing the edge seals until tiny gaps form. This constant flexing weakens even high-quality materials over time.

UV exposure proves particularly damaging. Solar radiation accelerates sealant degradation, especially on south and west facing windows that receive intense afternoon sun. The chemical bonds in the sealant break down, becoming brittle and losing adhesion to the glass.

Several factors compound these natural stresses:

  • Manufacturing defects in the original seal application leave weak points vulnerable to early failure
  • Poor installation creates uneven stress distribution across the sealed unit
  • Low-quality sealant materials cannot withstand normal environmental exposure
  • Inadequate desiccant within the spacer bar fails to absorb residual moisture

Understanding window damage prevention helps you recognise that misting is not a surface issue you can wipe away. The problem exists within the sealed cavity itself, requiring professional attention to resolve properly.

Signs of seal failure and misted double glazing

Spotting seal failure early saves money and prevents further damage. Visible condensation between glass panes provides the most obvious indication that your sealed unit has failed. This fogging appears as persistent moisture that won’t clear with wiping or ventilation.

Mineral deposits tell a more advanced story. White films or milky patterns on inner glass indicate prolonged seal failure where moisture has repeatedly entered and evaporated, leaving behind dissolved minerals. These deposits cannot be cleaned from outside because they sit between the panes.

Physical changes to the glass itself signal serious problems:

  • Glass warping or bowing suggests the inert gas between panes has escaped
  • Visible cracks or gaps around window edges show where seals have separated
  • Distorted reflections indicate uneven pressure within the sealed cavity
  • Rattling sounds when opening or closing suggest loose components

Pro tip: Inspect windows quarterly, especially after extreme weather. Early detection of small edge gaps or slight fogging lets you address issues before complete seal failure occurs, potentially saving hundreds on replacement costs.

Recognising different types of window condensation helps distinguish between normal surface condensation and sealed unit failure. Surface moisture disappears with ventilation, whilst internal misting persists regardless of room conditions.

How different spacer bars affect misting and window performance

Spacer bars separate glass panes and profoundly influence thermal performance. Traditional aluminium spacers conduct heat rapidly away from window edges, creating cold bridges where condensation forms more readily. These thermal weak points compromise the entire unit’s efficiency.

Close-up of window edge and spacer bar


Warm-edge spacers use materials with lower thermal conductivity, keeping edge temperatures closer to the centre glass temperature. Aluminium spacers increase condensation risk by 20-30% compared to modern warm-edge alternatives, making material choice crucial for long-term performance.


Spacer type Thermal conductivity Condensation risk Average lifespan Key advantage
Aluminium High 20-30% higher 10-15 years Lower initial cost
Stainless steel Medium 15-20% higher 15-18 years Good durability
Composite warm-edge Low Baseline 18-25 years Superior insulation
Thermoplastic Very low 25-35% lower 20-25 years Best thermal performance


The spacer bar also houses the desiccant that absorbs residual moisture during manufacturing. Quality warm-edge spacers incorporate more effective desiccant materials that maintain their absorption capacity longer, providing better protection against internal condensation.

Choosing warm-edge spacers during replacement prevents future misting issues. The modest additional cost delivers significant returns through reduced condensation, improved energy efficiency, and extended unit lifespan. Homeowners replacing failed units should specify warm-edge technology to prevent condensation in double glazed windows going forward.

How long do double glazing seals last and why premature failure occurs

Quality double glazing seals typically last 10-20 years under normal conditions. Material quality, installation precision, and environmental exposure determine where within this range your windows fall. Premium materials and professional installation push lifespan towards the upper end.

Infographic double glazing seal causes and effects


Premature failure stems from controllable and uncontrollable factors. Poor installation increases failure rate by 40% within the first five years, making installer choice critical. Rushed or inexperienced installation creates stress points that accelerate seal breakdown dramatically.


Lifespan range Common causes Observable effects Prevention strategy
5-10 years Poor installation, manufacturing defects Early fogging, edge gaps Choose certified installers
10-15 years Standard materials, moderate UV exposure Gradual misting, minor deposits Regular maintenance
15-20 years Quality materials, good installation Slow degradation Protective window films
20+ years Premium materials, warm-edge spacers, professional care Minimal issues Annual professional inspection


Environmental factors you cannot control include coastal salt exposure, industrial pollution, and extreme temperature variations. Understanding double glazing lifespan expectations helps you budget for eventual replacement whilst maximising current window performance.

Pro tip: Request installation certificates and material specifications when having windows fitted. Documentation proves valuable when assessing whether premature failure resulted from defective materials or poor workmanship, potentially triggering warranty coverage.

Different window seal failure types age at different rates. Primary seals fail first, followed by secondary seals. Understanding this progression helps you recognise when complete replacement becomes more cost effective than repeated repairs.

Preventive care and options for dealing with misted glazed units

Regular inspection catches problems before they escalate. Homeowners should examine windows for cracks or gaps quarterly to prevent moisture ingress. Check edge seals, frame joints, and glazing beads for separation or deterioration.

Cleaning and maintenance extend window life but cannot reverse seal failure. Proper care includes gentle cleaning with appropriate products, ensuring drainage holes remain clear, and checking frame condition. These measures prevent additional stress on already vulnerable seals.

Repair versus replacement depends on damage extent:

  1. Inspect all windows systematically, noting any fogging, deposits, or visible seal damage
  2. Document issues with photos showing affected areas and approximate size of misting
  3. Obtain professional assessment from certified window specialists for accurate diagnosis
  4. Compare repair costs against full sealed unit replacement for each affected window
  5. Consider upgrading to warm-edge spacers if replacing units to prevent recurrence
  6. Schedule work during dry weather to ensure proper seal curing and installation

Replacement often proves more cost effective than attempting to repair failed seals. Warm-edge spacer bars offer long-term benefits for reducing future misting whilst improving energy efficiency, making them worthwhile upgrades during replacement projects.

Pro tip: Group window replacements by priority. Address south and west facing units first, as they experience highest UV exposure and fail earliest. This staged approach spreads costs whilst protecting most vulnerable windows immediately.

Understanding your double glazing care options helps you make informed decisions. Some situations allow repair of failed double glazing, whilst others require complete replacement. Learning why replacing window seals matters helps you evaluate when repair makes financial sense.

How Cloudy2Clear can help with glazed unit misting

Your misted windows need expert attention, and Cloudy2Clear specialises in diagnosing and resolving double glazing failures. Since 2005, we have helped homeowners and property managers across England and Scotland restore clarity and efficiency to their windows through professional repairs and replacements.

https://www.cloudy2clearwindows.co.uk


Our specialists assess each situation individually, recommending repair or replacement based on damage extent and cost effectiveness. When replacement proves necessary, we install quality sealed units with warm-edge spacer bars that resist future misting whilst improving thermal performance. Professional installation ensures proper sealing and alignment, eliminating the installation defects that cause premature failure. Get expert help with your double glazing repairs and window glass replacement needs today.

Frequently asked questions

What causes misting between double glazed window panes?

Seal failure allows humid air to enter the space between panes, where it condenses on cooler glass surfaces. Thermal cycling, UV exposure, and manufacturing defects degrade the sealant over time, breaking the hermetic seal that keeps the cavity dry.

Can misted double glazing be repaired or must it be replaced?

Complete seal failure typically requires sealed unit replacement rather than repair. Attempting to dry out or reseal failed units rarely succeeds long term, as the underlying seal damage persists and moisture returns quickly.

How long should double glazing seals last before misting occurs?

Quality seals last 10 to 20 years depending on materials, installation quality, and environmental exposure. Poor installation can trigger failure within five years, whilst premium materials and warm-edge spacers extend lifespan beyond 20 years.

Do warm-edge spacer bars really prevent window misting?

Warm-edge spacers reduce condensation risk by 20 to 30% compared to aluminium alternatives by minimising thermal bridging at window edges. They keep edge temperatures warmer, reducing the conditions that promote condensation formation.

How can I tell if my double glazed windows need replacing?

Persistent fogging between panes, mineral deposits on inner glass, visible edge seal gaps, or glass warping indicate failure requiring replacement. Early stage issues like slight fogging may allow timely intervention before complete failure occurs.

Common causes of window damage and how to prevent them

Discovering a cracked pane, rotting frame, or persistent leak can be deeply frustrating, especially when repairs eat into your budget and disrupt your comfort. Preventing window damage starts with understanding its root causes, from relentless UV exposure and moisture ingress to the hidden stresses of daily use and temperature swings. In this article, we’ll explore the most common culprits behind window deterioration and share practical strategies to protect your property’s value and keep your spaces comfortable year-round.

Environmental factors: UV radiation and moisture ingress

Your windows face a constant battle against nature, and two of the most damaging environmental forces are UV radiation and moisture. UV exposure can reduce exterior wood coating lifespan by up to 50% within 5 years, with south-facing windows receiving 30% more UV than their north-facing counterparts. This relentless bombardment breaks down the wood fibres beneath your paint, leaving timber brittle and vulnerable.

Timber window with UV and moisture damage


Moisture is equally destructive. Timber with moisture content above 20% becomes highly susceptible to fungal decay, and poorly sealed windows can allow up to 1 litre of water ingress per square metre during heavy rain. Rain, condensation, and faulty sealing create the perfect conditions for rot to take hold, especially in frames that lack proper ventilation. You’ll notice the early signs as paint begins to blister, wood feels soft to the touch, or dampness appears around the frame edges.

Preventing this damage requires a proactive approach:

  • Inspect south and west-facing windows every six months for paint failure or soft spots.
  • Reseal gaps and reapply protective coatings before winter to block moisture.
  • Improve indoor ventilation to reduce condensation that accelerates decay.
  • Clean drainage channels regularly to prevent water pooling near frames.

Pro Tip: If you notice condensation forming between double-glazed panes rather than on the interior surface, the seal has failed and moisture is trapped inside. This requires professional repair to prevent further condensation issues and maintain energy efficiency.

Mechanical stress and thermal expansion: the hidden threats to window joints

Every time you open or close a window, you’re applying mechanical stress to hinges, locks, and joints. Over months and years, this repetitive motion wears down components, particularly in older timber frames where wood naturally ages and hardware loosens. But the real hidden danger comes from thermal expansion and contraction.

Temperature fluctuations cause timber to expand and contract by up to 0.5% in width, and this movement creates significant stress at frame joints and along glass edges. In Britain’s variable climate, where a cold morning can give way to a warm afternoon, your windows are constantly shifting. These micro-movements accumulate, eventually causing joints to separate, frames to warp, and windows to stick or refuse to close properly.

You can minimise mechanical and thermal damage with these steps:

  • Lubricate hinges and locks annually with a silicone-based product to reduce friction.
  • Operate windows gently, avoiding forceful slamming or yanking that accelerates wear.
  • Check for common window faults like sticking sashes or loose handles before they worsen.
  • Ensure joints are properly designed to accommodate natural wood movement.

Pro Tip: If your timber window becomes difficult to open in summer but operates smoothly in winter, thermal expansion is the likely culprit. A skilled joiner can plane down the affected edge slightly, allowing the frame to expand without binding whilst maintaining a tight seal when the wood contracts.

Impact damage and thermal stress fractures in window panes

Whilst frames battle UV and moisture, your glass faces its own set of challenges. Impact damage accounts for 30 to 40% of window damage claims in areas prone to severe weather, with hailstones, windborne debris, and unfortunately vandalism all posing serious risks. A single storm can shatter panes that have stood for decades, particularly in exposed locations.

Thermal stress fractures present a more subtle threat. When one part of a window pane heats up significantly faster than another, such as when sunlight strikes a partially shaded pane, the resulting expansion mismatch can cause the glass to crack. Thermal stress risks increase with window size and orientation, making large west-facing panes especially vulnerable during late afternoon sun exposure.

Protecting your glass requires awareness of these vulnerability patterns:

  1. Inspect windows after storms, high winds, or hail for chips, cracks, or impact marks.
  2. Check large panes and west-facing glass for stress fractures during seasonal temperature extremes.
  3. Trim nearby trees and shrubs to prevent branches striking windows during gales.
  4. Consider protective film or impact-resistant glazing in particularly exposed areas.
  5. Address small cracks immediately, as they compromise structural integrity and energy efficiency.
Damage Type Primary Cause Most Vulnerable Windows Prevention Strategy
Impact damage Hail, debris, vandalism Ground floor, exposed locations Protective film, landscaping control
Thermal fractures Uneven heating/cooling Large panes, west-facing Shading, quality glazing installation
Stress cracks Manufacturing defects, poor installation Any orientation Professional fitting, regular inspection

Poor installation practices and their impact on window durability

Even the highest-quality window will fail prematurely if installed incorrectly. Incorrect sealing, shimming, and fastener use cause leaks, drafts, and structural problems that undermine your window’s performance from day one. Inadequate sealing around the frame perimeter allows water to seep behind the casing, where it rots timber and corrodes metal components unseen.

Uneven shimming creates another critical issue. When installers don’t level the frame properly, it distorts under its own weight and the pressure of being fastened to the wall. This warping prevents proper operation, creates gaps that leak air and water, and places uneven stress on the glass. Using the wrong type or number of fasteners compounds these problems, either allowing excessive movement or over-constraining the frame so it can’t accommodate natural expansion.

Ensuring proper installation protects your investment:

  • Hire experienced installers with verifiable references and industry accreditation.
  • Request a detailed specification covering sealing materials, shimming approach, and fastener schedule.
  • Inspect the work before final payment, checking for level frames, smooth operation, and complete sealing.
  • Address any window leaks immediately, as they indicate installation faults requiring correction.

Pro Tip: A properly installed window should operate smoothly without sticking at any point in its travel, close with a consistent seal all around, and show no visible gaps between frame and wall when viewed from inside or outside. If you notice drafts within the first few months, don’t wait for the problem to worsen.

Comparing common window damage causes: a summary table and practical guidance

Understanding how different damage causes interact helps you prioritise your prevention efforts based on your property’s specific vulnerabilities. A south-facing timber window in a coastal area faces very different risks than a north-facing uPVC window in a sheltered urban location.


Damage Cause Typical Effects Primary Risk Factors Prevention Tips
UV radiation Paint degradation, wood fibre breakdown South/west orientation, exposed locations Regular repainting, UV-resistant coatings
Moisture ingress Rot, fungal decay, paint blistering Poor sealing, inadequate ventilation Seal maintenance, drainage clearing
Mechanical stress Worn hinges, loose locks, joint failures Frequent use, age, poor quality hardware Gentle operation, annual lubrication
Thermal expansion Joint separation, frame warping, sticking Temperature fluctuations, timber frames Quality joinery, expansion allowances
Impact damage Cracked/shattered glass Severe weather, exposed locations Protective measures, prompt repairs
Thermal fractures Stress cracks in glass Large panes, west-facing, shade patterns Quality glazing, appropriate shading
Poor installation Leaks, drafts, premature failure Inexperienced installers, cost cutting Professional fitting, thorough inspection


Your property’s location and window materials determine which risks require most attention. Coastal properties must prioritise moisture and impact protection, whilst urban homes might focus more on thermal stress and mechanical wear. A comprehensive maintenance programme addresses all potential causes proportionally.

Regular seasonal inspections let you catch problems early when repairs are simpler and cheaper. Spring checks should focus on winter water damage and condensation effects, whilst autumn inspections prepare windows for the harsher months ahead. Document your findings each time, noting any changes that might indicate developing issues requiring professional assessment.

Protect your windows with expert care from Cloudy2Clear

Now that you understand the main threats to your windows, you’re better equipped to prevent damage before it becomes costly. At Cloudy2Clear Windows, we’ve spent nearly two decades helping homeowners and business owners throughout England and Scotland maintain, repair, and replace windows damaged by UV exposure, moisture, thermal stress, and poor installation.

https://www.cloudy2clearwindows.co.uk


Our experienced team recognises the signs of developing problems that others might miss, from early timber decay to failing seals and stress fractures. Whether you need professional repairs to extend your existing windows’ lifespan or expert installation of energy-efficient replacements, we bring the knowledge and precision that prevent future damage. We understand your space matters, and proper window care protects both your comfort and your property’s value for years to come.

Frequently asked questions

How often should I inspect my windows for damage?

Inspect your windows twice yearly, ideally in spring and autumn, checking for paint deterioration, soft timber spots, seal failures, and glass cracks.

Can I prevent thermal stress fractures in large windows?

Quality installation with proper glazing techniques and avoiding sudden temperature changes through appropriate shading significantly reduces thermal fracture risk in large panes.

What’s the first sign that moisture is damaging my timber windows?

Paint blistering or peeling, particularly on lower frame sections, typically indicates moisture penetration before visible rot develops.

Does window orientation really affect damage risk?

Yes, south and west-facing windows receive substantially more UV radiation and thermal stress, requiring more frequent maintenance and protective measures.

How can I tell if my windows were installed correctly?

Properly installed windows operate smoothly, seal consistently all around, show no visible gaps, and remain free from leaks or drafts during normal weather conditions.

Identify and solve window condensation issues in 2026

Foggy windows frustrate thousands of UK property owners every winter. Many misdiagnose the problem, wasting money on ineffective fixes that leave condensation unchanged. Understanding whether moisture sits inside your room, outside on the glass, or trapped between panes determines which solution actually works. This guide walks you through identifying your specific condensation type and choosing the right fix to restore clarity and cut energy waste.

How to choose which window condensation issue to address

Accurate diagnosis starts with understanding what you’re looking at. Interior condensation forms on the room-facing surface when warm, humid air contacts cold glass. Exterior condensation appears on the outside pane during cold, calm nights when the glass cools below the dew point. Inter-pane condensation becomes trapped between double glazing layers after seal failure.

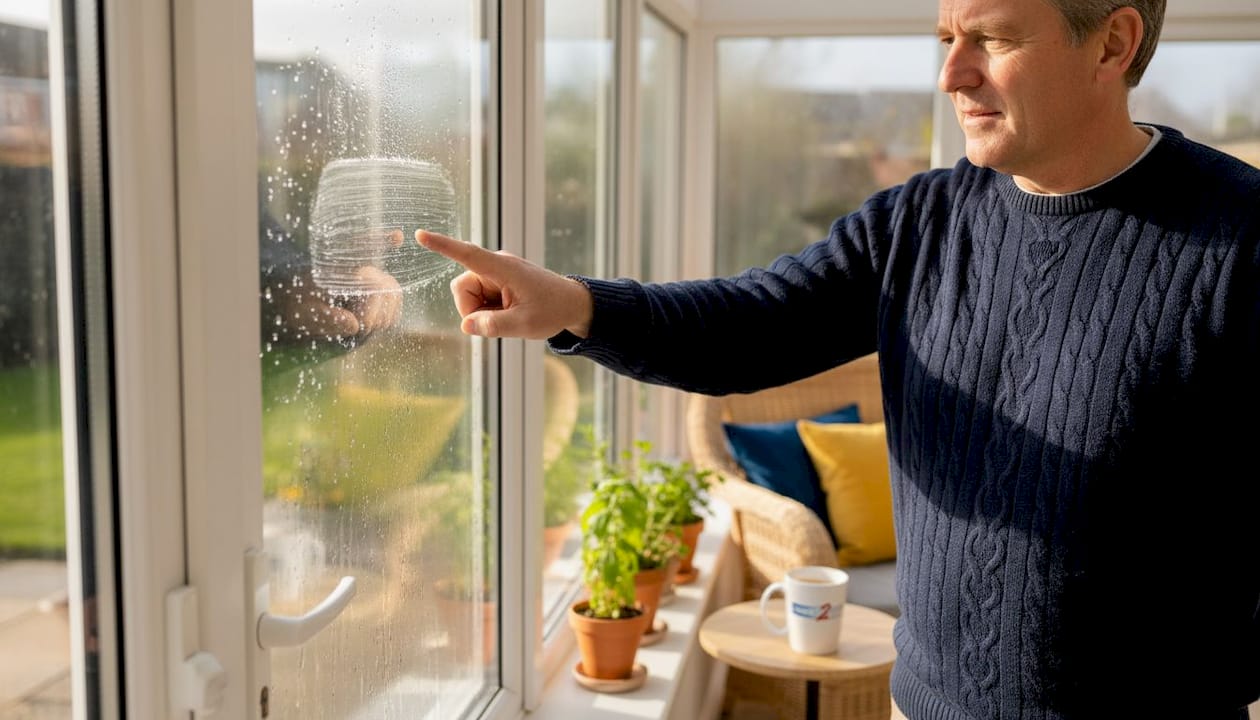
Location tells you everything. Wipe the glass with your finger. If moisture disappears, it’s interior or exterior. If you can’t touch the dampness, it’s inter-pane. Timing matters too. Interior condensation typically appears during cooking or showering. Exterior forms overnight in specific weather conditions. Inter-pane moisture persists regardless of indoor activities or weather changes.

Indoor humidity drives interior condensation. UK homes often reach 60-70% relative humidity in winter, especially in kitchens and bathrooms. When this moist air meets glass surfaces cooled by outside temperatures, water droplets form. Temperature differences between inside and outside create the conditions for condensation. Larger gaps increase the likelihood of moisture formation.

Energy efficiency implications vary dramatically. Inter-pane condensation signals complete seal failure, destroying the insulating gas layer between panes. This increases heating costs significantly as heat escapes through compromised glazing. Interior condensation affects comfort and air quality but doesn’t damage insulation. Exterior condensation proves your windows insulate well, keeping inner panes warmer than outside air.

Building age heavily influences condensation patterns. Older properties with single glazing or deteriorated seals experience far more problems than newer builds. Properties constructed before 2000 often need seal replacement or unit upgrades. Modern homes benefit from improved ventilation standards but can still face humidity issues without proper air circulation.

Key identification factors include:

  • Accessibility: Can you wipe away the moisture?
  • Persistence: Does condensation disappear with weather or activity changes?
  • Pattern: Does moisture appear uniformly or in specific areas?
  • Timing: Morning only, all day, or weather dependent?

Pro Tip: Photograph your windows at different times over several days. Patterns emerge that reveal whether condensation correlates with indoor activities, outdoor temperature, or persists constantly regardless of conditions.

Understanding these criteria saves time and money. You’ll avoid purchasing dehumidifiers for inter-pane problems or calling repair services for normal exterior condensation. Check related common window and door faults to spot additional issues affecting your windows.

Types of window condensation explained: interior, exterior, and inter-pane

Interior condensation happens when indoor moisture meets cold glass surfaces. Cooking, showering, drying clothes indoors, and even breathing release water vapour into your home. Poor ventilation traps this humidity. When warm, moist air contacts window glass cooled by outdoor temperatures, water droplets form on the inside surface. You’ll notice this most on winter mornings in bedrooms and bathrooms.

Condensation streaks on family kitchen window


Exterior condensation forms on the outer glass surface during specific weather conditions. Clear, cold nights with high outdoor humidity create ideal conditions. Your well-insulated windows keep the inner pane warm, whilst the outer pane cools below the dew point. Moisture from outside air condenses on the external surface. This actually indicates good window performance, showing effective insulation preventing indoor heat from warming the outer pane.

Inter-pane condensation appears trapped between double glazing layers. Seal failure causes over 80% of these cases in UK windows. The hermetic seal around double glazed units eventually degrades from thermal cycling, UV exposure, or manufacturing defects. Once compromised, outside moisture infiltrates the cavity, contaminating or replacing the insulating gas. You cannot wipe this condensation away.

Recognising each type requires specific observation:

  • Interior: Forms during high-humidity activities, wipes away easily, often appears in patches near frame edges
  • Exterior: Appears on calm, cold mornings, disappears as sun warms glass, covers outer surface uniformly
  • Inter-pane: Visible but untouchable, persists constantly, often shows watermarks or mineral deposits, may appear cloudy or milky

Tactile testing provides immediate answers. Run your finger across affected glass. Interior moisture smears and transfers to your skin. Exterior condensation requires checking from outside. Inter-pane condensation remains frustratingly visible but physically unreachable. Some homeowners mistakenly attempt cleaning inside surfaces repeatedly before realising moisture sits between panes.

Visual clues help differentiate types. Interior condensation often streams down glass in rivulets, pooling at the bottom frame. Exterior moisture creates uniform coverage resembling morning dew. Inter-pane condensation frequently leaves permanent etching or staining on inner glass surfaces, visible even after moisture temporarily evaporates during hot weather.

Understanding these distinctions prevents misdiagnosis. Check related guidance on conservatory condensation prevention and common window faults for additional identification support.

Impact of each condensation type on energy efficiency and window performance

Inter-pane condensation destroys window insulation. Failed seals allow moisture into the cavity, displacing argon or krypton gas that provides thermal resistance. Thermal efficiency drops up to 30% once seals fail, forcing heating systems to work harder maintaining comfortable temperatures. Your energy bills climb whilst rooms feel colder near windows.

Financial impacts vary significantly. A typical UK home losing 30% window efficiency might see heating costs rise £200-400 annually depending on property size and insulation levels. Business premises with extensive glazing face proportionally larger increases. These costs compound over years until you address the seal failure.

Interior condensation affects indoor air quality more than thermal performance. Persistent moisture promotes mould growth on frames, walls, and soft furnishings. Health implications include respiratory irritation and allergic reactions. However, the window itself retains insulating properties. Addressing humidity sources resolves the issue without replacing glazing.

“Interior condensation signals excessive indoor humidity that affects your entire home, not just windows. Controlling moisture at the source protects furnishings, decorations, and structural timbers whilst eliminating window fogging.”

Exterior condensation indicates effective insulation. When outer panes stay cold enough for dew formation, it proves inner panes retain indoor heat rather than conducting it outside. This condensation causes no energy loss. Some homeowners unnecessarily worry about exterior moisture, not realising it demonstrates good thermal performance. The moisture evaporates naturally as temperatures rise.

Performance degradation follows predictable patterns:

  • Inter-pane: Immediate and severe efficiency loss, progressive glass staining, eventual complete insulation failure
  • Interior: No direct efficiency impact, but indicates humidity levels that increase heating demand
  • Exterior: Zero efficiency impact, purely cosmetic and temporary

Understanding these differences helps prioritise action. Inter-pane condensation demands urgent attention to stop energy waste. Interior moisture requires ventilation improvements and humidity control. Exterior condensation needs no intervention. Learn more about maximising window energy efficiency across your property.

Solutions and prevention strategies for different condensation types

Interior condensation responds to ventilation and humidity control. Open windows briefly each morning to exchange humid indoor air with fresh outside air. Use extractor fans in bathrooms and kitchens during moisture-generating activities. Consider installing trickle vents in window frames for continuous background ventilation. Dehumidifiers effectively reduce moisture levels in problematic rooms.

Heating patterns influence interior condensation. Maintaining consistent temperatures prevents cold surfaces where moisture condenses. Avoid drying clothes indoors without ventilation. Keep furniture away from external walls to allow air circulation. These simple adjustments typically resolve interior condensation without professional intervention.

Exterior condensation rarely requires treatment. The phenomenon proves your windows work efficiently. If visibility concerns arise, apply hydrophobic coatings or anti-condensation films to outer surfaces. These products encourage water to sheet off rather than forming droplets. Most property owners accept exterior condensation as harmless and temporary.

Inter-pane condensation demands professional repair. 100% of cases require specialist intervention because you cannot access the sealed cavity. DIY attempts risk further damage and void warranties. Failed units need complete glass replacement or specialised repair techniques that restore the hermetic seal and replace contaminated gas.

DIY fixes often worsen inter-pane problems:

  • Drilling holes to “release moisture” destroys remaining insulation completely
  • Applying sealants externally cannot reach failed internal seals
  • Waiting hoping moisture will evaporate allows progressive glass staining
  • Ignoring the issue compounds energy losses over months and years

Professional repairs involve removing affected glass units, installing new sealed units with fresh insulating gas, and ensuring proper frame sealing. Reputable services offer guarantees covering workmanship and seal integrity. This investment restores full thermal performance and eliminates unsightly moisture.

Pro Tip: Schedule professional assessment at first signs of inter-pane condensation. Early intervention often allows glass unit replacement without replacing entire window frames, significantly reducing costs compared to waiting until frames deteriorate.

Preventive maintenance extends window lifespan. Regular frame cleaning removes debris that degrades seals. Check weatherstripping annually. Monitor indoor humidity with hygrometers, maintaining levels between 40-50% to prevent interior condensation whilst avoiding excessively dry air. Review detailed prevention strategies for double glazed windows for comprehensive guidance.

Summary comparison table and decision guide

Understanding differences at a glance helps you act decisively. This comparison synthesises key characteristics, impacts, and solutions for each condensation type.


Feature Interior Exterior Inter-pane
Location Room-facing surface Outside surface Between glass layers
Cause Indoor humidity meeting cold glass Outer pane cooling below dew point Seal failure allowing moisture infiltration
Timing During/after moisture-generating activities Cold, calm nights with high outdoor humidity Constant regardless of conditions
Accessibility Wipe away easily Wipe from outside Completely inaccessible
Energy impact None directly (indicates high humidity) None (proves good insulation) Severe (up to 30% efficiency loss)
Health concerns Promotes mould growth if persistent None None (purely performance issue)
Solution Ventilation and humidity control Optional anti-fog coatings Professional glass unit replacement
Cost to fix Low (behaviour changes, ventilation) Minimal (usually unnecessary) Moderate to high (unit replacement)
Urgency Medium (affects air quality) Very low (cosmetic only) High (ongoing energy waste)
DIY feasible Yes (highly effective) Yes (rarely needed) No (professional only)


Your decision path depends on condensation location and persistence. Wipe the glass first. If moisture disappears and reappears with indoor activities, address ventilation and humidity. If it appears outside overnight but clears during the day, ignore it or apply coatings purely for aesthetics. If moisture sits untouchably between panes, schedule professional repair immediately.

Property characteristics influence appropriate responses. Homeowners can implement ventilation improvements and humidity control independently. Business owners should prioritise professional solutions maintaining warranties and ensuring building regulations compliance. Rental properties require landlord involvement for structural modifications or unit replacements.

Severity guides urgency. Light morning condensation clearing by midday suggests minor humidity issues manageable with ventilation. Heavy condensation causing streaming water pooling on sills demands immediate humidity reduction. Inter-pane moisture visible constantly indicates complete seal failure requiring prompt professional attention preventing further efficiency degradation.

Situational recommendations: choosing the right approach for your property

Older buildings frequently need professional intervention. Properties built before 2000 commonly have original double glazing approaching end of life. Seal failure prevalence increases significantly in windows over 15 years old. If you own a period property experiencing inter-pane condensation, budget for glass unit replacement rather than attempting temporary fixes.

New builds benefit most from proactive humidity management. Modern homes are tightly sealed for energy efficiency, but this traps moisture without adequate ventilation. Install trickle vents, use extractor fans consistently, and maintain background ventilation. These practices prevent interior condensation becoming chronic. New double glazing should not show inter-pane moisture within warranty periods.

Business premises should prioritise energy savings. Commercial property managers face scrutiny over operating costs and sustainability metrics. Addressing inter-pane condensation delivers measurable efficiency improvements and demonstrates environmental responsibility. Certified repairs ensure building regulations compliance and maintain property value.

Consider these property-specific recommendations:

  1. Single glazed windows: Upgrade to double glazing for dramatic condensation reduction and energy savings
  2. Failed double glazing under 10 years old: Check warranties before paying for repairs, as manufacturers often cover seal failures
  3. Listed buildings: Consult conservation officers about approved repair methods preserving historical character
  4. Rental properties: Document condensation patterns, notify landlords promptly, and understand tenant responsibilities versus landlord obligations
  5. Commercial premises: Schedule professional energy audits identifying all efficiency opportunities beyond just window repairs

Severity thresholds indicate when professional help becomes essential. Light interior condensation responds well to DIY ventilation improvements. Moderate condensation persisting despite ventilation changes warrants professional assessment ruling out structural moisture issues. Inter-pane condensation always requires specialists regardless of severity.

Recognising limitations saves money and frustration. Homeowners successfully manage interior condensation through behaviour changes. However, attempting inter-pane repairs without proper equipment and expertise typically fails, wasting time whilst energy losses continue. Professional services provide guarantees, correct diagnosis, and lasting solutions.

Explore comprehensive resources on repairing failed double glazing, replacing glass in double glazed windows, preventing condensation in double glazed windows, and choosing double glazing options for deeper guidance tailored to your situation.

Improve your windows with expert double glazing repairs

Struggling with persistent window condensation that won’t respond to ventilation improvements? Cloudy2Clear Windows specialises in diagnosing and resolving all condensation types affecting homes and businesses across England and Scotland. Our professional double glazing repair services restore window clarity whilst dramatically improving energy efficiency.

https://www.cloudy2clearwindows.co.uk


Since 2005, we’ve helped thousands of property owners eliminate inter-pane condensation through expert glass unit replacement. Our certified technicians assess your specific situation, recommend cost-effective solutions, and complete repairs backed by comprehensive guarantees. Whether you need single unit replacement or full property window upgrades, we deliver lasting results that reduce heating costs and enhance comfort.

Stop wasting money on ineffective DIY fixes. Contact Cloudy2Clear Windows today for professional consultation. We’ll accurately identify your condensation type, explain your options clearly, and provide transparent pricing. Discover how our double glazing repairs and window glass replacement services can transform your property’s performance and appearance.

Frequently asked questions

What causes window condensation?

Condensation forms when water vapour in air contacts surfaces cooler than the dew point temperature. Indoor activities like cooking, showering, and breathing release moisture that condenses on cold glass. Temperature differences between inside and outside create conditions for condensation formation.

How do interior, exterior, and inter-pane condensation differ?

Interior condensation appears on room-facing surfaces and wipes away easily. Exterior condensation forms outside overnight during specific weather conditions. Inter-pane condensation becomes trapped between double glazing layers after seal failure and cannot be accessed or wiped away.

Can I prevent condensation without replacing windows?

Interior condensation responds effectively to improved ventilation, humidity control, and consistent heating. Open windows briefly daily, use extractor fans, and maintain indoor humidity between 40-50%. Exterior condensation requires no intervention as it indicates good insulation. Only inter-pane condensation demands window unit replacement.

When should I call professionals for condensation problems?

Schedule professional assessment immediately upon detecting inter-pane condensation. This moisture signals complete seal failure requiring specialist repair. Also contact professionals if interior condensation persists despite ventilation improvements, as underlying moisture issues may need investigation.

Does condensation damage window energy efficiency?

Inter-pane condensation severely impacts thermal performance, reducing efficiency up to 30% and increasing heating costs significantly. Interior condensation doesn’t directly affect window insulation but indicates high indoor humidity forcing heating systems to work harder. Exterior condensation has zero energy impact and actually proves effective insulation.

Types of safety glass: a clear guide for homes and businesses 2026

Choosing the correct safety glass for your property can feel overwhelming, especially when balancing UK compliance requirements with practical safety needs. Whether you’re renovating a home with young children or managing a commercial space, selecting the right type prevents injuries and keeps you within legal boundaries. This guide breaks down the main types of safety glass available in England and Scotland, explains critical selection criteria, and helps you match the best option to your specific property needs.

How to choose safety glass: key selection criteria

Selecting safety glass demands more than picking the toughest option available. You need to evaluate impact resistance, breakage behaviour, and how well each type meets your property’s regulatory requirements. UK Building Regulations Approved Document K requires safety glass in doors and adjacent panels within 1500 mm of floor level and within 300 mm of door edges. Similarly, glass below 800 mm from floor level must be safety glass unless protected by a rail or barrier.

Certification marks confirm your glass has passed rigorous testing and complies with UK standards. Look for BS 6206 Kitemark labels on products to ensure they meet impact safety requirements. Understanding your property’s specific needs helps narrow choices. A family home with toddlers demands different safety features than a commercial office or industrial facility.

Key selection factors include:

  • Impact resistance level required for the location
  • Breakage behaviour that minimises injury risk
  • Regulatory compliance for critical glazing areas
  • Certification marks confirming product reliability
  • Security considerations beyond basic safety

Location matters significantly. Areas prone to accidental impacts, such as doors and low-level glazing, need robust safety glass. Balconies and balustrades require shard containment to prevent falls if breakage occurs. For comprehensive guidance on window regulations, explore our building regulations for windows energy savings compliance guide.

Pro Tip: Always verify certification before purchasing. A reputable supplier will provide documentation confirming BS 6206 or BS EN standards compliance, giving you peace of mind that your glass meets legal and safety benchmarks.

Toughened (tempered) safety glass

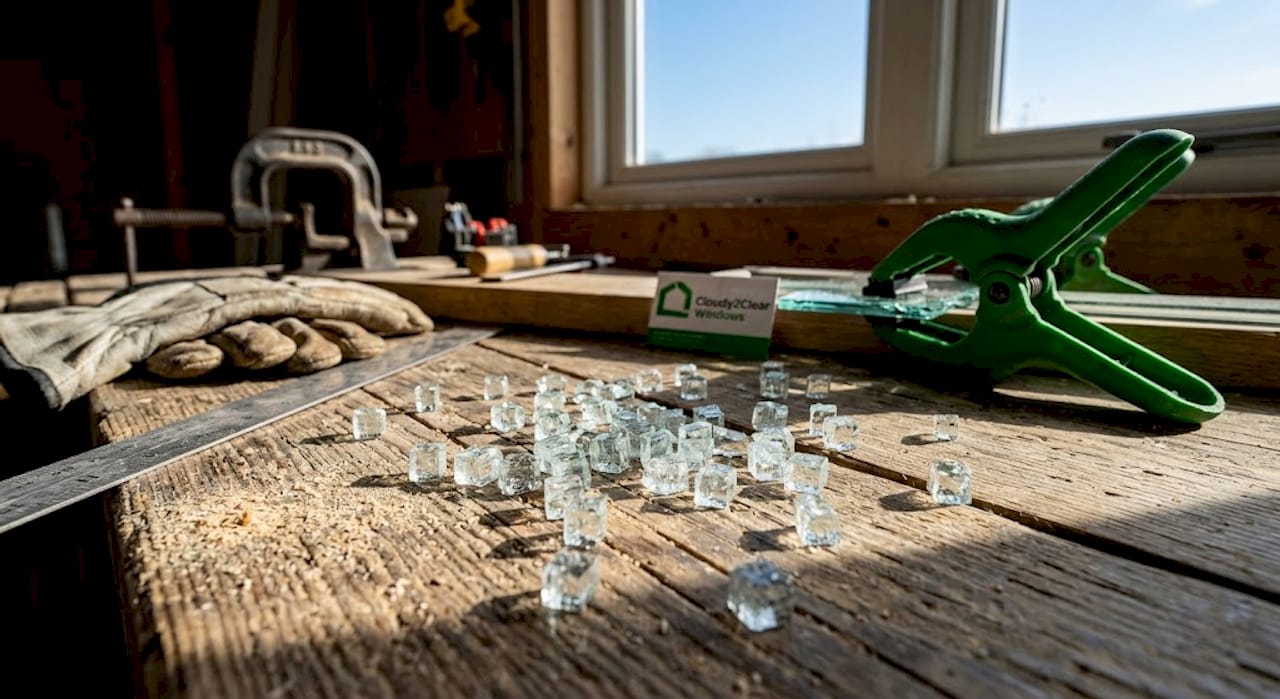
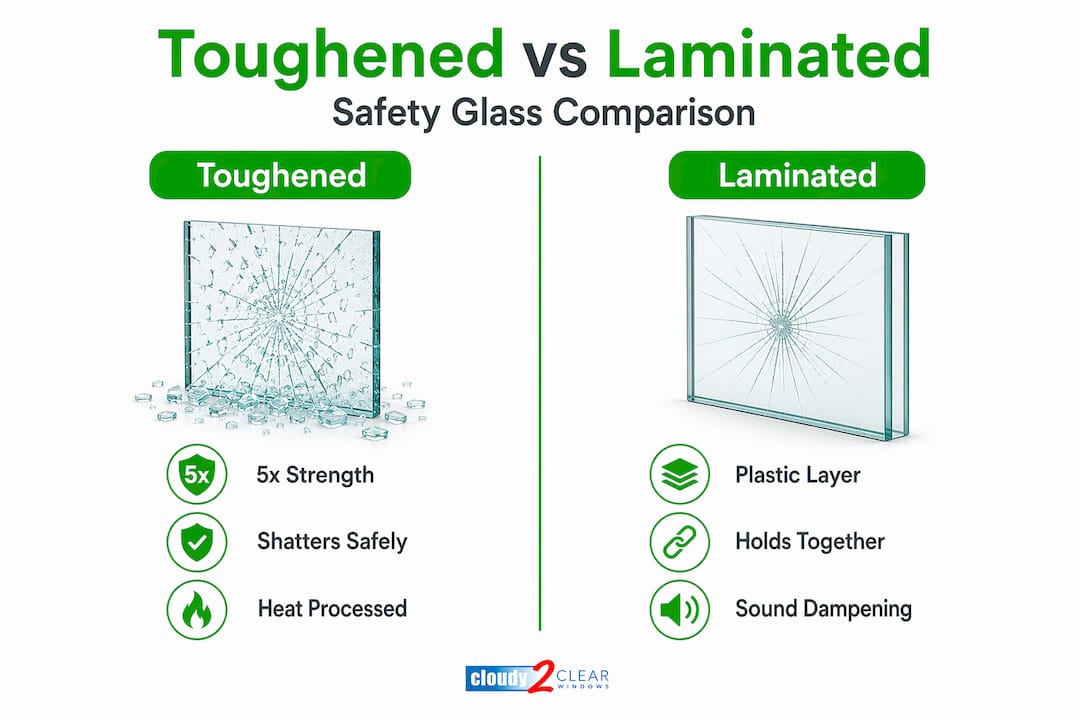
Toughened glass delivers exceptional strength through a specialised heating and rapid cooling process. This treatment makes it approximately 4–5 times stronger than annealed glass, offering superior resistance to impact and thermal stress. When breakage occurs, toughened glass shatters into thousands of small, blunt granules rather than dangerous shards, dramatically reducing injury risk.

Certified under BS EN 12150, toughened glass fulfils UK compliance requirements for most critical locations. Its strength makes it the preferred choice for entrance doors, doorside panels, and windows vulnerable to impacts from furniture, equipment, or human contact. Commercial properties particularly benefit from toughened glass in high-traffic areas where durability is essential.

Common applications include:

  • Front and rear entrance doors
  • Doorside panels within 300 mm of door edges
  • Shopfronts and commercial glazing
  • Windows below 800 mm from floor level
  • Shower screens and bathroom enclosures

Toughened glass cannot be cut or modified after tempering, so precise measurements before manufacture are crucial. If you need to drill holes for handles or fittings, specify these requirements upfront. The glass arrives ready to install with no further alterations possible. Learn more about different glazing units benefits to understand how toughened glass integrates with modern window systems.

Pro Tip: Toughened glass offers excellent impact resistance but provides no shard containment. If you need the glass to stay in place after breakage, such as in overhead applications or balustrades, laminated glass is a safer choice.

Laminated safety glass

Laminated glass consists of two or more glass layers bonded together with a tough plastic interlayer, typically polyvinyl butyral (PVB). This construction creates a composite material where broken shards adhere to the interlayer rather than falling away. Laminated glass holds shards together on breakage, reducing injury and security risks whilst complying with BS EN 14449.

Laminated glass cutaway showing interlayer structure


The interlayer provides additional benefits beyond safety. It blocks up to 99% of harmful UV rays, protecting furnishings, flooring, and artwork from fading. Laminated glass also offers improved sound insulation compared to standard glazing, making it ideal for properties near busy roads or noisy environments.

Ideal applications for laminated glass:

  • Balustrades and balconies where fall prevention is critical
  • Glass floors and walkways requiring structural integrity
  • Wet rooms and bathrooms prone to slips
  • Overhead glazing like skylights and canopies
  • Security-conscious areas needing penetration resistance

Laminated glass remains intact even when cracked, maintaining a barrier against intruders or environmental elements until repairs occur. This containment feature makes it essential for elevated glazing where falling glass poses serious risks. Unlike toughened glass, laminated versions can sometimes be cut after manufacture, though this requires specialist equipment and expertise. For aesthetic considerations, check our guide on glazing bars impact to see how laminated glass works with traditional window designs.

The plastic interlayer thickness varies based on performance requirements. Standard configurations use 0.38 mm PVB, whilst enhanced security or acoustic applications may specify thicker interlayers. Always discuss your specific needs with a glazing professional to select the appropriate laminate construction.

Other types of safety glass: wired and specialist glass

Wired glass incorporates a wire mesh embedded within the glass during manufacture, historically used for fire resistance. Wired glass includes embedded wire mesh for fire resistance but is not recommended as general safety glass because it may shatter dangerously. When broken, wired glass produces sharp shards around the wire mesh, creating significant injury risks.

Modern fire-resistant glass options have largely superseded wired glass for safety applications. Specialist intumescent glass systems provide superior fire protection whilst meeting current safety standards. These alternatives swell when exposed to heat, creating an insulating barrier without the dangerous breakage characteristics of traditional wired glass.

Specialist safety glass types include:

  • Heat-soaked toughened glass for reduced spontaneous breakage risk
  • Ballistic glass for extreme security applications
  • Walk-on glass for structural floors and roofs
  • Curved safety glass for architectural features
  • Anti-slip coated glass for walkways and stairs

Heat-soaked glass undergoes additional processing to eliminate nickel sulphide inclusions that can cause spontaneous breakage in toughened glass. This treatment is particularly important for overhead glazing where unexpected failure poses serious risks. Ballistic glass layers multiple laminated sheets to resist projectile impacts, used in high-security environments like banks or government buildings.

Walk-on glass requires careful structural engineering to support dynamic loads safely. Engineers calculate thickness, support spacing, and edge conditions to ensure the glass withstands foot traffic without deflecting excessively. Anti-slip treatments applied to the surface improve traction in wet conditions, essential for glass staircases or exterior walkways.

Unless your project demands specialist fire resistance, security, or structural performance, stick with toughened or laminated glass for general safety applications. These mainstream options provide better value and wider availability whilst meeting standard UK compliance requirements.

UK building regulations and safety glass compliance

Approved Document K establishes mandatory requirements for safety glazing throughout England and Wales, with similar provisions in Scotland. Glass below 800 mm from floor level must be safety glass unless protected by a rail or barrier. Critical locations also include doors, doorside panels within 300 mm of edges, and glazing within 1500 mm of floor level adjacent to doors.

BS 6206 defines the UK standard for impact safety, categorising glass into Class A (highest impact resistance), Class B (medium), and Class C (lowest acceptable). All safety glass must display the BS 6206 Kitemark confirming it has passed standardised impact testing. This certification gives you legal protection and assurance the product meets baseline safety requirements.

Double-glazed units present specific compliance challenges. Double-glazed units must have both panes safety glass compliant as per critical location regulations for full compliance. Simply having one toughened or laminated pane does not satisfy requirements if the other pane is annealed glass in a critical location.

Key regulatory requirements:

  • Safety glass mandatory in doors and within 300 mm of door edges
  • Glazing below 800 mm requires safety glass or protective barriers
  • Both panes in double glazing must meet standards in critical locations
  • BS 6206 Kitemark certification confirms UK compliance
  • Installers must provide documentation proving specification compliance

BS EN 12600 classifies safety glass impact performance using a pendulum test from heights of 1200 mm, 450 mm, and 190 mm. This European standard complements BS 6206, providing detailed performance data for specifiers. The classification system helps match glass strength to specific risk levels in different locations.

Proper installation is equally critical as product certification. Even compliant glass installed incorrectly can fail prematurely or not perform as intended during impacts. Always use qualified installers familiar with safety glazing requirements. Our window installation standards compliance guide covers best practices for ensuring your installation meets all necessary benchmarks.

Building control officers may request certification documentation during inspections. Keep all product certificates, installation records, and compliance statements in a safe location. These documents prove due diligence and protect you legally if questions arise about glazing safety in your property.

Safety glass use cases and practical recommendations

Matching safety glass types to specific property locations maximises protection whilst controlling costs. Toughened glass excels in doors, doorside panels, and high-impact windows where strength matters most. Its lower cost compared to laminated glass makes it economical for large commercial installations requiring numerous safety glazing points.

Laminated glass suits balustrades, balconies, and wet rooms where shard containment provides crucial additional safety. In wet areas like bathrooms, laminated safety glass is favoured to reduce injury risk from slips and glass breakage. The interlayer prevents dangerous shards from scattering across wet floors where occupants are vulnerable.

Practical use case recommendations:

  • Front doors: Toughened glass for impact resistance and cost efficiency
  • Balustrades: Laminated glass to contain shards and prevent falls
  • Low-level windows: Toughened glass meets regulations economically
  • Overhead glazing: Laminated glass essential for shard containment
  • Wet rooms: Laminated glass reduces injury from breakage on wet surfaces

Avoid wired glass except where specific fire-resistance ratings are mandated by building regulations. Modern fire-resistant alternatives provide better safety characteristics without the injury risks associated with traditional wired glass. Ensure all installations include proper certification confirming compliance with relevant standards.

Consider occupant vulnerability when selecting glass types. Homes with young children, elderly residents, or individuals with mobility challenges benefit from laminated glass in critical locations. The containment feature provides an extra margin of safety if accidental impacts occur. Commercial properties with heavy foot traffic should prioritise durability, making toughened glass the practical choice for most applications.

For guidance on selecting appropriate glazing for your entire window system, review our double glazing options guide covering performance characteristics beyond safety considerations.

Comparing types of safety glass: summary table

This comparison consolidates key differences between main safety glass types to support informed decisions based on your property requirements.


Feature Toughened glass Laminated glass Wired glass
Strength vs. standard glass 4–5 times stronger Moderate strength Similar to standard
Breakage behaviour Shatters into blunt granules Shards adhere to interlayer Sharp shards around wire
Shard containment None Excellent Poor
Typical applications Doors, shopfronts, low windows Balustrades, wet rooms, overhead glazing Fire doors (being phased out)
UK compliance standard BS EN 12150, BS 6206 BS EN 14449, BS 6206 Varies by fire rating
UV protection None Up to 99% None
Security benefit Moderate High Low
Acoustic performance Standard Enhanced Standard
Cost relative to standard Moderate premium Higher premium Moderate premium
Availability Widely available Widely available Decreasing


Toughened glass offers the best balance of strength and cost for most applications. Laminated glass justifies its higher price where shard containment, UV protection, or security matters most. Wired glass has limited modern applications and should only be specified where fire regulations explicitly require it.

Both toughened and laminated glass come in various thicknesses to match structural and performance requirements. Standard residential applications typically use 4 mm to 6 mm glass, whilst commercial or structural glazing may require 8 mm to 12 mm or thicker. Always consult a qualified glazing professional to confirm appropriate specifications for your specific installation.

Situational picks: choosing the right safety glass for your property

Tailoring your safety glass choice to specific scenarios ensures optimal protection matched to real-world risks. These recommendations help you navigate common property situations confidently.

  1. Homes with young children: Specify laminated glass for all low-level glazing below 800 mm. The shard containment feature minimises injury risk if curious toddlers bump into glass or throw toys. Laminated glass in doorside panels provides an extra safety margin in high-traffic family areas.
  2. Commercial units with heavy foot traffic: Choose toughened glass for doors, partitions, and shopfronts. The superior impact resistance withstands daily wear from customers and staff whilst keeping costs manageable across large glazing areas. Ensure certification documentation is readily available for building control inspections.
  3. Balconies and balustrades: Always use laminated glass to prevent falls if breakage occurs. Building regulations mandate specific edge protection standards, and laminated glass fulfils these requirements whilst maintaining transparency. Consider thicker laminates (10 mm or 12 mm) for structural balustrade applications.
  4. Wet rooms and bathrooms: Laminated glass reduces slip-related injuries when breakage happens on wet surfaces. The interlayer contains shards, preventing them from scattering across floors where occupants are barefoot and vulnerable. Toughened glass works for shower enclosures but lacks the containment benefits.
  5. Offices and workspace partitions: Toughened glass provides cost-effective safety for internal partitions and office fronts. The breakage pattern minimises injury risks whilst maintaining the open, modern aesthetic businesses prefer. Add manifestation markings to prevent walk-through accidents.
  6. Heritage or period properties: Laminated glass can incorporate slim profiles that respect traditional aesthetics whilst meeting modern safety standards. Specialist suppliers offer laminated glass with Georgian bars or decorative patterns matching original window styles.
  7. High-security environments: Specify multi-layer laminated glass with thicker PVB interlayers (1.52 mm or greater) to resist forced entry. Combine with appropriate framing systems and locking mechanisms for comprehensive security. Ballistic laminated glass provides protection in extreme threat scenarios.

Each situation balances safety requirements, budget constraints, and aesthetic preferences. Consulting with experienced glazing professionals ensures your specifications align with building regulations whilst delivering practical protection for occupants. Never compromise on certification or installation quality to save costs, as non-compliant glazing exposes you to legal liability and genuine safety risks.

Find the right safety glass solutions with Cloudy2Clear

Navigating safety glass options becomes simpler with expert guidance tailored to your property. At Cloudy2Clear Windows, we have specialised in double glazing repairs and window glass replacement since 2005, helping homeowners and businesses throughout England and Scotland upgrade to compliant, safe glazing. Our team understands UK Building Regulations thoroughly and ensures every installation meets current safety standards.

https://www.cloudy2clearwindows.co.uk


Whether you need to replace non-compliant glass in critical locations or upgrade tired windows with modern safety features, we provide personalised recommendations based on your specific needs. Our experience across residential and commercial sectors means we understand the unique challenges different properties present. From toughened glass for busy commercial entrances to laminated solutions for family homes, we match the right product to your requirements and budget. Contact us today to discuss how we can enhance your property’s safety whilst maintaining the aesthetic you value.

FAQ

What does the BS 6206 certification mark on safety glass indicate?

The BS 6206 Kitemark confirms the glass has passed standardised impact testing and meets UK safety requirements for critical glazing locations. This certification ensures the product is suitable for use in doors, low-level windows, and other areas where accidental impacts are likely. Always verify this mark before purchasing safety glass, and keep documentation for building control inspections. For more details on compliance standards, see our window installation standards compliance guide.

Can I use wired glass for general safety glazing in my home?

Wired glass is not recommended for general safety applications because it shatters into dangerous sharp shards around the embedded wire mesh. Whilst it offers fire resistance, modern alternatives like toughened or laminated glass provide superior safety characteristics without injury risks. Reserve wired glass only for situations where specific fire-resistance ratings are mandated, and even then, consider newer intumescent glass systems that meet fire standards safely.

Does double glazing automatically include safety glass?

No, double glazing does not automatically include safety glass in both panes. Both panes must be safety glass compliant when installed in critical locations defined by Approved Document K, such as doors or low-level windows. Simply having one toughened or laminated pane does not satisfy regulations if the other pane is standard annealed glass. Always verify that your double-glazed units include appropriate safety glass specifications and certification for the intended installation location.