• USP Logo Icon
    25 Year Guarantee
  • USP Leaf Icon
    Latest ECO Friendly Technology
  • USP Pointer Icon
    National Coverage
Get a FREE quote

Why window seals fail: causes, signs & prevention

Window seal failure is one of the most common problems affecting double glazed units across England and Scotland, and it does not only happen to old windows. Even relatively new installations can develop faults within just a few years, particularly when exposed to the unpredictable British climate. Thermal expansion and contraction, driven by temperature swings and direct sunlight, is one of the leading triggers. This guide explains exactly why seals fail, what warning signs to look for, and what you can do to protect your windows before the problem gets worse.

How double glazed window seals work

Every double glazed unit relies on two layers of sealing to keep it performing properly. The primary seal, usually made from butyl rubber, bonds directly to the glass and the spacer bar running around the edge of the unit. The secondary seal, typically silicone or polysulphide, sits on the outside of that and provides structural support and additional moisture resistance. Together, they trap a layer of air or inert gas (usually argon) between the two panes, which is what gives double glazing its insulating and sound-reducing properties.

When either seal is compromised, moisture-laden air begins to enter the gap between the panes. At first, you might notice a faint haze. Over time, that haze turns into visible condensation or even water droplets sitting between the glass. Once moisture is inside, the insulating gas is gone and the unit’s thermal performance drops significantly. You can read more about the types of window seal failures to understand how each type progresses.

Here is a quick overview of what affects how long your seals will last:

Factor Effect on seal lifespan
Unit quality Higher quality seals last longer, up to 20+ years
Sun exposure South and west-facing windows degrade faster
Coastal location Salt air and humidity accelerate breakdown
Installation quality Poor fitting shortens lifespan considerably
Maintenance Regular checks and cleaning extend performance


According to industry data, double glazed seals typically last between 10 and 20 years, though this varies widely depending on quality and exposure. Key factors that shorten seal life include:

  • Direct and prolonged sunlight on south or west-facing elevations
  • Coastal or high-humidity environments
  • Low-quality materials used during manufacture
  • Poor installation technique
  • Lack of routine maintenance

With this base knowledge, let us examine what actively causes these seals to break down.

Infographic window seal failure causes and signs

Main causes of window seal failure

Understanding what causes seal failure helps you take the right steps at the right time. There is rarely just one culprit.

Thermal expansion and contraction is the most significant cause. Every day, as temperatures rise and fall, the glass and frame materials expand and contract slightly. Over years, this repeated movement stresses the seals. In summer, direct sun can cause a process known as solar pumping, where the air inside the unit heats up, expands, and pushes against the seals. When it cools at night, it contracts and pulls air back in. This cycle of expansion and contraction gradually weakens the bond between the seal and the glass.

Installer checking exterior window seal damage


Natural ageing is unavoidable. Seal materials, even good ones, degrade over time through simple wear and tear. Rubber and silicone become brittle, lose flexibility, and eventually crack. This process is faster in windows exposed to harsh weather.

Poor installation or manufacturing defects are more common than many people realise. Misaligned glass, uneven pressure on the spacer bar, or a weak initial bond can all cause premature seal failure within just a few years of fitting.

Physical damage is another trigger. Accidental knocks, nearby building work, or even using a pressure washer too close to the frame can crack or dislodge seals without you noticing immediately.

UV exposure and weathering cause the outer seal materials to harden and shrink over time. UV degradation accelerates breakdown particularly on windows with no overhang or shade protection. Adding UV protection for windows can meaningfully slow this process.

Windows on south and west-facing elevations can experience seal degradation up to 40% faster than those on north-facing walls, due to greater sun and weather exposure.

Pro Tip: Check the inside edge of your window frames for any yellowing, stickiness, or slight separation from the glass. These are early signs of primary seal softening that most homeowners overlook until condensation appears.

Here is a summary of the main causes and their relative impact:

Cause Likelihood Impact on seal
Thermal expansion (solar pumping) Very high Severe over time
Natural ageing Certain Moderate to severe
Poor installation Moderate Severe, early onset
Physical damage Low to moderate Immediate or rapid
UV and weathering High Moderate, cumulative


Short and long-term triggers to be aware of:

  • Short-term: physical impact, pressure washing, sudden temperature extremes
  • Long-term: UV exposure, freeze-thaw cycles, gradual material ageing, persistent damp

Now we know the common triggers, let us look more closely at the unique pressures from British weather. You can also explore our window seal failure guide for a deeper breakdown of each failure type.

British weather: A critical factor in seal longevity

The UK climate is particularly hard on window seals. England and Scotland experience a wide range of conditions throughout the year, from freezing winters to warm, sunny summers, often with significant rainfall and coastal wind in between. This variety is precisely what makes British weather so damaging to double glazing.

South and west-facing windows bear the brunt of it. They receive the most direct sunlight and are most exposed to prevailing south-westerly winds and rain. In Scotland especially, harsh weather including rain, wind, and cold winters accelerates seal breakdown, particularly in coastal and high-humidity areas.

Coastal locations in both England and Scotland present an additional challenge. Salt-laden air is corrosive and can attack seal materials and frame finishes more aggressively than inland conditions. Properties in areas like Cornwall, the Scottish Highlands, or the north-east coast of England may see seal lifespans reduced by three to five years compared to sheltered inland locations. Understanding how climate influences window seals is essential if you live in one of these areas.

UK regional risk factors to keep in mind:

  • Coastal properties: salt air and persistent moisture
  • Scottish Highlands: freeze-thaw cycles and high wind exposure
  • Northern England: prolonged cold and damp winters
  • South-west England: high rainfall and strong prevailing winds
  • Urban areas: pollution and temperature variation from heat islands

Understanding the harsh reality of British weather, let us now explore the signs of early and late seal failure.

How to spot failed seals: Early and late signs

Catching seal failure early can save you money and prevent further damage to your frames and surrounding walls. Here is how to check your windows systematically:

  1. Look between the panes. Stand close to the window and look at the glass at an angle. Any fogging, haze, or visible moisture between the two panes is a clear sign the seal has failed.
  2. Check for condensation patterns. Condensation on the inside surface of the inner pane is normal in cold weather. Condensation between the panes is not.
  3. Feel for draughts. Run your hand slowly around the edge of the frame on a cold or windy day. Any noticeable airflow suggests the outer seal has broken down.
  4. Inspect the frame edges. Look for any visible cracking, separation, or discolouration around the perimeter of the glass unit.
  5. Test the mechanism. Stiff or sticky handles and hinges can indicate frame distortion caused by moisture ingress following seal failure.

Physical damage from impacts or pressure washing can cause failures that are not immediately visible, so check windows after any nearby work or accidental knocks.

Pro Tip: Professionals often check for a slight bowing or bulging of the glass, which indicates pressure changes inside the unit. If your glass looks slightly convex or concave, the sealed unit may already be compromised even without visible condensation.

If you spot any of these signs, our double glazing repair advice can help you decide on the right next step.

Can you repair or must you replace? Solutions explained

This is the question most homeowners and business owners face once they confirm a seal has failed. The honest answer is: it depends on the extent of the damage.

Repair options that may be available include:

  • Edge resealing: Applying new sealant around the perimeter of the unit, suitable for minor outer seal degradation
  • Defogging or ventilation drilling: A small hole is drilled to allow moisture to escape, though this does not restore the insulating gas
  • Argon refill: Possible in some cases where the unit structure is still sound
  • Full glass unit replacement: The sealed unit is replaced while keeping the existing frame

When is full replacement the only sensible option? If the glass itself is cracked, if the frame has warped due to moisture, or if the unit is more than 15 years old, a full replacement will almost always deliver better long-term value. Repair is cheaper in the short term, but full unit replacement restores thermal efficiency and typically comes with a new warranty.

Pro Tip: When choosing a repair specialist, look for a company that offers a written guarantee on their work, uses FENSA-registered installers, and can provide references or reviews from local customers. A reputable firm will always assess the frame condition before recommending repair over replacement.

For more detail on your options, our guide to repairing double glazing covers the process step by step.

How to prevent window seal failure

Prevention is always more cost-effective than repair. A few straightforward habits can add years to the life of your double glazing.

  • Address chips and cracks promptly. Even a small chip in the glass edge can allow moisture to work its way into the seal over time.
  • Clean frames and seals regularly. Use a mild detergent and a soft cloth. Avoid abrasive cleaners that can degrade rubber seals.
  • Pay extra attention to south and west-facing windows. These need more frequent checks, especially after summer and winter.
  • Avoid high-pressure washing near window frames. The force can dislodge or damage seals without leaving any visible mark.
  • Consider UV-protective window film. This reduces the solar pumping effect and slows UV degradation. Sun protection for windows is a practical and relatively low-cost measure.
  • If buying a property, ask about window age and warranty. Windows approaching 15 years old may need attention soon, and knowing this upfront helps you budget accordingly.

It is also worth knowing that in lower-quality units, the primary butyl seal can begin to soften and migrate under heat and UV, giving a slightly melted appearance around the spacer bar before full failure occurs. If you notice this, act quickly. Our guide to preventing window seal problems has further practical advice.

You now have the facts and the tools to protect your windows. But if your windows are already showing signs of failure, professional support is close at hand.

Professional help for window seal failure

If you have spotted condensation between the panes, felt a draught, or noticed any of the other warning signs covered in this guide, it is time to call in a specialist. Attempting to manage a failed sealed unit without the right tools and materials rarely produces a lasting result.

https://www.cloudy2clearwindows.co.uk


At Cloudy2Clear Windows, we have been helping homeowners and businesses across England and Scotland since 2005. We specialise in double glazing glass replacement, replacing only the failed glass unit rather than the entire window frame, which keeps costs down without compromising on performance. Whether you need a single unit replaced or a full property assessment, our local teams are ready to help. If you are based in the Midlands, our team offering repairs in Milton Keynes is just one example of the nationwide coverage we provide. Get in touch today for a free, no-obligation quote.

Frequently asked questions

How long should window seals last before failing?

Most double glazed window seals last between 10 and 20 years, with higher quality units sometimes reaching 25 years depending on installation quality and exposure.

Can failed window seals be repaired, or do they always need replacing?

Minor failures can sometimes be addressed with resealing or defogging, but full unit replacement is often the most effective solution for restoring thermal efficiency and long-term performance.

Does the weather in Scotland and England really increase the risk of seal failure?

Yes. Harsh UK weather conditions including wind, rain, and freeze-thaw cycles accelerate seal breakdown, particularly in coastal or exposed positions where salt air adds further stress.

Are any window brands immune to seal failure?

No brand is completely immune. Natural ageing of seal materials affects all units eventually, and quality, installation standard, and ongoing maintenance are the most reliable defences against early failure.

What is a window gasket? Complete guide to double glazing seals

Most people assume that fogged-up or draughty windows mean the entire unit needs replacing. In reality, a small flexible strip called a window gasket is often the culprit, and replacing it costs a fraction of a full window swap. A window gasket is a flexible strip crucial for sealing and insulation in double glazed windows, yet it rarely gets the attention it deserves. This guide covers everything you need to know: what gaskets are, the different types, how long they last, how to spot problems, and what repairs actually cost.

What exactly is a window gasket?

Think of a window gasket like the rubber seal around your fridge door. Without it, cold air escapes, moisture gets in, and the whole system becomes inefficient. In your double glazed windows, the gasket does exactly the same job, sitting between the glass pane and the frame to create a tight, weatherproof barrier.

A window gasket is a flexible rubber or synthetic strip positioned between the glass and frame, ensuring an airtight and waterproof seal. You will find gaskets in virtually all modern uPVC and aluminium windows across England and Scotland, running along the perimeter of each pane. They are often overlooked during routine maintenance, yet they are doing constant work every single day.

Hands fitting gasket on window frame


Gaskets are made from EPDM rubber, TPE, and other UV-resistant materials, each chosen for their ability to flex and compress without cracking. The material choice matters enormously in the UK’s variable climate, where a window might face freezing temperatures in January and strong summer sun in July.

Here is a quick overview of what gaskets actually do:

Function What it prevents
Airtight seal Draughts and heat loss
Waterproofing Rain ingress and damp
Soundproofing External noise penetration
Dust prevention Fine particles entering the frame


The key benefits of a well-fitted gasket include:

  • Reduced energy bills by maintaining the thermal barrier
  • Damp prevention along window frames and sills
  • Noise reduction, particularly valuable in urban areas
  • Protection for the window glass replacement unit itself from moisture damage
  • Improved comfort by eliminating cold spots near windows

For anyone dealing with persistent draughts or damp patches, window leak prevention often starts with inspecting the gasket before anything else.

Types of window gaskets and choosing the right fit

Not all gaskets are the same shape, and fitting the wrong type is one of the most common DIY mistakes we see. Each profile is designed for a specific position and function within the window assembly.

Infographic of window gasket types and materials


Common types include bubble gaskets, wedge gaskets, and E-gaskets, each with distinct shapes and uses. Here is how they differ:

Gasket type Shape Position Primary role
Bubble gasket Hollow, round Frame channel Compression seal, draught exclusion
Wedge gasket Ribbed, tapered Internal, glass edge Glass retention and internal seal
E-gasket Fir tree profile External face Compression seal against weather


Pairing wedge (internal, glass retention) with E-gasket (external) offers optimal sealing in most modern uPVC windows. Using one without the other, or substituting the wrong profile, leaves gaps that allow water and cold air to enter.

The most common mistakes when choosing gaskets:

  • Wrong profile width: a gasket that is too narrow will not compress properly
  • Incorrect material: standard rubber in a coastal Scottish location degrades faster than EPDM
  • Mismatched groove depth: the gasket must seat fully into the frame channel
  • Ignoring the frame manufacturer: different uPVC brands use proprietary groove sizes

Pro Tip: Before buying replacement gaskets, photograph the existing profile and measure the groove width with a calliper. Many suppliers will match the profile from a photo, saving you from a wasted trip.

If you are already dealing with water getting in, fixing window leaks often requires identifying which gasket type has failed before ordering parts.

How window gaskets work and why they matter

A gasket works through compression. When the window closes, the gasket is squeezed between the glass and the frame, and that pressure creates the seal. The tighter and more consistent the compression, the better the barrier against the elements.

“Gaskets compress to form a hermetic barrier; flexibility and resistance to temperature/UV is crucial.”

Imagine a wet and windy night on the west coast of Scotland. Wind-driven rain is hitting the window at an angle, and the temperature outside is close to freezing. A healthy gasket keeps all of that outside. A degraded one lets in a thin stream of cold air and moisture, which then causes condensation on the inner frame and, over time, damp patches on the wall below.

Or consider a busy road in a city like Edinburgh or Manchester. A well-fitted gasket contributes meaningfully to noise reduction by sealing the gap through which sound waves travel. It is not a miracle soundproofing solution, but it makes a noticeable difference in day-to-day comfort.

Here is how gaskets protect your home in practice:

  1. Draught exclusion: the compressed gasket blocks the air pathway around the glass edge
  2. Water resistance: the seal prevents capillary action drawing rainwater inward
  3. Thermal retention: a tight seal supports the insulating gas layer inside the glass unit
  4. Condensation control: by keeping cold air out, the inner glass surface stays warmer and less prone to condensation
  5. UV and ozone resistance: quality materials maintain their flexibility despite years of sun and atmospheric exposure

The window seal lifespan is directly linked to how well the gasket maintains its compression over time. Once it loses elasticity, every other function starts to degrade with it.

How long do window gaskets last? Lifespan and what affects it

Gaskets are not a fit-and-forget component. They age, and in the UK’s climate, they can age quickly if the conditions are harsh.

Lifespan is typically 5 to 10 years; up to 20 years under ideal conditions, but may be shortened by UV exposure, compression fatigue, pollution, or poor drainage. Most homeowners in England and Scotland will need to inspect their gaskets at least every five years, and replace them sooner if the property faces south or is near a busy road.

Factor Effect on lifespan
UV exposure (south-facing) Accelerates brittleness
Coastal salt air Degrades standard rubber faster
Blocked drainage channels Traps water, softens gasket
Extreme temperature swings Causes repeated expansion and contraction
High-quality EPDM or silicone Extends life by 3 to 5 years


Wet climates accelerate wear; silicone and neoprene last longer than standard rubber by three to five years. For properties in the Scottish Highlands or along the Welsh and English coasts, upgrading to silicone or neoprene gaskets at replacement time is a worthwhile investment.

Pro Tip: Clear your window drainage channels every autumn. These small slots at the bottom of the frame allow rainwater to escape. When they block with debris, water pools against the gasket and accelerates deterioration significantly.

For draught-free window performance, annual checks are far cheaper than emergency replacements. A five-minute visual inspection after winter can catch early-stage gasket wear before it becomes a costly problem.

Key stat: A gasket that fails prematurely due to blocked drainage or poor installation can reduce a window’s thermal efficiency by up to 30%, significantly increasing heating costs over a winter season.

Common window gasket problems and how to spot them

Gasket failure rarely happens overnight. It is a gradual process, and the early signs are easy to miss if you are not looking for them.

Failures include brittleness from UV, cracks, compression flattening, poor installation, and in rare coastal cases, salt corrosion. Each failure mode looks slightly different, which is why a visual check is so useful.

Watch out for these warning signs:

  • Visible cracks or splits along the gasket length, especially at corners
  • Hardening or shrinkage, where the gasket has pulled away from the glass edge
  • Black streaks or mould appearing inside the frame channel
  • Draught or whistling noise when the window is closed
  • Water marks or damp patches at the base of the frame after rain
  • Condensation forming at the frame edge rather than on the glass itself

A draught on a calm day is one of the clearest indicators. Run your hand slowly around the closed window frame. Any cold air movement points directly to a gasket that has lost its compression.

Key stat: Research suggests that draughty windows and doors account for up to 25% of heat loss in older UK homes, much of which can be traced back to failed or degraded seals.

If you notice misting between the panes rather than at the frame edge, that is a different problem entirely and points to a failed double glazing unit rather than just the gasket. Knowing the difference saves you from paying for the wrong repair.

Repairing and replacing window gaskets: what homeowners need to know

Once you have identified a gasket problem, the good news is that replacement is often straightforward and affordable, especially compared to a full window unit swap.

DIY replacement costs £30 to £50 per window; professional replacement costs £80 to £300 depending on region, with mistakes risking misalignment. For most ground-floor uPVC windows, a confident DIYer can manage the job with the right gasket profile and a few basic tools.

Here is the basic process for replacing a window gasket:

  1. Remove the old gasket by pulling it free from the frame groove, starting at a corner
  2. Clean the groove thoroughly with a damp cloth to remove debris, old sealant, and mould
  3. Measure and cut the new gasket to length, allowing a small overlap at the join
  4. Press the new gasket firmly into the groove, working around the perimeter evenly
  5. Test the seal by closing the window and checking for any draught or movement

If only gaskets fail and there is no misting, you can replace the seal without touching the glass. However, misting between panes means the sealed unit has failed and requires a whole unit replacement costing £200 to £500.

When to call a professional rather than attempting DIY:

  • Multi-storey windows where working at height is involved
  • Heritage or timber-framed windows with non-standard profiles
  • Commercial properties where building regulations apply
  • Windows under warranty, as DIY work may void the guarantee

Pro Tip: Always buy slightly more gasket than you think you need. Cutting too short and trying to stretch the material is a common mistake that leaves gaps at the corners and defeats the purpose of the repair.

For a full overview of your double glazing repair options, it is worth getting a professional assessment before committing to either a gasket replacement or a full unit swap.

Get help with window gaskets and double glazing repairs

Understanding your window gaskets is the first step. Knowing when to call in expert help is the second.

https://www.cloudy2clearwindows.co.uk


At Cloudy2Clear Windows, we have been repairing and replacing double glazed windows across England and Scotland since 2005. Whether you need a straightforward gasket swap or a full glass replacement service, our experienced team can assess the problem and recommend the most cost-effective solution. We cover a wide network of locations, including our team handling repairs in Oxford and many surrounding areas. For business owners, our commercial window services cover everything from office blocks to retail units. Get in touch today for an honest assessment and a no-obligation quote.

Frequently asked questions

Do all double glazed windows have gaskets?

Most modern double glazed windows use gaskets as standard, particularly uPVC systems. Older or timber-framed designs may rely on putty or mastic sealant instead.

How can I tell if my window gasket has failed?

The clearest signs are drafts, water ingress, and visible damage such as cracks or hardening along the gasket strip. Running your hand around a closed window frame on a windy day is a quick and reliable test.

Is it safe to replace window gaskets myself?

DIY is possible for straightforward ground-floor windows, but a professional is recommended for multi-storey properties, heritage frames, or any window still under warranty.

Does replacing the gasket improve energy efficiency?

Yes. An effective gasket maintains insulation and prevents draughts, restoring the window’s thermal performance and often reducing heating costs noticeably.

What is the difference between gasket replacement and double glazing unit replacement?

Gasket replacement addresses seal failures at the frame edge. Unit replacement is only needed when the glass itself is misted, meaning the internal argon or air seal has broken down.

How to seal drafty windows to save energy and reduce costs

Drafty windows can turn your comfortable home into a cold, unwelcoming space whilst driving up heating bills throughout winter months. You probably notice the chill creeping in around window frames or feel a persistent breeze near the glass even when everything looks closed. Learning practical sealing methods transforms these problem areas into efficient barriers against the cold, cutting energy waste and improving indoor comfort without requiring professional help for every situation. This guide walks you through identifying draft sources, selecting appropriate materials, and executing effective sealing techniques that deliver lasting results.

Understanding the causes and preparation for sealing drafty windows

Window seal failures and draftiness often arise from degraded seals and gaps that develop over time. The rubber gaskets around double glazing units deteriorate from UV exposure and temperature fluctuations, whilst frame joints separate as buildings settle. Poor initial installation creates immediate draft problems that only worsen with age. You might also discover gaps where the window frame meets the wall, particularly in older properties where original sealant has cracked and fallen away.

Inspecting cracked window gasket for drafts


Detecting drafts requires simple but effective testing methods. Hold a lit candle or incense stick near window edges on a windy day and watch for flame movement or smoke disturbance. Alternatively, close a thin strip of paper in the window and try pulling it out whilst the window remains shut. If the paper slides out easily, you have found a draft source. Run these tests around the entire window perimeter, checking all four sides plus the meeting rails where sashes come together. Proper assessment and preparation improve sealing outcomes significantly.

Gathering the right tools and materials before starting prevents frustrating mid-project trips to the hardware shop. You will need weatherstripping in foam or rubber varieties, exterior-grade sealant suitable for your window material, a caulking gun, utility knife, cleaning supplies including methylated spirits, lint-free cloths, and possibly a putty knife for removing old sealant. Consider purchasing a few extra metres of weatherstripping since cutting to exact lengths often results in some waste.

Sealing material Best use case Typical lifespan
Foam tape weatherstripping Movable joints, easy application 1-3 years
Rubber gasket weatherstripping High-traffic windows, better durability 3-5 years
Silicone sealant Permanent gaps, exterior use 10-20 years
Acrylic latex caulk Interior gaps, paintable finish 5-10 years
Rope caulk Temporary seasonal sealing Single season


Infographic of window sealing steps


Pro Tip: Wear protective gloves when handling sealants and clean window surfaces thoroughly with methylated spirits before applying any sealing materials. Dust, moisture, and old residue prevent proper adhesion, causing new seals to fail within weeks rather than lasting years.

Step-by-step guide to sealing drafty windows effectively

Draught proofing extends window life and saves energy when executed properly. Follow this systematic approach for professional-quality results without hiring contractors.

  1. Clean window frames and surrounding areas thoroughly using methylated spirits and lint-free cloths. Remove all dust, grease, old sealant fragments, and loose paint. Allow surfaces to dry completely before proceeding, which typically takes 15-30 minutes depending on humidity levels. This preparation step determines whether your sealing materials bond properly or peel away within months.
  2. Apply weatherstripping or foam tape to movable joints where window sashes meet frames. Measure each section carefully and cut weatherstripping slightly longer than needed, then trim to exact length during installation. Press firmly along the entire length to ensure complete contact with the surface. For sliding windows, apply weatherstripping to both vertical channels. For casement windows, focus on the frame areas where the window closes against the seal.
  3. Use sealant or caulk to fill larger gaps and cracks between window frames and walls. Cut the sealant tube nozzle at a 45-degree angle to create a bead width matching your gap size. Apply steady pressure whilst moving the caulking gun smoothly along the gap. For deep cracks exceeding 6mm, use foam backer rod first to reduce sealant consumption and improve flexibility. Smooth the bead with a wetted finger or smoothing tool within five minutes of application before a skin forms.
  4. For secondary defence against drafts, consider applying insulating window film to the interior glass surface. This transparent plastic shrinks tight when heated with a hairdryer, creating an additional air barrier. Whilst not a permanent solution, window film provides extra insulation during particularly cold months and costs considerably less than replacement windows.
  5. Check for missed spots by running your hand around sealed areas whilst someone else creates air pressure differences by opening and closing interior doors. Mark any remaining draft sources with tape and repeat the sealing process in those specific locations. Multiple thin applications often work better than one thick bead that may not cure properly.

Pro Tip: Avoid over-applying sealant, which creates messy excess that requires cleanup and may prevent windows from opening smoothly. Apply just enough to fill the gap, then smooth immediately for a professional appearance and proper function.

Always ensure adequate ventilation when using chemical sealants indoors, and exercise caution when working on ladders to reach upper-floor windows. Some sealants release strong fumes during curing that can cause headaches or respiratory irritation in enclosed spaces.


Common issues, troubleshooting, and maintenance tips for sealed windows

Even properly sealed windows can develop problems over time. Sealant cracks appear as materials age and building movement stresses the bonds. Adhesive failure occurs when weatherstripping loses its grip, often because surface preparation was inadequate or the wrong adhesive type was used for the material. Condensation despite sealing typically indicates ventilation problems rather than seal failure, though it can damage seals over time if moisture becomes trapped.

When sealant cracks develop, remove the damaged section completely rather than sealing over it. Use a utility knife or putty scraper to extract old material, clean the area thoroughly, and apply fresh sealant. For weatherstripping that has come loose, remove it entirely and clean away residual adhesive before installing new strips. If condensation appears between double glazing panes, the sealed unit itself has failed and requires professional window maintenance or replacement since no amount of external sealing will resolve internal moisture.

Regular maintenance extends the life of your sealing work significantly. Inspect seals every autumn before heating season begins, looking for cracks, gaps, or areas where weatherstripping has compressed and lost effectiveness. Clean window frames and seals gently with mild soap solution, avoiding harsh chemicals that degrade rubber and silicone materials. During severe weather, check that wind-driven rain has not compromised exterior sealant, particularly around the bottom rails where water accumulates.

Sealant type Average durability Maintenance frequency Weather resistance
Silicone 15-20 years Inspect annually Excellent
Acrylic latex 5-10 years Inspect annually Good for interior
Butyl rubber 10-15 years Inspect every 2 years Excellent
Foam tape 1-3 years Replace as needed Fair


Maintaining sealed windows effectively requires following several key practices:

  • Clean seals gently without using abrasive materials that damage surfaces
  • Inspect weatherstripping compression and replace when gaps appear
  • Avoid painting over weatherstripping, which reduces flexibility
  • Check exterior sealant after storms for weather damage
  • Lubricate moving window parts to prevent stress on seals
  • Never force stuck windows, which can tear weatherstripping
  • Remove and reapply temporary sealing materials seasonally
  • Address building settlement cracks promptly before they enlarge

Verifying sealing success and when to call professional repairs

Testing your sealing work confirms effectiveness before winter cold arrives. The smoke test using incense or a candle remains the simplest verification method. Pass the smoke source slowly around all sealed areas whilst watching for disturbance. Any movement indicates remaining drafts requiring additional attention. Monitor your energy bills over the following months. Properly sealed windows should reduce heating costs noticeably, though the exact amount depends on how drafty they were initially and your overall home insulation.

Thermal imaging cameras, increasingly available as smartphone attachments, reveal temperature differences that indicate air leakage. These devices show cold spots in false colour, making draft sources visually obvious even when you cannot feel them. Some energy suppliers offer free thermal imaging assessments that identify problem areas throughout your home, not just windows.

Several signs indicate sealing alone will not solve your window problems:

  • Persistent drafts after thorough sealing attempts
  • Condensation appearing between double glazing panes
  • Visible frame damage including rot or severe warping
  • Increasing energy bills despite sealing efforts
  • Windows that no longer open or close properly
  • Cracked or broken glass requiring replacement

Knowing when DIY fixes suffice versus requiring professional help saves money and frustration. Weatherstripping replacement and basic gap sealing work well as DIY projects for most homeowners. However, failed double glazing units, structural frame damage, and persistent moisture problems need expert diagnosis. Professional double glazing repairs improve energy efficiency significantly when DIY is insufficient, addressing underlying problems that surface treatments cannot fix.

Homeowners who invest in professional double glazing repairs typically see energy savings of 15-25% compared to leaving damaged windows unsealed, with payback periods of 3-5 years depending on window size and local energy costs.

Enhance your window sealing with expert repairs and services

Whilst DIY sealing methods work brilliantly for minor drafts and maintenance, some window problems require professional expertise to resolve properly. Cloudy2Clear Windows offers comprehensive double glazing repairs in Oxford, Leicester and Loughborough, and throughout England and Scotland. Our specialists diagnose underlying causes of persistent drafts, failed seals, and condensation issues that DIY approaches cannot address.

https://www.cloudy2clearwindows.co.uk


With nearly two decades of experience since our establishment in 2005, we understand exactly how window problems affect both residential comfort and commercial building efficiency. Our broken window repair services restore windows to peak performance, combining expert repairs with high-quality replacement components when necessary. Whether you need failed seal replacement, frame restoration, or complete glazing unit renewal, our team delivers solutions that enhance comfort whilst reducing energy waste for years to come.

How to seal drafty windows: frequently asked questions

What is the easiest way to stop window drafts?

Foam tape weatherstripping provides the quickest and easiest draft solution for most homeowners. Simply clean the window frame, cut the tape to length, and press it firmly into place where the window meets the frame. This method requires no special tools and works immediately, though it needs replacement every few years as the foam compresses.

How long does window draught proofing last?

Draught proofing longevity varies by material type and installation quality. Foam weatherstripping typically lasts 1-3 years, rubber gaskets endure 3-5 years, whilst properly applied silicone sealant can perform effectively for 10-20 years. Regular inspection and maintenance extend the life of all sealing materials significantly.

Can sealing drafty windows reduce my heating bills?

Yes, sealing drafty windows typically reduces heating costs by 10-20% depending on how severe the drafts were initially. The savings accumulate over time, often paying back your material costs within a single heating season whilst improving comfort immediately. Combining window sealing with other insulation improvements delivers even greater energy savings.

When should I replace my window instead of sealing it?

Replace windows when frames show structural damage like rot or severe warping, when double glazing units have failed with condensation between panes, or when repeated sealing attempts fail to stop persistent drafts. Windows over 20 years old often benefit from replacement rather than continued repairs, particularly if energy efficiency has degraded significantly.

Are DIY draught-proofing products effective?

DIY draught-proofing products work excellently for straightforward sealing tasks when applied correctly to properly prepared surfaces. Weatherstripping, foam tape, and caulk deliver professional-quality results for minor to moderate draft problems. However, structural issues, failed glazing units, and severe frame damage require professional assessment and repair for lasting solutions.

How glazing impacts property value: a homeowner’s guide

Many homeowners believe that replacing old windows with modern double glazing is purely about comfort and energy bills. Yet glazing upgrades significantly influence property market value, buyer appeal, and long-term financial returns. This guide clarifies which glazing improvements genuinely boost property value, how energy efficiency translates into market advantage, and what choices deliver the best return on investment. Understanding these connections helps you make informed decisions that enhance both your living environment and your property’s worth in today’s competitive housing market.

How glazing improves property value and energy efficiency

Modern glazing transforms how buildings perform thermally. Double glazing reduces heat loss by up to 50%, creating a barrier between indoor warmth and outdoor cold through two panes separated by an insulating gas layer. This fundamental improvement delivers multiple benefits that directly influence property value.

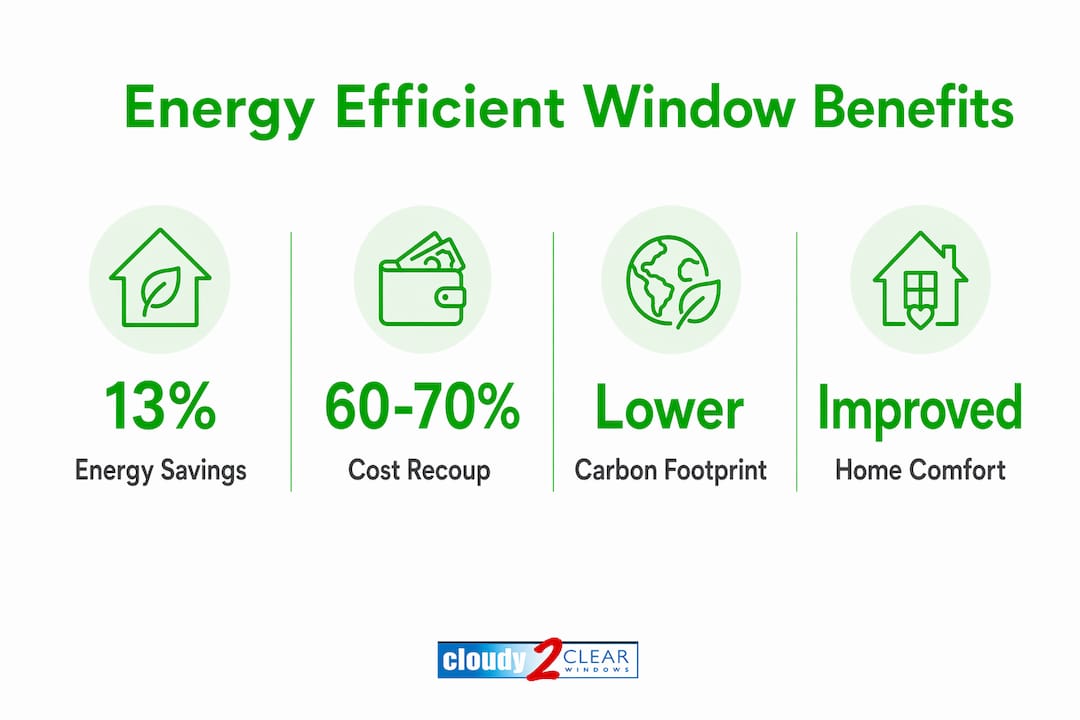
Homebuyers increasingly prioritise energy efficiency when evaluating properties. A home with quality double glazing signals lower running costs, reduced carbon footprint, and modern standards compliance. These factors translate into tangible market advantages. Properties with newer double glazing see faster sales and better offers from buyers appreciating energy savings. Estate agents consistently report that efficient glazing features prominently in buyer decision-making, particularly among younger purchasers conscious of environmental impact and utility expenses.

Beyond thermal performance, double glazing delivers comfort improvements that enhance daily living quality:

  • Noise reduction creates quieter indoor environments, especially valuable in urban locations near traffic or commercial areas
  • Condensation control prevents moisture buildup that damages window frames, sills, and surrounding walls
  • Draught elimination removes cold spots near windows, making rooms more comfortable throughout
  • UV protection reduces fading of furnishings, carpets, and artwork exposed to direct sunlight

The payback period concept connects these benefits to property value. Initial glazing investment typically recovers within five to eight years through energy savings alone. When you factor in increased property sale price, the financial case strengthens considerably. A mid-terrace home spending £4,000 on complete double glazing replacement might save £300 annually on heating whilst adding £5,000 to £8,000 to market value, depending on local demand and property type.

Expert analysis confirms these patterns. According to glazing specialists, quality window upgrades rank among the most cost-effective home improvements for value enhancement, outperforming many cosmetic renovations. The combination of measurable energy savings, regulatory compliance, and buyer appeal creates multiple value drivers that compound over time.

Pro Tip: Request thermal imaging surveys before and after glazing upgrades to document heat loss reduction. These visual records provide compelling evidence of performance improvements when marketing your property.

Types of glazing and their effect on property value

Understanding different glazing technologies helps you select options that match your property type, climate, and value objectives. Each glazing category offers distinct performance characteristics and cost profiles.

Infographic on glazing types and value impact


Glazing Type Thermal Performance Typical Cost Value Impact Best Application
Single glazing Poor (U-value 5.0) £150-250/m² Negative in modern market Heritage properties only
Standard double glazing Good (U-value 1.6) £300-450/m² Moderate increase Most residential properties
Low-E double glazing Excellent (U-value 1.2) £400-550/m² Strong increase Energy-conscious buyers
Triple glazing Superior (U-value 0.8) £500-700/m² Variable increase Cold climates, premium homes


Triple glazing offers better insulation but has higher upfront costs and may suit colder climates more. In moderate UK regions, the additional expense rarely justifies the marginal performance gain over quality double glazing with low-emissivity coatings. These microscopic metallic layers reflect heat back into rooms whilst allowing light transmission, delivering excellent thermal efficiency at reasonable cost.

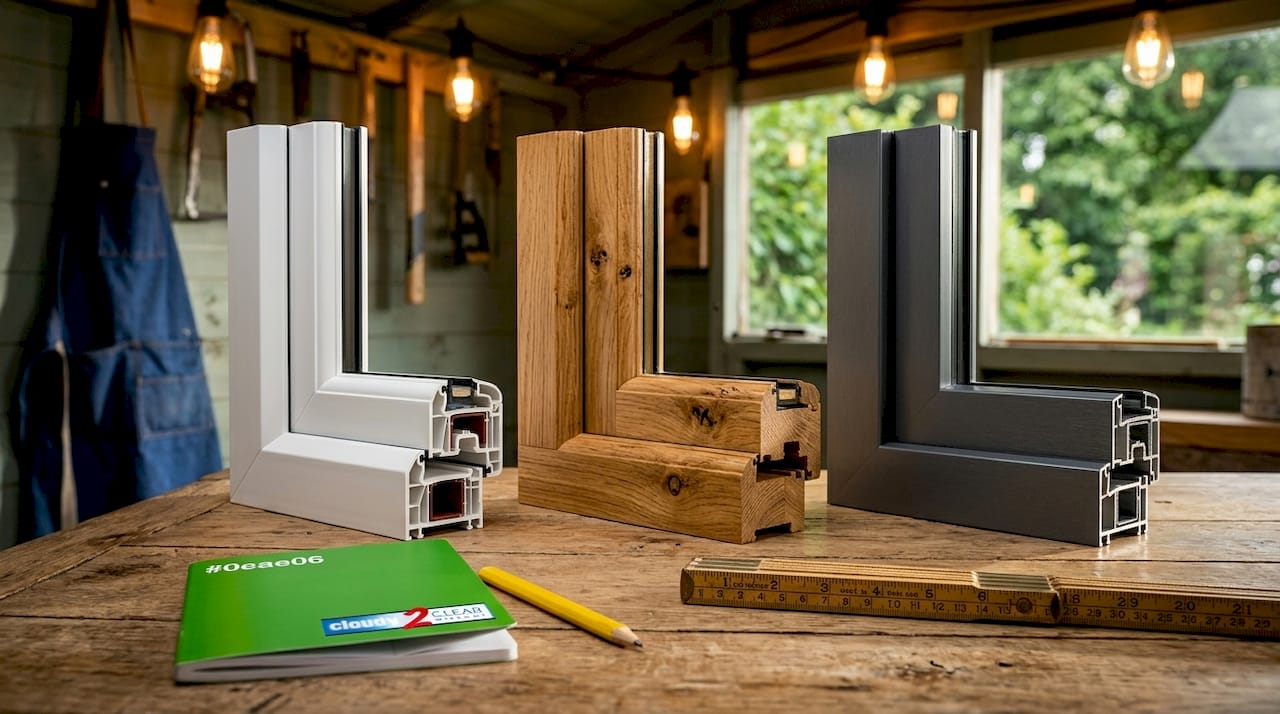
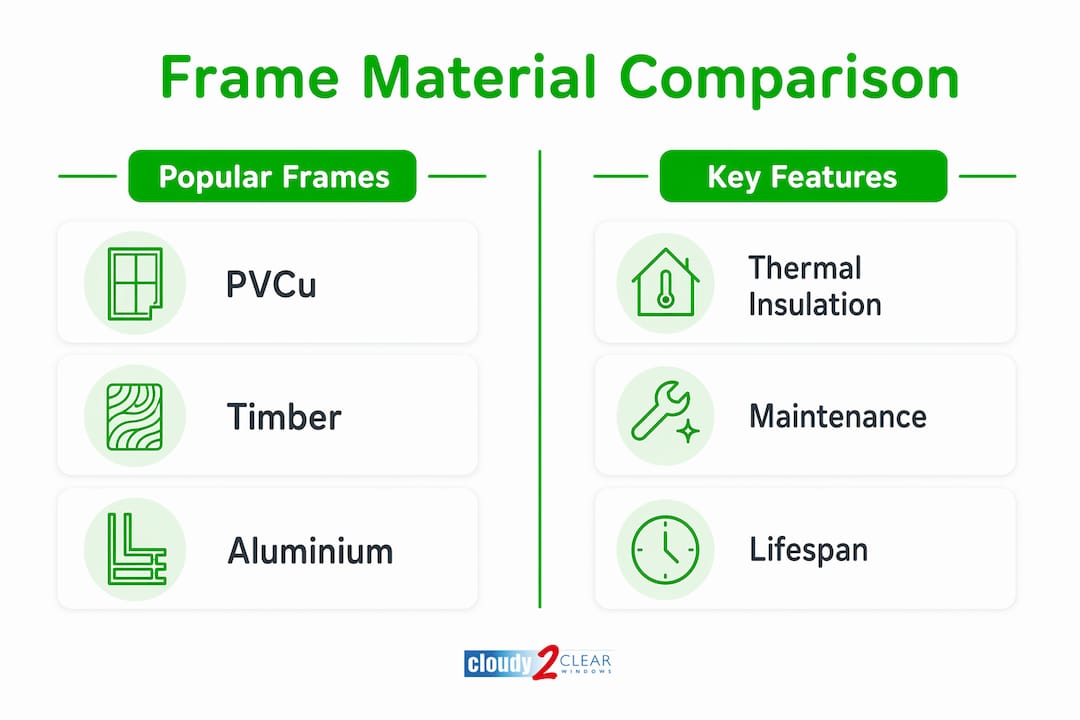
Frame material and style significantly influence both performance and aesthetic appeal:

  • uPVC frames offer excellent insulation, minimal maintenance, and competitive pricing, making them popular for standard residential applications
  • Timber frames provide traditional appearance valued in period properties and conservation areas, though requiring more maintenance
  • Aluminium frames suit contemporary designs and commercial applications, offering slim sightlines and durability despite slightly lower insulation
  • Composite frames combine materials to balance thermal performance, appearance, and longevity

Glazing bar configuration affects character and value differently across property types. Georgian-style bars enhance period home authenticity, potentially adding value in conservation areas. However, excessive bars in modern properties can appear dated and reduce light transmission. Glazing bars impact window efficiency by creating additional thermal bridges, though modern warm-edge spacers minimise this effect.

Gas fills between panes influence insulation effectiveness. Argon gas, standard in quality double glazing, offers better thermal resistance than air. Krypton gas provides superior performance in narrower gaps typical of triple glazing but costs significantly more. For most homeowners, argon-filled double glazing with low-E coatings delivers optimal value-to-performance ratio.

Pro Tip: Match glazing specification to your property’s architectural style and local market expectations. Over-specifying triple glazing in a modest semi-detached home rarely recovers additional cost, whilst under-specifying basic double glazing in a premium property limits value potential.

Glazing for commercial properties versus residential homes

Commercial fenestration requirements differ substantially from residential applications, creating distinct value drivers and investment considerations. Understanding these differences helps property managers and business owners optimise glazing decisions.

Commercial fenestration upgrades enhance energy ratings and can attract higher-value tenants seeking modern, efficient premises. Office buildings, retail units, and industrial facilities face stricter energy performance regulations than residential properties. Building regulations Part L sets minimum standards for non-domestic buildings, requiring U-values typically below 1.6 W/m²K for windows. Meeting or exceeding these standards affects Energy Performance Certificate ratings, which directly influence rental values and tenant demand.

Commercial glazing installations prioritise different factors:

  • Larger pane sizes require structural considerations and safety glass specifications
  • Security features including laminated glass and reinforced frames protect valuable inventory and equipment
  • Fire safety regulations mandate specific glass types and frame materials in certain applications
  • Acoustic performance matters more in offices and healthcare facilities where noise disrupts productivity
  • Aesthetic consistency across large facades affects brand image and street presence

Tenant preferences increasingly favour energy-efficient premises. Businesses face rising utility costs and corporate sustainability commitments, making operational efficiency a key location criterion. Properties with modern, high-performance glazing command rental premiums averaging 8-12% over comparable buildings with outdated windows. This premium reflects both reduced energy expenses and enhanced working environments that support employee wellbeing and productivity.

Retail properties gain additional benefits from glazing upgrades. Large display windows with low-E coatings reduce solar heat gain whilst maintaining product visibility, cutting air conditioning costs in summer. Anti-reflective treatments improve window shopping appeal by eliminating glare that obscures merchandise. These features directly support revenue generation, justifying higher specification investments than typical residential applications.

Commercial fenestration services require specialist expertise in project management, safety compliance, and minimal business disruption. Installation timing often occurs outside trading hours to avoid customer impact, adding logistical complexity and cost compared to residential work.

Pro Tip: Commercial property owners should schedule glazing assessments every three years to identify performance degradation before it affects energy ratings or tenant satisfaction. Proactive maintenance costs less than reactive repairs and protects rental income.

Maintaining glazing to sustain property value

Regular maintenance protects your glazing investment and prevents deterioration that reduces thermal performance and visual appeal. Neglected glazing can lead to reduced thermal performance and visible damage, lowering property curb appeal and market value.

Common glazing problems develop gradually, making early detection crucial:

  1. Seal failure allows moisture between panes, creating condensation and cloudiness that blocks views and signals poor insulation
  2. Frame deterioration from weather exposure causes draughts, water ingress, and structural weakness requiring costly repairs
  3. Hardware wear affects opening mechanisms, locks, and hinges, compromising security and functionality
  4. Glass damage including chips, cracks, and scratches reduces both appearance and thermal efficiency
  5. Drainage blockages trap water in frame channels, accelerating corrosion and rot in surrounding materials

Maintenance frequency and costs vary by glazing type and exposure conditions:


Glazing Type Average Lifespan Annual Maintenance Cost Replacement Indicators
uPVC double glazing 20-25 years £50-80 Seal failure, frame discolouration
Timber double glazing 15-20 years £120-180 Rot, paint failure, draughts
Aluminium double glazing 25-30 years £60-100 Corrosion, seal failure
Triple glazing 25-35 years £70-120 Seal failure, hardware wear


Preventative maintenance extends glazing lifespan and maintains performance. Clean frames and glass quarterly using non-abrasive cleaners to prevent dirt buildup that traps moisture. Lubricate hinges, locks, and moving parts annually with silicone spray to ensure smooth operation. Clear drainage holes in frame bottoms to prevent water accumulation. Inspect seals for cracks or gaps, addressing minor issues before they escalate into seal failure requiring complete unit replacement.

Double glazing lifespan depends heavily on installation quality and ongoing care. Professional installation with proper sealing and drainage significantly outperforms DIY or budget installations. Similarly, buildings in coastal areas face accelerated deterioration from salt exposure, requiring more frequent inspections and maintenance.

Timely repairs protect property value more cost-effectively than deferred maintenance. A single failed unit costs £150-300 to replace, whilst neglecting it allows moisture damage to spread to surrounding frames and walls, potentially requiring £2,000-5,000 in structural repairs. Estate agents consistently report that visible glazing defects, particularly condensation between panes, create negative first impressions that reduce offers and extend time on market.

External factors also impact glazing longevity. Properties near construction sites, busy roads, or industrial areas accumulate more dirt and pollutants requiring frequent cleaning. Similarly, buildings with poor guttering or drainage systems expose glazing to excessive water, accelerating frame deterioration. Addressing these environmental factors through drain relining and repairs protects your entire property envelope, including windows.

Pro Tip: Schedule professional glazing inspections every five years, even if no obvious problems exist. Specialists identify early-stage issues invisible to untrained eyes, allowing cost-effective interventions before major repairs become necessary.

Enhance your property value with expert glazing services

Cloudy2Clear Windows brings two decades of glazing expertise to homeowners and commercial property managers throughout England and Scotland. Our specialist teams understand how quality glazing improvements enhance both energy efficiency and market value, delivering installations and repairs that protect your investment for years ahead.

https://www.cloudy2clearwindows.co.uk


We offer comprehensive glazing solutions tailored to your property’s specific requirements and value objectives. From complete window replacements to targeted repairs addressing condensation, seal failure, or hardware issues, our services maintain the thermal performance and visual appeal that buyers value. Our local branches provide personalised consultations, helping you select glazing specifications that match your budget whilst maximising return on investment.

Whether you need double glazing repairs in Milton Keynes, expert service in Oxford, or professional installations across Leicester and Loughborough, our experienced teams deliver quality workmanship that enhances property value whilst improving comfort and efficiency. Contact your nearest branch today to discuss how upgraded glazing can benefit your home or business.

Frequently asked questions

Does double glazing really increase property value?

Yes, quality double glazing typically adds 5-10% to property value depending on local market conditions and existing window quality. Buyers increasingly prioritise energy efficiency and lower running costs when evaluating homes. Properties with modern, well-maintained glazing sell faster and attract better offers than comparable homes with outdated single glazing or deteriorated double glazing showing visible condensation or seal failure.

What type of glazing is best for increasing property value?

Low-E double glazing offers the best value-to-cost ratio for most UK properties. It delivers excellent thermal performance at reasonable cost whilst meeting buyer expectations for modern, efficient homes. Triple glazing suits premium properties in colder regions but rarely justifies additional expense in moderate climates. Match glazing style to your property’s architecture, using traditional designs for period homes and contemporary options for modern buildings to maximise appeal.

How often should glazing be inspected or replaced?

Inspect glazing every three to five years to identify developing issues before they require expensive repairs. Double glazing typically lasts 20-25 years with proper maintenance, though coastal properties and harsh exposure conditions may reduce lifespan. Replace units showing seal failure, persistent condensation between panes, or significant frame deterioration. Proactive replacement maintains property value and prevents moisture damage spreading to surrounding structures.

Can I upgrade glazing in a conservation area?

Conservation areas restrict window alterations to preserve architectural character, but upgrades remain possible with appropriate specifications. Most planning authorities permit like-for-like replacements using traditional materials and designs. Secondary glazing offers an alternative that improves thermal performance without altering external appearance. Consult your local planning department before proceeding, as requirements vary significantly between authorities and specific conservation designations.

How much does professional glazing installation cost?

Complete home glazing replacement typically costs £3,000-£8,000 depending on property size, glazing specification, and frame materials. Individual window replacements range from £100-£700 per unit. Commercial installations vary more widely based on project scale and specification requirements. Obtain detailed quotes from multiple specialists, ensuring comparisons include equivalent glazing specifications, frame materials, and warranty terms. Quality installation significantly affects long-term performance and value protection.

Spot signs of window damage: save £100s on energy bills

Noticing a draught near your windows or condensation forming between panes can feel frustrating, especially when you’re unsure whether it signals a minor issue or a costly replacement. Window damage often develops gradually, making it easy to overlook until energy bills climb or comfort drops. Identifying early warning signs empowers you to act before small problems escalate into expensive repairs. This guide walks you through practical detection methods, common damage types, and clear repair versus replacement criteria, helping you make informed decisions that protect your home and budget.

How to identify key signs of window damage

Detecting window damage early requires a combination of visual inspection and simple physical tests. Start with a thorough visual scan of each window, looking for fogging between panes, cracked or peeling seals, and discolouration or soft spots in timber frames. Fogging and seal cracks indicate seal failure, which allows moisture ingress and reduces insulation. Soft spots or dark patches on wood suggest rot, which can spread if left untreated.

Probing timber frames with a screwdriver or similar tool helps detect rot before it becomes visible. Press gently into suspect areas; if the wood feels spongy or the tool sinks easily, rot has likely taken hold. A moisture meter provides objective readings: levels above 20% indicate high rot risk, signalling the need for immediate attention. These tools are inexpensive and widely available at hardware stores.

A candle or smoke test reveals draughts and air leaks around window frames. Light a candle or incense stick and hold it near the edges of closed windows. If the flame flickers or smoke drifts horizontally, air is escaping, which compromises energy efficiency. Check drainage channels at the bottom of window frames for blockages or standing water. Blocked drains trap moisture against seals and frames, accelerating damage. Clear debris regularly to prevent pooling.

Pro Tip: Perform inspections on windy days to make draughts more obvious. The increased air pressure makes leaks easier to detect with a candle test, helping you pinpoint problem areas quickly.

For comprehensive guidance on spotting issues early, review our common window faults guide. If you discover leaks during your inspection, learn how to fix window leaks with practical steps.

Common types of window damage and what they mean

Understanding the specific type of damage affecting your windows helps you decide whether repair or replacement makes sense. Wet rot affects timber locally, caused by prolonged moisture exposure from leaks or poor drainage. It appears as soft, dark patches on wood and typically remains confined to the affected area. Wet rot stays localised and can often be treated by removing damaged timber and applying fungicidal treatments.

Dry rot presents a more serious threat. Unlike wet rot, dry rot spreads extensively through timber and even masonry, sending thread like strands across surfaces. It thrives in damp, poorly ventilated conditions and can seriously damage window frames, walls, and structural elements if untreated. Dry rot requires professional assessment and remediation to prevent further spread.

Seal failure leads to condensation between panes and significant heat loss. When the hermetic seal around double glazed units breaks down, moisture enters the gap, causing persistent fogging that cannot be wiped away. This reduces visibility, damages insulation, and increases heating costs. Understanding window seal failure types helps you recognise when replacement becomes necessary.

Condensation trapped inside double glazed window


uPVC windows can discolour, turning yellow over time, and become brittle, reducing their lifespan. uPVC yellowing and brittleness result from UV exposure and weathering, particularly on south and west facing installations. While cosmetic at first, brittleness compromises structural integrity, making frames prone to cracking.

Identifying the specific damage type influences your repair or replacement decision. Localised wet rot may only require timber repair, whilst extensive dry rot or multiple seal failures across several windows often justify full replacement for long term cost effectiveness and improved energy performance.

Comparing repair versus replacement: when and why

Deciding between repair and replacement hinges on the extent of damage, cost implications, and long term benefits. Small seal or isolated timber rot repairs cost only 15-25% of full replacement, making them attractive when damage remains confined to one or two windows. Repairing a single failed seal or treating localised rot restores function without the expense of new installations.

Extensive damage across multiple windows reduces efficiency and comfort severely. If several windows show seal failure, rot, or structural issues, the cumulative repair costs can approach or exceed replacement expenses. Replacement guarantees improved insulation meeting current building regulations, delivering better energy performance and reduced heating bills. Modern double glazed units offer superior thermal efficiency compared to older installations, often paying for themselves through energy savings over time.

Repair can extend window life but requires regular maintenance and inspections. Patched seals and treated timber need monitoring to ensure problems do not recur. Replacement eliminates this ongoing concern, providing new warranties and peace of mind. Consider location factors when evaluating options. South and west facing windows deteriorate faster due to increased weather exposure, making them more likely to need replacement sooner than sheltered installations.


Factor Repair Replacement
Cost 15-25% of replacement Full upfront investment
Lifespan extension 3-7 years with maintenance 15-25 years or more
Energy efficiency Restores original performance Meets current standards
Maintenance needs Regular inspections required Minimal for new units
Best for Isolated damage, single windows Multiple failures, extensive damage


Pro Tip: If more than 30% of your windows show damage, replacement often proves more cost effective than multiple repairs. Calculate total repair costs against replacement quotes to make an informed choice.

For detailed benefits of addressing seal issues, explore window seal replacement benefits. If you need immediate repairs, our broken window repairs service provides fast, professional solutions.

Preventing window damage through routine maintenance

Proactive maintenance prevents most window damage, extends lifespan, and reduces repair costs. Perform detailed inspections twice yearly, in spring and autumn, to catch issues early. Spring inspections identify winter weather damage, whilst autumn checks prepare windows for harsher conditions. Look for seal deterioration, timber softness, drainage blockages, and paint wear during each inspection.

Reseal any gaps to avoid draughts and moisture ingress. Over time, sealant around window frames degrades, creating openings for air and water. Apply fresh sealant to cracks and gaps, ensuring a watertight barrier. This simple step dramatically improves insulation and prevents moisture related damage. Keep drainage channels clear to prevent water pooling. Remove leaves, dirt, and debris from drainage slots at the bottom of frames. Blocked drains trap water against seals and timber, accelerating rot and seal failure.

Repaint exposed timber regularly to protect against rot. Repainting every 3-10 years maintains a protective barrier against moisture and UV damage. Sand down flaking paint, apply primer to bare wood, and finish with exterior grade paint suitable for your climate. South and west facing windows require more frequent checks due to weather exposure. These orientations receive more rain, wind, and sun, accelerating wear. Inspect them quarterly if possible, and prioritise maintenance tasks on these windows first.

Follow these maintenance steps to protect your investment:

  1. Inspect all windows twice yearly, focusing on seals, timber, and drainage
  2. Clean drainage channels and remove debris to prevent water accumulation
  3. Reseal gaps and cracks with high quality exterior sealant
  4. Repaint timber frames every 3-10 years, prioritising south and west facing windows
  5. Check for draughts using a candle test and address leaks immediately
  6. Monitor moisture levels with a meter, treating readings above 20% as urgent

Key maintenance tasks and their frequency:


Task Frequency Purpose
Full inspection Twice yearly (spring, autumn) Detect damage early
Drainage cleaning Quarterly Prevent water pooling
Resealing gaps As needed (every 2-5 years) Maintain airtight barrier
Repainting timber Every 3-10 years Protect against moisture and UV
Draught testing Annually Ensure energy efficiency


Learn more about window maintenance benefits and preventing window damage through our detailed guides.

Expert window repair and replacement services

If your inspections reveal persistent damage or you need professional assessment, Cloudy2Clear offers expert window repair and replacement services across key UK regions. Our experienced team evaluates window condition, provides honest recommendations, and delivers high quality solutions tailored to your needs. Whether you face isolated seal failure or extensive timber rot, we help you choose the most cost effective path forward.

https://www.cloudy2clearwindows.co.uk


Professional replacements ensure compliance with current energy standards, improving insulation and reducing heating costs. Our installations meet building regulations, delivering performance and peace of mind. Services cover broken glass and seal repairs, timber and frame restoration, and full double glazing replacement. With decades of experience since 2005, we understand how to extend window lifespan and enhance your property’s comfort and value. For local expertise, explore our window repairs in Oxford and other regional branches.

Frequently asked questions

What are the most common signs of window damage?

The most common signs include fogging between panes, cracked or peeling seals, soft or discoloured timber, and noticeable draughts. Condensation that cannot be wiped away indicates seal failure, whilst soft spots in wood suggest rot. A candle test revealing flickering flames near closed windows confirms air leaks. Regular inspections help you spot these warning signs before they escalate into costly repairs.

How often should I inspect my windows for damage?

Inspect windows twice yearly, ideally in spring and autumn, to catch damage early. Spring inspections identify winter weather impacts, whilst autumn checks prepare windows for harsher conditions. South and west facing windows benefit from quarterly inspections due to increased weather exposure. Regular checks extend window lifespan and reduce the likelihood of expensive emergency repairs. Learn more about preventing window damage through routine maintenance.

Can minor seal damage be repaired or is replacement necessary?

Minor seal issues can be repaired cost effectively when caught early, typically costing 15-25% of full replacement. Single window seal failures often respond well to targeted repairs, restoring insulation and eliminating condensation. However, if multiple windows show seal damage or repairs fail to resolve fogging, replacement becomes more economical. Frequent inspections and maintenance reduce the need for full replacement by addressing problems before they spread. For detailed guidance, review our window seal repair insights.

What maintenance steps help prevent window damage?

Key maintenance steps include resealing gaps, clearing drainage channels, and repainting timber every 3-10 years. Perform biannual inspections to identify issues early, focusing on seals, timber condition, and drainage function. South and west facing windows require more frequent checks due to weather exposure. Clean drainage slots quarterly to prevent water pooling, which accelerates rot and seal failure. Apply fresh sealant to cracks and repaint timber frames to maintain protective barriers against moisture and UV damage. Consistent upkeep dramatically extends window lifespan and reduces repair costs. Explore our window maintenance tips for comprehensive advice.