• USP Logo Icon
    25 Year Guarantee
  • USP Leaf Icon
    Latest ECO Friendly Technology
  • USP Pointer Icon
    National Coverage
Get a FREE quote

How to maintain window seals effectively

Knowing how to maintain window seals is one of the most cost-effective things you can do for your home. A neglected seal does more damage than most homeowners realise. Research shows that a tiny 1/16-inch gap around a window frame allows as much cold air in as a 3-inch open window. That translates directly into higher energy bills, persistent draughts, and the kind of condensation that quietly encourages mould. The good news is that most seal maintenance is straightforward, predictable, and well within the reach of any motivated homeowner or property manager.

How to maintain window seals: know what you are working with

Before you pick up a caulk gun, you need to understand which type of seal you are dealing with. Each one fails differently and needs a different approach.

Seal type Location Function Maintenance method
Caulk seal Frame meets wall Fills stationary gaps Remove and reapply sealant
Weatherstripping Moving sashes and tracks Seals operable window parts Clean and replace strips
Insulated glass unit (IGU) seal Between double or triple glazed panes Prevents moisture ingress between panes Professional replacement required


The golden rule here is straightforward: use caulk for stationary gaps and weatherstripping for any part of the window that moves. Getting this wrong causes real problems. Caulk applied to a moving sash will bind the window shut or crack almost immediately. Weatherstripping on a fixed frame will leave gaps because it is not designed to fill static joints.

The third type, the IGU seal, is the one most homeowners overlook entirely. This is the factory-sealed bond between the panes of glass in a double glazed unit. You cannot repair it yourself. When it fails, professional replacement is the only lasting fix, and understanding that distinction saves you from wasting time and money on DIY attempts that will not work.

Finger points to failed window glass seal


Knowing the five types of seal failures and their typical lifespans helps you prioritise where to focus your efforts first.

Hierarchy infographic of window seal failure types

Tools and preparation: getting it right before you start

Good preparation separates a seal that lasts five years from one that peels off within a season. The right timing matters as much as the right materials.

What you will need

  • Caulk gun and silicone or siliconised latex caulk (exterior grade)
  • Utility knife and putty knife for removing old sealant
  • Weatherstripping material suited to your window type (foam, V-strip, or rubber)
  • Isopropyl alcohol or a dedicated surface cleaner
  • Painter’s tape for neat lines
  • Foam backer rod for gaps larger than 6mm
  • Gloves and safety glasses
Item Purpose Approx. cost
Silicone caulk (exterior) Sealing fixed frame gaps £4 to £10 per tube
Weatherstripping (self-adhesive foam) Sealing moving window parts £5 to £15 per roll
Caulk gun Even application of sealant £6 to £20
Foam backer rod Filling large gaps before caulking £3 to £8 per pack
Putty/utility knife Removing old sealant cleanly £3 to £10


Timing is genuinely important. Schedule your inspection and any re-caulking every 18 to 24 months, ideally in early autumn before the heating season begins. Spring works well too, once temperatures are reliably mild.

Temperature is not a trivial detail. Most exterior caulks need temperatures above 4°C to bond correctly. Applying sealant in freezing or damp conditions leads to poor adhesion and early failure. Check the weather forecast and pick a dry day with stable mild temperatures.

Pro Tip: Run your hand along each window frame on a cold, windy day. You will feel any draught far more clearly than you would in still conditions, making it much easier to pinpoint exactly where the seal has broken down.

Step-by-step maintenance guide

This is where the practical work happens. Follow these steps in order and you will get a clean, durable result.

  1. Inspect every seal carefully. Look for cracked, shrinking, or missing caulk along the frame where it meets the wall. Check weatherstripping for compression, tears, or sections that have pulled away from the frame. Understanding common signs of failure early prevents small problems from becoming large ones.
  2. Remove all old caulk. Use your utility knife to score along the edges of the old sealant, then work the putty knife underneath to lift it free. Do not rush this stage. Applying new caulk over old residue without full removal leads to quick failure. The new sealant simply cannot bond through the degraded layer beneath it.
  3. Clean the surface thoroughly. Wipe the area with isopropyl alcohol or a surface cleaner and allow it to dry completely. Any moisture, grease, or dust will prevent the new caulk from adhering properly. This step is where many DIY repairs go wrong because it feels like preparation rather than the actual job. It is just as important as the caulk itself. For guidance on keeping frames clean as part of your ongoing routine, professional window cleaning advice is worth reviewing.
  4. Apply painter’s tape on both sides. This keeps your bead neat and protects the frame and wall finish. A tidy line is not just cosmetic. It tells you the caulk has been applied consistently, which matters for performance.
  5. Load and apply caulk in a single continuous bead. Hold the gun at a 45-degree angle and maintain steady pressure as you move along the joint. Aim for a bead roughly 6mm wide. Do not stop and restart mid-run if you can avoid it, as joins in the bead are weak points.
  6. Tool the bead smooth. Use a damp fingertip or a caulk smoothing tool to press the sealant into the joint and create a slightly concave profile. This improves both adhesion and water runoff. Remove the painter’s tape before the caulk skins over.
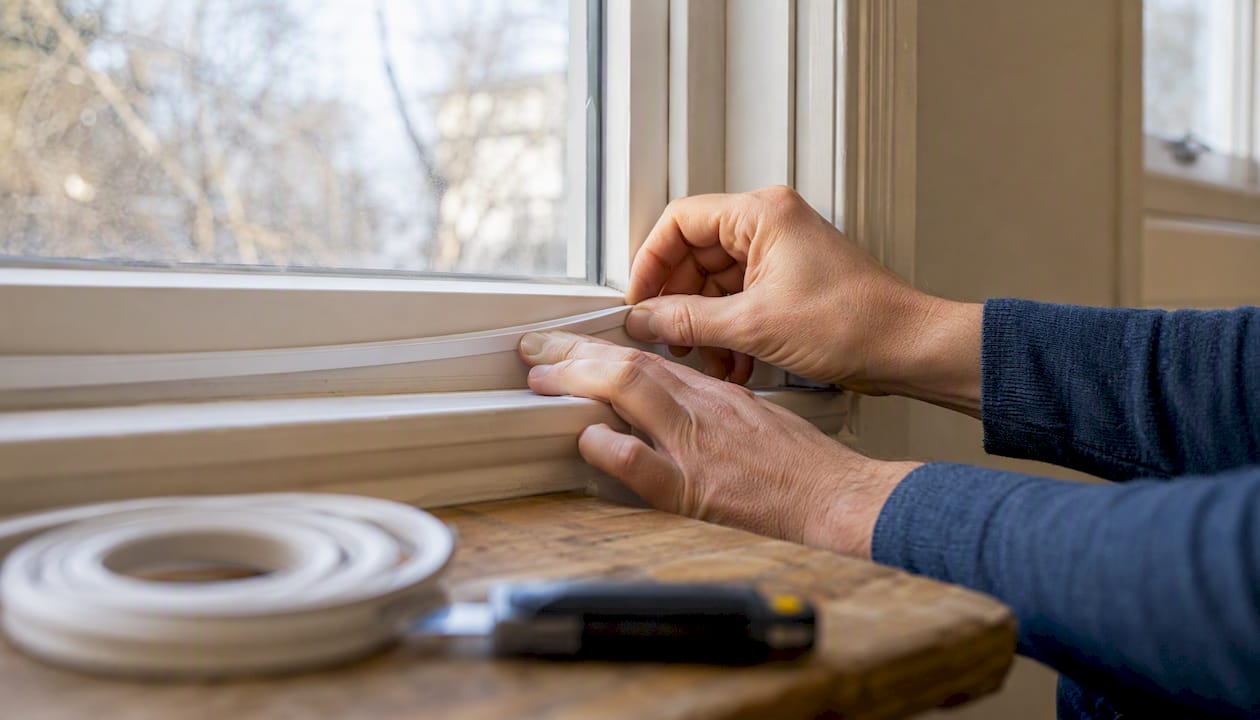
  7. Replace weatherstripping on moving parts. Remove the old strip, clean the channel or surface, and cut your new weatherstripping to length. Press it firmly into place, working from one end to the other without stretching it. Choosing the right material depends on your window style, the size of the gap, and how frequently the window is used.

Pro Tip: Never block weep holes when caulking. These small slots at the bottom of the frame are designed to drain any water that enters the frame channel. Sealing them traps moisture inside and leads to rot and structural damage over time.

Troubleshooting: condensation, large gaps, and seasonal fixes

Not every problem you encounter will be a simple caulk replacement. Some issues need a slightly different approach.

Condensation: surface or between the panes?

This distinction matters enormously. Condensation on the inside or outside surface of your glass is a ventilation and humidity issue, not a seal failure. Maintaining indoor humidity between 30 and 50% during the heating season prevents most surface condensation. A basic hygrometer costs under £20 and gives you a clear reading.

Condensation appearing between the panes is a completely different matter. That foggy appearance between panes means the IGU seal has failed and the inert gas fill has been replaced by moist air. You cannot fix this with caulk or weatherstripping. The glass unit needs professional replacement.

“Surface condensation is a home environment problem. Inter-pane condensation is a glazing problem. Treating them the same way wastes time and money.”

Large gaps and supplementary fixes

  • For gaps larger than 6mm, fit a foam backer rod into the gap before caulking. Backer rod creates a flexible backing that supports the caulk and prevents it from cracking under movement.
  • Low-expansion spray foam applied carefully behind internal trim can fill rough structural gaps without affecting window operation. This works well around older frames where the original installation left large voids.
  • Seasonal window insulation film kits add a secondary barrier in winter. They are not a substitute for proper seal maintenance but they make a noticeable difference to comfort in older properties.
  • Thermal curtains with a close fit to the wall reduce heat loss significantly during cold months.

For a complete guide to sealing against draughts, the fix window leaks guide covers both DIY and professional approaches in detail.

My honest take on window seal maintenance

Having worked with homeowners across the country for nearly two decades, I have seen the same pattern repeat itself. People wait until there is visible damage, a mould patch, or an energy bill that genuinely shocks them. By that point, what could have been a £15 tube of caulk and an afternoon becomes a much more involved repair.

The most common mistake I see is treating all seals as identical. Someone applies exterior caulk to the moving sash of a casement window, the window binds within weeks, and they conclude that caulk “does not work.” It works perfectly. It was just used in the wrong place.

What I have found genuinely effective is a layered approach. Sort the caulk and weatherstripping first. Then address humidity with ventilation or a dehumidifier. Then consider supplementary measures like insulation film for north-facing windows in winter. Each layer compounds the benefit of the one before it.

The benefits of timely seal replacement are not abstract. Homeowners who maintain seals proactively report more consistent room temperatures, less condensation, and noticeably lower heating costs. That is a straightforward return on a small, regular investment of time.

— Cloudy2Clear

When to call Cloudy2Clear Windows

https://www.cloudy2clearwindows.co.uk


Some seal problems genuinely exceed DIY scope. Failed IGU seals, frames with significant rot or movement, and double glazing units with persistent inter-pane fogging all need professional attention to resolve properly.

Cloudy2Clear Windows has been repairing and replacing double glazed units since 2005, with local branches across England serving both homeowners and property managers. Whether you need a double glazing repair in Oxford, a glazing repair in Leicester or Loughborough, or expert help in Milton Keynes, the team can assess the condition of your seals, replace failed glass units, and advise on the most cost-effective route forward. Homeowners in Watford and surrounding areas can also access the same professional service. Contact your nearest branch for a no-obligation assessment.

FAQ

How often should window seals be inspected?

Inspect and re-caulk window seals every 18 to 24 months, ideally in early autumn before the heating season starts or in spring once temperatures are consistently above 4°C.

What is the difference between caulk and weatherstripping?

Caulk is used to seal fixed, stationary gaps where the window frame meets the wall. Weatherstripping seals the moving parts of a window, such as the sash or casement edge, and must allow the window to open and close freely.

Can I fix inter-pane condensation myself?

No. Condensation between the panes of a double glazed unit means the IGU seal has failed. This requires professional replacement of the glass unit and cannot be resolved with DIY caulking or resealing.

What temperature do I need to apply exterior caulk?

Most exterior caulks require temperatures above 4°C to bond correctly. Applying sealant in cold or wet conditions prevents proper adhesion and leads to early failure.

How do I stop condensation on the inside of my windows?

Surface condensation on the inside of glass is usually caused by high indoor humidity rather than a seal failure. Maintaining indoor humidity between 30 and 50% through ventilation or a dehumidifier resolves most cases.

How to clean double glazing: a UK guide

Double glazed windows are one of the best investments you can make in your home, but knowing how to clean double glazing properly is a skill most people never fully develop. The result? Streaky glass, grimy frames, and the creeping suspicion that the view through your windows should look better than it does. Whether you are dealing with stubborn external dirt, condensation sitting between the panes, or frames that have seen better days, this guide walks you through the right techniques, the right materials, and how to spot when a problem goes beyond what a cloth and a bucket can fix.

What you need before you start cleaning

Getting the right materials together before you begin makes the difference between a clean window and a smeared one. Many people reach for whatever is under the sink, and that is where things go wrong.

Here is what you actually need:

  • Microfibre cloths (at least two: one for applying solution, one for buffing dry). Microfibre cloths trap dirt and moisture without leaving lint or scratches, which paper towels simply cannot match.
  • A squeegee with a clean, unscratched rubber blade.
  • A spray bottle for applying solution in a controlled, even mist.
  • A soft-bristled brush or vacuum with a narrow attachment for frames and tracks.
  • Distilled water or cooled boiled water, which avoids the mineral deposits that tap water leaves behind.
  • White vinegar (diluted: one part vinegar to four parts water) or a small amount of mild washing-up liquid in water.

What you should avoid is just as important. Ammonia-based products can damage tinted glass or window films over time, causing discolouration. Abrasive pads and scourers will scratch glass permanently. And whilst vinegar is useful, using too much or failing to rinse it off properly can leave a residue that actually attracts more dust.

Pro Tip: If you want to remove dirt from double glazing without any risk of residue, distilled water alone is often enough for light soiling and is the safest option for rubber seals around the glass.

Professional window cleaners take this even further. Pure water fed-pole systems use water filtered to remove all dissolved solids, leaving no mineral residue whatsoever. It is an option worth knowing about if your windows are particularly large or difficult to reach.

How to clean double glazing step by step

Cleaning a standard double-glazed window takes around 20 to 30 minutes when done properly. Rushing it is the main reason people end up with streaks.

Timing matters more than most people realise. Cleaning in direct sunlight causes your solution to evaporate before you can wipe it away, leaving streaks baked onto the glass. Early morning or overcast conditions give you the working time you need. This single change will improve your results immediately.

Follow these steps for both interior and exterior glass surfaces:

  1. Vacuum the frames and tracks first. Before you touch the glass, remove loose dust and debris from the surrounding frame and track with a soft brush or vacuum attachment. If you skip this, dirt will transfer back onto the glass the moment you open or close the window.
  2. Lightly mist the glass with your cleaning solution. Do not saturate the glass. A light, even spray is enough. Too much liquid runs into the frame seals and can cause long-term problems.
  3. Wipe with a microfibre cloth in straight horizontal strokes from top to bottom to lift the initial layer of dirt.
  4. Apply a second light mist and use your squeegee in an overlapping S-pattern, working from top to bottom. Wipe the squeegee blade with a clean cloth after each stroke.
  5. Buff the glass dry with a clean, dry microfibre cloth, paying attention to the edges where solution tends to pool.
  6. Check from an angle in natural light to catch any remaining streaks before they dry.

Pro Tip: For interior glass, a dry microfibre buff at the very end, using circular motions on any stubborn spots, will clear the last traces of streakiness without adding more liquid.

For upper-floor windows, many double-hung windows allow the sashes to tilt inward so you can clean the exterior glass safely from inside the room. Check whether your windows have this feature before considering ladders. If they do, press the tilt latch and bring the sash gently inward to access the outer surface.

These double glazing cleaning steps are worth bookmarking for your regular cleaning routine.

Infographic shows double glazing cleaning steps

How to clean window frames and tracks

Glass cleaning alone is not the best way to clean double glazing. Your frames and tracks do as much work visually and functionally, and neglecting them means dirt migrates back onto the glass almost immediately. If tracks and frames are not cleaned first, dirt gets redeposited onto glass during opening and closing, undoing your efforts quickly.

Different frame materials need slightly different approaches:

  • uPVC frames respond well to a solution of warm water and a small amount of washing-up liquid. Wipe with a soft cloth and rinse with clean water. Do not use cream cleaners or solvent-based products, as these cause surface dulling over time.
  • Timber frames need more care. Use a damp cloth rather than a wet one, and dry the frame promptly to prevent moisture from working into the wood grain. Inspect the paintwork or stain at the same time, as bare patches on timber frames are entry points for damp.
  • Aluminium frames are the most straightforward. Warm soapy water works well, and a dry buff at the end prevents water spotting.

For all frame types, the rubber seals around the glass deserve attention. Wipe them gently with a damp cloth to remove grime, and inspect them closely for cracking or hardening. A compromised seal is the first stage of a failing unit, and catching it early matters. For more on keeping your windows performing well over time, Cloudy2Clear Windows has guidance on maintaining double-glazed windows that goes further than cleaning alone.

When cleaning is not the answer

Cleaning double glazing window seals and frame


This is where homeowners most commonly get caught out. You clean the glass thoroughly, but the cloudiness or misting remains. That is because it is not on the surface at all.

Seal failure causes condensation and trapped dirt between the two panes of glass inside the sealed unit. No cloth, no spray, and no amount of scrubbing will reach it. The sealed unit is precisely that: sealed. The space between the panes contains an inert gas (typically argon) that provides the insulating effect, and once the seal fails, that gas escapes and moisture enters.

Here is a quick reference to help you identify what you are dealing with:


What you see Likely cause What to do
Streaks on surface Cleaning residue or technique Re-clean with correct method
Dirt on glass surface External soiling Clean with steps above
Misting between panes Seal failure Professional assessment needed
Permanent cloudiness inside panes Mineral or moisture deposit between glass Unit repair or replacement
Condensation on inside surface Poor ventilation in room Improve room ventilation


Some homeowners attempt to drill small holes into the sealed unit to dry it out or clean inside. This does not work and causes irreversible damage to the unit. The only genuine solutions to internal condensation are professional resealing, glass unit replacement, or full window replacement depending on the extent of the damage.

If you suspect seal failure, the right move is to get a professional assessment. Cloudy2Clear Windows has been diagnosing and repairing double glazing since 2005, and in many cases a unit replacement is far more affordable than a full window replacement. You can read more about realistic double glazing care tips to help extend the life of your units between professional checks.

Our take: technique beats products every time

Over the years, I have seen homeowners spend good money on specialist window cleaning sprays, only to get worse results than a bucket of diluted washing-up liquid and a proper squeegee technique. The routine maintenance with simple solutions consistently outperforms expensive chemical cleaners when the technique is sound.

The most common mistake I see is cleaning in the wrong conditions. People tackle windows on a sunny Saturday afternoon, and the solution dries faster than they can work. The resulting streaks look worse than the original dirt, and the instinct is to blame the product. Change the timing and the same cheap solution produces brilliant results.

The other misconception worth addressing is the idea that you can clean “inside” double glazing at home. I understand why people search for it. When you see misting or grime between the panes, the urge to fix it yourself is strong. But the physics of a sealed unit make DIY intervention impossible without causing further damage. Recognising that distinction early saves a lot of wasted effort and frustration.

My honest advice: build a simple cleaning routine every four to six weeks, use the right cloths and a squeegee, and do it on an overcast morning. You will be surprised how much better your windows look year-round. And when the problem is between the panes rather than on them, call someone who can actually fix it.

— Cloudy2Clear

Need professional help with your double glazing?

Even the best cleaning routine has limits. If you are dealing with persistent misting, failed seals, or damage that goes beyond surface dirt, Cloudy2Clear Windows can help.

https://www.cloudy2clearwindows.co.uk


Since 2005, Cloudy2Clear Windows has been repairing and replacing double glazed units for homeowners and property managers across the UK. Rather than replacing entire windows unnecessarily, the team identifies whether a unit repair is possible, which is typically faster and more cost-effective. Cloudy2Clear Windows serves a wide range of areas, including Oxford double glazing repairs, Milton Keynes, Watford, and Leicester. Commercial property managers are also welcome. If your windows need attention beyond a clean, get in touch with the team for an assessment.

Frequently asked questions

What is the best way to clean double glazing without streaks?

Clean on an overcast day or in the early morning to prevent solution from drying too fast. Use a squeegee in an overlapping S-pattern, then buff dry with a clean microfibre cloth.

Can I clean inside double glazed units at home?

No. The space between double glazed panes is sealed. Misting or dirt inside the unit is caused by seal failure and requires professional repair or unit replacement.

How often should I clean double glazed windows?

Every four to six weeks is a good general routine for most UK homes. Frames and tracks benefit from a light clean at the same time to prevent dirt transferring back onto the glass.

What should I avoid when cleaning uPVC window frames?

Avoid cream cleaners, solvent-based products, and abrasive pads. These dull and scratch the uPVC surface. Warm soapy water and a soft cloth are sufficient for routine cleaning.

How do I know if my double glazing needs repairing rather than cleaning?

If you see misting, cloudiness, or dirt sitting between the two panes of glass rather than on the surface, that is a sign of seal failure. Cleaning will not resolve it; a professional assessment is needed.

What is toughened safety glass? UK guide

Most people assume all glass is broadly the same. It is not. What is toughened safety glass, and why does it matter for your home or business? It is a specially treated product that performs dramatically differently from ordinary glass. Get the specification wrong, and you may be breaching UK Building Regulations without realising it. Get it right, and you have a product that is safer, stronger, and more versatile than anything standard glazing can offer. This guide covers exactly what you need to know.

What is toughened safety glass?

Toughened safety glass, also widely known as tempered safety glass, is ordinary glass that has been put through a controlled thermal treatment process to dramatically change its physical properties. Here is how it works.

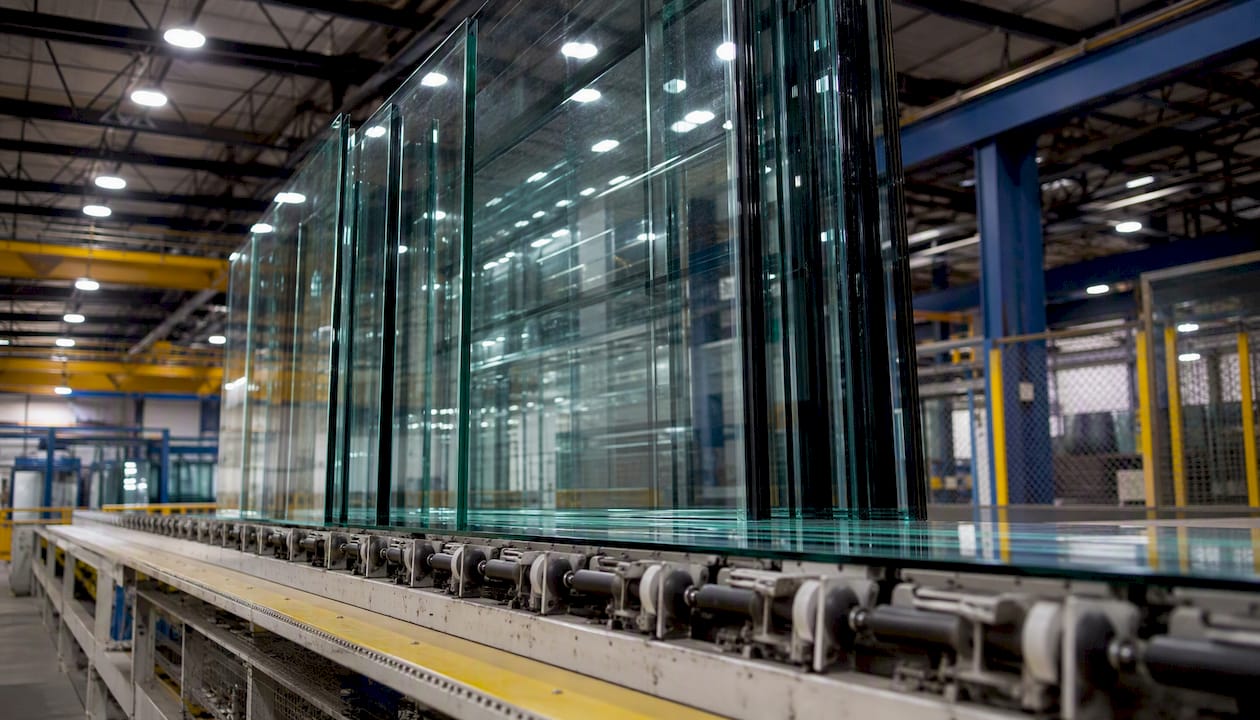
The glass is heated in a furnace to around 620°C and then rapidly cooled using a process called quenching, where jets of cool air are blasted across both surfaces simultaneously. This rapid cooling causes the outer surfaces to contract and harden before the inner core has finished cooling. The result is a permanent state of compressive stress on the surface, with tensile stress held in the centre. That internal tension is exactly what gives toughened glass its remarkable mechanical performance.

The practical outcome is significant. Toughened glass is approximately five times stronger than ordinary annealed glass of the same thickness. It also withstands temperatures up to around 250°C, making it far more resistant to thermal stress than standard glazing.

Crucially, when toughened glass does break, it behaves very differently from ordinary glass. Rather than fracturing into long, razor-sharp shards, toughened glass shatters into small blunt cubes. These pieces are far less likely to cause serious lacerations, which is the whole point of calling it safety glass.

Closeup of broken toughened glass fragments


One thing worth knowing before you purchase: all cutting, drilling, and shaping must be done before the toughening process. Once treated, the glass cannot be cut or modified. Any attempt to do so will cause it to shatter completely.

Pro Tip: Always confirm your glass measurements and any required cut-outs for handles or fittings before ordering toughened glass. Changes cannot be made once it has been through the toughening process.

Benefits of toughened glass for UK properties

The advantages of toughened glass go well beyond simply meeting a legal standard. Here is what makes it a genuinely smart choice for homes and businesses across the UK.

  • Significantly stronger. At roughly five times the strength of standard glass, toughened glazing resists impact from accidental knocks, flying debris, and everyday use far more effectively.
  • Safer when broken. The small, blunt fragments produced on breakage greatly reduce the risk of serious injury, making it the right choice anywhere people are close to glazed surfaces.
  • Thermally resistant. With a tolerance of up to 250°C, it handles temperature fluctuations in kitchens, conservatories, and south-facing rooms without warping or cracking under heat stress.
  • Versatile for installation. Because of its strength, toughened glass supports frameless designs such as glass balustrades, structural partitions, and shower enclosures, giving architects and homeowners far more flexibility.
  • Cost-effective. Compared to laminated safety glass, toughened glass typically costs £15 to £30 more per pane than standard glass, making it the more affordable safety upgrade.

Pro Tip: If you are refurbishing a bathroom or fitting a new shower enclosure, toughened glass is specifically recommended over other glass types. Its safe breakage behaviour is particularly valuable in wet environments where a slip or fall could result in contact with glazing.

The durability of toughened glass also reduces long-term maintenance costs. It is less likely to scratch or chip during installation and handles the kind of incidental contact that would crack or scratch standard glass with relative ease.

UK regulations and where toughened glass is required

UK Building Regulations Approved Document K sets out clear requirements for safety glazing in critical locations. If you are renovating, building, or replacing glass in your property, these rules apply to you directly.

Safety glass is legally required in the following critical zones:

Location Critical dimension
Glazed doors (full and partial) Glazing within 1,500mm from floor level
Side panels adjacent to doors Glazing within 300mm of the door frame
Low-level windows and panels Glazing below 800mm from floor level


In these areas, the glass must either break safely (as toughened glass does) or be robust enough to resist breakage. The regulations do not specify toughened glass by name. UK law requires safe breakage or robustness, not a specific product, meaning laminated glass or a physical barrier can also fulfil the requirement in some circumstances.

That said, toughened glass is by far the most common and cost-effective way to meet the standard, which is why it is the default choice across residential and commercial projects in the UK.

For businesses and commercial premises, the rules are particularly firm. Workplace glazing under UK Regulation 14 requires that doors and partitions use either toughened or laminated glass, and safety glass must be appropriately marked. On larger glazed surfaces, manifestation markings are also required to prevent collisions, such as frosted bands or patterns at eye level.

See our guide on safety glass requirements for a broader breakdown of how these regulations apply to different property types.

Toughened vs laminated glass: which should you choose?

Both toughened and laminated glass qualify as safety glazing under UK regulations, but they are made differently and behave differently in use. Understanding those differences helps you choose the right product for each application.

Infographic comparing toughened and laminated glass features


Laminated glass is made from two or more panes bonded together with a polyvinyl butyral (PVB) interlayer. When it breaks, the fragments stay attached to the interlayer rather than scattering. Toughened glass shatters into small blunt cubes, while laminated glass holds the broken pieces together. Neither outcome causes the jagged laceration risk associated with ordinary annealed glass, but the practical results are quite different.

Here is a direct comparison to help you decide:

Feature Toughened glass Laminated glass
Strength vs standard glass Up to 5x stronger Moderate increase
Breakage behaviour Shatters into small blunt pieces Cracks but stays bonded
Post-breakage opening Yes (glass falls away) No (interlayer holds fragments)
Typical cost premium per pane £15 to £30 £30 to £60
Best suited for Doors, windows, showers, balustrades Overhead glazing, security, noise reduction
Can be cut after manufacture No Yes (with care)


The key consideration is what happens after breakage. In areas where you need the glass to remain in place after an impact, such as overhead rooflights, skylights, or security-sensitive areas, laminated glass is the preferred option. For everything from residential doors and side panels to shopfronts and shower screens, toughened glass delivers the right balance of strength, safety, and value.

For a full breakdown of when laminated glass is the better choice, the laminated glass guide from Cloudy2Clear Windows is worth reading alongside this article.

Choosing and installing toughened glass in your property

Making the right choice about safety glazing starts with an honest assessment of your property and what the regulations require of you.

  1. Identify your critical zones. Walk through your property and check any glazing near doors, at low level, or in areas with heavy foot traffic. If any of those panes are standard annealed glass, they may not be compliant.
  2. Check what you are replacing. Replacing annealed glass with more annealed glass in a safety-critical location is a breach of UK Building Regulations. Any like-for-like replacement in a critical zone must use safety glass.
  3. Budget realistically. Toughened glass costs roughly £15 to £30 more per pane than standard glass. On a whole-house renovation, that is a modest additional spend for a significant safety improvement.
  4. Always use a qualified installer. Toughened glass must be specified and fitted correctly to perform as intended. An experienced glazier will also select the right glass type and confirm compliance with Approved Document K.
  5. Look for the kite mark. Compliant toughened safety glass is marked with the British Standards kite mark (BS EN 12150). Always check for this marking when purchasing or verifying installed glass.
  6. Plan modifications before ordering. Toughened glass cannot be cut or drilled after manufacture. Confirm your exact dimensions, frame specifications, and any hardware requirements before placing an order.

Pro Tip: If you are unsure whether the glazing in your property meets current safety standards, a professional glazing survey is a worthwhile investment. A qualified installer can check each pane against Approved Document K requirements and identify any glazing that poses a risk or breach.

My take on toughened glass after 20 years in the trade

I have visited hundreds of properties across the UK where the glazing around doors and low-level windows was still the original annealed glass from decades ago. The owners had no idea it was non-compliant, and in many cases, no idea how much of a hazard it represented.

What I have learned is that most people do not avoid toughened glass because of cost. They avoid it because nobody has explained what it actually does, or told them clearly that the law requires it in certain locations. Once they understand that replacing annealed glass in critical zones with more of the same breaches Building Regulations, the conversation changes immediately.

My honest opinion: toughened glass is the right call for the vast majority of residential and commercial applications in the UK. It is not just about ticking a compliance box. It genuinely performs better, breaks more safely, and costs less than people assume. The gap between toughened and standard glass in price terms is small. The gap in safety is not.

Where I have seen laminated glass genuinely earn its higher cost is in overhead glazing and situations where security is the priority. For everything else, toughened glass does the job better and for less money. Do not let the slightly higher upfront cost put you off. The cost of not having it in the right place is far greater.

— Cloudy2Clear Windows

How Cloudy2Clear Windows can help

If this article has prompted you to look more closely at the glazing in your home or business, Cloudy2Clear Windows is ready to help.

https://www.cloudy2clearwindows.co.uk


Established in 2005, Cloudy2Clear Windows has been installing, replacing, and repairing double glazed units across the UK for over two decades. The team works across both residential and commercial properties, covering areas including Milton Keynes, Watford, Oxford, Leicester, and Bury St Edmunds, among many others. Whether you need a single pane replaced in Milton Keynes, safety glass fitted at your Watford commercial premises, or a full assessment of your glazing compliance, the team brings the expertise to get it right.

For businesses, Cloudy2Clear Windows also offers a dedicated commercial window repair service covering toughened glass installation, replacement, and compliance work across a wide range of sectors. All work is carried out to UK Building Regulations standards, giving you peace of mind that your glazing is not just safe but fully compliant.

Get in touch with Cloudy2Clear Windows for a quote or a glazing consultation. It is a straightforward conversation that could save you from a costly compliance issue down the line.

FAQ

What is the difference between toughened and tempered glass?

There is no practical difference. Toughened glass and tempered glass are the same product, just referred to by different names. Both terms describe glass that has been heat-treated and rapidly cooled to increase strength and produce a safer breakage pattern.

Yes, in specific locations. UK Building Regulations Approved Document K requires safety glazing in glazed doors within 1,500mm of the floor, side panels within 300mm of a door, and low-level glazing below 800mm. Toughened glass is the most common way to comply, though laminated glass is also acceptable.

How strong is toughened glass compared to ordinary glass?

Toughened glass is approximately five times stronger than standard annealed glass of the same thickness. This makes it significantly more resistant to impact, thermal stress, and everyday wear.

Can toughened glass be cut or drilled after manufacture?

No. All cutting, drilling, and shaping must be completed before the glass undergoes the toughening process. Attempting to modify toughened glass after treatment will cause it to shatter entirely.

What does toughened glass cost compared to standard glass?

Toughened glass typically costs £15 to £30 more per pane than standard glass. Laminated safety glass carries a higher premium of £30 to £60 per pane, making toughened glass the more cost-effective safety glazing option for most applications.

What is an A-rated window? UK guide 2026

If you have been browsing window quotes and stumbled across terms like “A-rated” or “WER B,” you are not alone in feeling unclear about what they actually mean. Understanding what is an A-rated window matters because it directly affects your heating bills, home comfort, and even your property’s energy certificate. The British Fenestration Rating Council (BFRC) operates a window rating scale that runs from G all the way to A++, and knowing where A sits on that scale, and whether it is right for your home, can save you both money and frustration.

What is an A-rated window and how is it measured?

Window energy ratings in the UK are governed by the BFRC, which independently certifies and labels windows based on their overall thermal performance. The BFRC rating scale runs from G to A++, with G being the least efficient and A++ the highest performing. An A-rated window sits near the top of this scale. It is considered excellent, but it is worth knowing that A+ and A++ options do exist for those who want to go further.

The rating is not based on a single measurement. It combines three factors:

  • U-value: How much heat passes through the window. Lower is better. A-rated windows typically achieve around 1.0 to 1.2 W/m²K.
  • Solar gain: How much warmth from sunlight the window captures and lets into the room, which can offset heating costs.
  • Air leakage: How much cold air infiltrates around the frame and seals.

One common misconception is that the rating refers only to the glass. The BFRC certification covers the complete window unit, including the frame, seals, and spacer bars. This is why two windows using the same glass but different frames can end up with different ratings.

Rating band Typical U-value (W/m²K) Performance level
G 5.0+ Very poor
D 2.8–3.5 Below average
B 1.4–1.6 Meets legal minimum
A 1.0–1.2 Excellent
A+ 0.8–1.0 Superior
A++ ~0.8 or below Highest available


Pyramid infographic of UK window ratings

UK building regulations and A-rated windows

Understanding the legal minimum is just as useful as understanding the top of the scale. Under Part L 2022 building regulations, replacement windows in England must meet at least a WER band B or a maximum U-value of 1.4 W/m²K. This applies to most domestic window replacements.

A-rated windows exceed this minimum by a meaningful margin. Where B-rated windows barely satisfy the rules, A-rated products offer noticeably better insulation and lower running costs. For property managers overseeing multiple units, this distinction can add up to significant savings across a portfolio.

Here is what you need to know about compliance:

  • Replacement windows must meet Part L 2022 as a legal baseline.
  • Using a FENSA or CERTASS registered installer ensures your installation is signed off and compliant.
  • Installations not certified by a registered body may require a local authority building control application, which adds time and cost.
  • A better energy rating can improve your property’s Energy Performance Certificate (EPC) score, which matters for lettings compliance and resale value.

Pro Tip: If you are a landlord, check whether your property currently meets the Minimum Energy Efficiency Standards (MEES). Upgrading to A-rated windows can contribute meaningfully to raising an EPC band.

Benefits of A-rated windows for homeowners

Moving from a lower-rated window to an A-rated one brings real, everyday improvements. The most immediate is warmth. Rooms feel more comfortable because there are fewer cold spots near the glass and less draughty air creeping through the frame.

Window installer measuring bay window frame


On the cost side, upgrading to A-rated windows typically costs around £50 to £150 more per unit compared to lower-rated alternatives. Over time, the reduction in heat loss offsets this through lower heating bills. For context, A++ triple glazing, which sits above A-rated, costs significantly more at around £800 to £1,200 per window installed, but can save up to £420 per year on heating in the right property.

Key benefits at a glance:

  • Reduced heat loss through the glass and frame, lowering the demand on your boiler.
  • Fewer draughts and cold spots, making living spaces more consistently comfortable.
  • Lower carbon footprint over the product’s lifetime.
  • Improved acoustic performance in many products, as thicker glass units reduce outside noise.
  • Better property value and EPC rating, which helps with sales and rental compliance.

It is worth noting that your home’s orientation and heating patterns affect how much you benefit. A north-facing room will gain less from solar gain than a south-facing one, so the best window for your home depends on more than just the letter on the label.

Pro Tip: Ask your installer to consider room orientation when specifying windows. A window with a higher solar gain factor may suit south-facing rooms more than a slightly lower U-value.

Common misconceptions about A-rated windows

A lot of the confusion around window ratings comes down to misunderstanding the difference between U-value and WER. The U-value measures heat loss alone. The Window Energy Rating combines heat loss, solar gain, and air leakage into one overall score. This means a window with a better U-value does not automatically have a better WER, because solar gain and air tightness also count.

Here are the most important things to get right when choosing A-rated windows:

  1. Verify the BFRC label. Do not rely on a manufacturer’s marketing claims. Ask to see the BFRC certificate, which enables a genuine like-for-like comparison between products.
  2. Check the spacer bars. Aluminium spacer bars can add 0.2 to 0.4 W/m²K to the effective U-value of a window. Warm-edge spacers reduce this thermal bridging and are specified in most quality A-rated products.
  3. Do not assume A++ is always worth the premium. A++ windows use triple glazing, low-emissivity coatings, and insulated frames to achieve U-values of around 0.8 W/m²K or lower. These are excellent products, but the additional cost is only justified if your property’s heat loss profile makes that extra performance worthwhile.
  4. Prioritise installation quality. Poor sealing around the frame can introduce air leakage that negates much of the thermal benefit, even in a top-rated window.
  5. Use registered installers. FENSA or CERTASS registration is not just a bureaucratic tick. It means the installation has been checked against Building Regulations.

“The rating on the sticker is only half the story. What happens during installation, from frame sealing to spacer bar choice, determines whether you actually get the performance you paid for.”

How windows impact insulation is a broader topic than most buyers realise, and it starts long before the glass arrives on site.

How to choose A-rated windows with confidence

Once you understand the basics, buying A-rated windows becomes a straightforward process if you ask the right questions. Here is a practical checklist to take into any conversation with a supplier or installer:

  • Ask for the BFRC label and certificate for the specific window model you are being quoted on, not a generic product brochure.
  • Compare whole-window ratings, not just glass specifications. Two windows can use the same double-glazed unit but perform very differently depending on the frame material and construction.
  • Ask about spacer bar type. Confirm warm-edge spacers are included as standard, particularly if you are targeting an A-rating or above.
  • Request the U-value and solar gain factor separately, not just the overall rating letter. This helps you match the window to your specific rooms.
  • Confirm the installer’s registration. Ask whether they are FENSA or CERTASS registered before signing any contract.

You can learn more about selecting glazing for efficiency and what frame materials work best alongside high-energy-rated glass. For a step-by-step approach to the full process, Cloudy2Clear Windows has published a guide to energy efficient window upgrades that walks you through every stage.

Pro Tip: When comparing quotes, always check whether VAT is included and whether building regulation compliance certification is provided as part of the service. Some cheaper quotes exclude both.

My honest take on A-rated windows

I have seen a lot of homeowners make the same two mistakes. The first is buying on rating letter alone without verifying the BFRC certificate or asking about installation quality. The second is going straight for A++ when an A-rated product would have given them virtually the same comfort improvement at a fraction of the extra cost.

In my experience, A-rated windows represent the right balance for most UK homes. They deliver genuine, measurable thermal performance, they exceed legal minimums by enough to be worthwhile, and they sit at a price point where the payback period is realistic. Not every property needs triple glazing. A well-installed A-rated window with warm-edge spacers and a quality frame will outperform a poorly fitted A++ product every time.

What I always say is this: prioritise the certification, the installer’s registration, and the quality of the components. The letter on the label matters, but it only tells you what the window can do. A registered, experienced installer is what determines what it will do in your home.

— Cloudy2Clear Windows

Ready to upgrade to A-rated windows?

Cloudy2Clear Windows has been supplying and installing energy-efficient glazing across the UK since 2005. Whether you need advice on which rating suits your property, a quote for A-rated replacements, or a repair to an existing double glazed unit, the team is ready to help.

https://www.cloudy2clearwindows.co.uk


With branches covering a wide range of regions, you can access expert advice and certified installation locally. If you are in the Milton Keynes area, the Cloudy2Clear Milton Keynes branch can discuss your glazing options and provide BFRC-certified products installed by registered professionals. For those further afield, explore the full double glazing replacement service to find the right solution for your home or commercial property.

FAQ

What does A-rated mean for a window?

An A-rated window has been independently certified by the BFRC and scores near the top of the energy rating scale, which runs from G to A++. It combines strong heat retention, useful solar gain, and low air leakage into a single performance score.

No. UK building regulations under Part L 2022 require replacement windows to achieve at least a WER band B or a U-value of no more than 1.4 W/m²K. A-rated windows exceed this minimum and are recommended for better long-term energy savings.

How much more do A-rated windows cost?

Upgrading to A-rated windows typically costs around £50 to £150 more per window compared to lower-rated options. This additional upfront cost is generally recovered over time through reduced heating bills.

Is A++ always better than A-rated?

A++ windows offer superior insulation, particularly through triple glazing, but they cost significantly more. For many UK homes, A-rated windows deliver excellent performance at a more realistic budget, and the extra cost of A++ is not always justified by the energy savings achieved.

How do I verify that a window is genuinely A-rated?

Ask the supplier or installer for the BFRC certificate specific to the window model. The BFRC label covers the complete unit, including frame and seals, so it gives you a reliable and standardised basis for comparison.

Misty windows: how to diagnose and fix the problem

Many homeowners treat misty windows as an unavoidable side effect of British weather. A quick wipe and it is gone, right? Not always. What looks like everyday condensation can actually be a signal that your double glazing has failed internally, and no amount of wiping will fix it. Warm moist air meeting cold glass is what typically triggers condensation, especially in autumn and winter, but the cause determines everything about the right solution. This article walks you through exactly how to tell the difference and what to do next.

What causes misty windows and how to tell the difference

Understanding why your windows turn misty is the first step to solving the problem correctly. Condensation forms when warm moist air meets a cold surface, causing water droplets to appear. That much is well known. What trips people up is assuming all window misting is the same.

There are two distinct problems that look similar but require completely different responses:

  • Surface condensation forms on the inside face of the glass. It is caused by high indoor humidity and cold glass. You can wipe it off with a cloth. It tends to appear in the morning, especially in winter, and often clears as the room warms up.
  • Sealed-unit failure (also called internal misting) is when moisture is trapped between the two panes of your double glazing. You cannot wipe it away because it is inside the unit. It may look hazy, streaky, or cloudy regardless of the weather outside.

The key diagnostic test is simple: run your finger across the glass. If the mist wipes clean, it is surface condensation. If the haziness is still there, the glazed unit has failed and moisture has entered the sealed cavity.

Feature Surface condensation Sealed-unit failure
Location On the glass surface Between the panes
Can be wiped away? Yes No
Cause High humidity, cold glass Failed hermetic seal
Seasonal pattern Mostly autumn and winter Year-round, persistent
Solution Ventilation and humidity control Sealed unit replacement


Man testing window condensation with finger


Surface condensation is seasonal and manageable. Internal misting is permanent until the unit is replaced. Knowing which one you are dealing with saves you time, money, and frustration.

Now that we understand the nature of misty windows, we can explore how to manage and prevent surface condensation effectively.

Managing and preventing surface condensation effectively

Surface condensation is common across homes and businesses in England and Scotland, particularly in winter when heating is running and windows stay closed. The good news is that most cases respond well to straightforward changes. Ventilation improvements such as daily airing and using extractor fans during cooking or showering are the most effective starting points.

Here is a practical sequence to follow:

  1. Open windows briefly each morning. Even five to ten minutes allows moist overnight air to escape. This single habit makes a noticeable difference in bedroom and bathroom windows.
  2. Use extractor fans in kitchens and bathrooms. These rooms generate the most moisture. Leave fans running for a few minutes after cooking or showering.
  3. Avoid drying clothes on indoor radiators. A single load of washing releases around two litres of moisture into the air as it dries. Use a tumble dryer or dry clothes outside where possible.
  4. Keep curtains open during the day. Closed curtains trap cold air against the glass and reduce airflow, making condensation worse.
  5. Maintain indoor humidity between 40% and 50%. This range is comfortable for occupants and low enough to prevent persistent condensation.

You can also take a few targeted steps to reduce moisture at the source:

  • Place moisture-absorbing products near particularly cold or north-facing windows
  • Ensure trickle vents in window frames are open and unblocked
  • Check that loft and wall insulation is adequate, as poorly insulated walls create cold spots that attract condensation
  • Learn more about long-term strategies with these condensation prevention tips for double glazing

For a more detailed guide on protecting your double glazed units from moisture damage, you can also read about how to prevent condensation in double glazed windows.

Pro Tip: Buy a hygrometer (a small device that measures indoor humidity) and place one in rooms where condensation is worst. They cost around £10 to £15 and take the guesswork out of whether your ventilation efforts are working.

Once surface condensation is controlled or ruled out, we turn to solutions for internal sealed-unit failure and misted double glazing.

Understanding and repairing misted double glazing units

A double glazed unit is made up of two panes of glass with a sealed cavity between them, usually filled with argon gas for insulation. When the hermetic seal (the airtight bond around the edge of the unit) fails, outside moisture enters that cavity. The result is permanent internal fogging that no amount of cleaning or ventilation will shift.

Seal failure typically happens due to age, heat exposure, or frame movement over time. Once it fails, your options are straightforward:

  • Sealed unit replacement: The failed glass unit is removed from the existing frame and replaced with a new one. The frame itself stays in place. This is the standard repair and is suitable for most windows.
  • Full window replacement: The frame and glass are both replaced. This is only necessary if the frame is damaged, warped, or structurally compromised.

The cost difference is significant. Sealed unit replacement typically costs £80 to £250 per pane including fitting, making it far more economical than full window replacement.

Repair type Typical cost (per window) When it is appropriate
Sealed unit replacement £80–£250 Seal failure, frame intact
Full window replacement £400–£900 Frame damaged or severely aged
DIY defogging kits £20–£60 Not recommended (temporary at best)


For a full breakdown of what to budget, the double glazing repair costs UK guide covers current pricing across different window types and regions.

The cost of replacing misted double glazed units is often far lower than people expect, which is why getting a quote before assuming you need full replacement is always worth doing.

Pro Tip: Get at least three written quotes from registered installers before committing to any repair. Prices vary considerably, and having multiple quotes helps you identify fair pricing and avoid unnecessary upselling.

With costs and repair options clear, let us review some practical tips homeowners can use while managing misty window issues.

Temporary fixes and expert tips for homeowners

Before your repair appointment, or while you are deciding on next steps, there are a few things you can try to manage the issue. These are not permanent solutions, but they are practical in the short term.

For surface condensation only, a small amount of washing-up liquid spread thinly across the glass can temporarily reduce misting by altering how water droplets form on the surface. It is not a fix, but it can reduce the visual impact while you put longer-term measures in place.

Here is what else you can do in the short term:

  • Keep radiators clear of furniture and curtains so warm air circulates freely
  • Open trickle vents on window frames to encourage airflow
  • Use a small dehumidifier in rooms with persistent condensation
  • Check window cleaning methods for keeping glass surfaces in the best condition during this period

What to avoid is equally important. DIY defogging kits sold online claim to inject solutions between the panes and clear the misting. Some produce short-term results, but they do not restore the seal or the insulation value of the unit. In some cases, they can introduce additional moisture or chemicals into the cavity.

‘Professional sealed unit replacement is the only permanent solution for misted double glazing.’ — Home Careness

The most useful step you can take is an accurate diagnosis. Understanding how to identify and solve types of window condensation helps you move forward with confidence rather than spending money on approaches that will not last.

Pro Tip: Keep radiators on a low, consistent setting rather than blasting heat on and off. Dramatic temperature swings accelerate seal degradation and contribute to surface condensation.

Understanding temporary fixes prepares homeowners to take informed next steps when addressing misty window problems.

Choosing and working with professionals for double glazing repairs

Finding the right glazier matters. Not just for the quality of the repair, but for avoiding unnecessary costs. Some installers will recommend full window replacement when only the sealed unit needs attention. Obtaining at least three quotes from registered installers ensures you have a fair basis for comparison.

When searching for a professional, keep the following checklist in mind:

  • Look for FENSA-registered glaziers. FENSA is the UK’s primary competent persons scheme for window installation and replacement. Registration means the installer meets industry standards and their work is automatically registered with the local authority.
  • Ask for itemised written quotes. A trustworthy installer will break down costs clearly, including call-out charges, glass unit costs, and fitting fees separately.
  • Confirm exactly what is being replaced. If your frame is sound, you should only be quoted for the sealed unit, not the full window.
  • Ask about guarantees. Reputable glaziers typically offer a guarantee on both the sealed unit and their workmanship, often for five to ten years.
  • Check reviews and regional availability. A local installer with strong reviews in your area is usually a safer choice than a national call centre with subcontracted labour.

Expect a single window sealed unit replacement to take between one and two hours from start to finish. The process is not particularly disruptive, and you should have a clear, properly sealed window by the time the job is done.

If you are based in Scotland, our team covering double glazing repairs in Glasgow and Ayr is available to assess and repair failed sealed units. Further south, our double glazing repairs in Oxford team covers the surrounding region too.

A fresh take on misty windows: balancing DIY and professional repairs

Here is something we have observed over nearly two decades of working with homeowners across England and Scotland: most people either do too little or too much.

They either ignore misted windows for years, assuming it is just cosmetic, or they panic and authorise full window replacements that were never necessary. Both responses are understandable. Neither is ideal.

The honest truth is that the majority of foggy window problems fall into one of two categories. Either it is surface condensation, which costs nothing to fix beyond some ventilation habit changes, or it is sealed-unit failure, which is almost always repairable without replacing the whole window. Mist between panes is caused by seal failure and cannot be resolved by household cleaning methods, but the sealed unit itself is a replaceable component.

What homeowners often overlook is frame condition. If you have an older property with original timber or uPVC frames that are warped, rotting, or poorly fitted, addressing only the glass unit may leave you with the same problem within a few years. A good glazier will flag this before starting work. One who does not mention the frame condition at all is worth being cautious about.

There is also a strong case for monitoring multiple windows at once. Seal failures rarely happen in isolation. If one unit has failed on a set of windows installed at the same time, others are likely not far behind. Grouping repairs in a single visit saves on call-out charges and fitting costs. Staying proactive about preventing condensation in double glazed windows extends the life of your units considerably.

Pro Tip: Walk around your property on a cold morning and check every window for persistent haze. Catching multiple failing units early and grouping the repairs is one of the most practical ways to keep costs down.

Professional double glazing repair services with Cloudy2Clear Windows

If you have worked through this guide and realised your windows need professional attention, we are here to help. At Cloudy2Clear Windows, we have been repairing and replacing failed sealed units across England and Scotland since 2005. Our focus has always been on replacing only what needs replacing, keeping your existing frames wherever possible and saving you money in the process.

https://www.cloudy2clearwindows.co.uk


We cover a wide range of locations, including double glazing repairs in Milton Keynes, repairs in Oxford, and many other areas across England and Scotland. Our glaziers use quality sealed units backed by manufacturer guarantees, and every quote we provide is transparent and itemised. There is no pressure to replace full windows when a sealed unit repair will do the job properly. If you are ready to clear up your misty windows for good, explore our double glazing glass replacement service and get in touch with your local branch today.

Frequently asked questions

What causes windows to become misty between the panes?

Misting between panes means the hermetic seal on your insulated glass unit has failed, allowing moisture to enter and condense inside the glass cavity where it cannot be wiped away.

Can I fix misty windows myself?

For surface condensation, improving ventilation can reduce the problem, but DIY defogging attempts are unreliable for sealed-unit failure. Professional sealed unit replacement is the only permanent solution for internal misting.

How much does it cost to replace a misted double glazed unit in the UK?

Sealed unit replacement typically costs between £80 and £250 per pane including fitting, which is usually considerably less expensive than full window replacement.

How can I prevent surface condensation on my windows?

Reduce indoor humidity and improve ventilation by briefly airing rooms each morning, using extractor fans during cooking and showering, and keeping air circulating freely near windows.

Should I replace the entire window if my double glazing is misty?

Not usually. The glass unit and frame are separate components, and replacing only the sealed unit is typically sufficient unless the frame itself is damaged or structurally compromised.