• USP Logo Icon
    25 Year Guarantee
  • USP Leaf Icon
    Latest ECO Friendly Technology
  • USP Pointer Icon
    National Coverage
Get a FREE quote

Prevent window leaks: the essential checklist for UK homes

Double glazing offers excellent insulation and weather protection, but it is not immune to leaks. Many UK homeowners and business owners are caught off guard when water finds its way inside during a heavy downpour, despite having relatively modern windows installed. The truth is that most window leaks are not sudden failures; they are the result of gradual neglect and small issues that compound over time. This guide gives you a practical, expert-backed checklist to help you stay ahead of leaks, protect your property, and avoid the costly consequences of water damage working its way silently through your building.

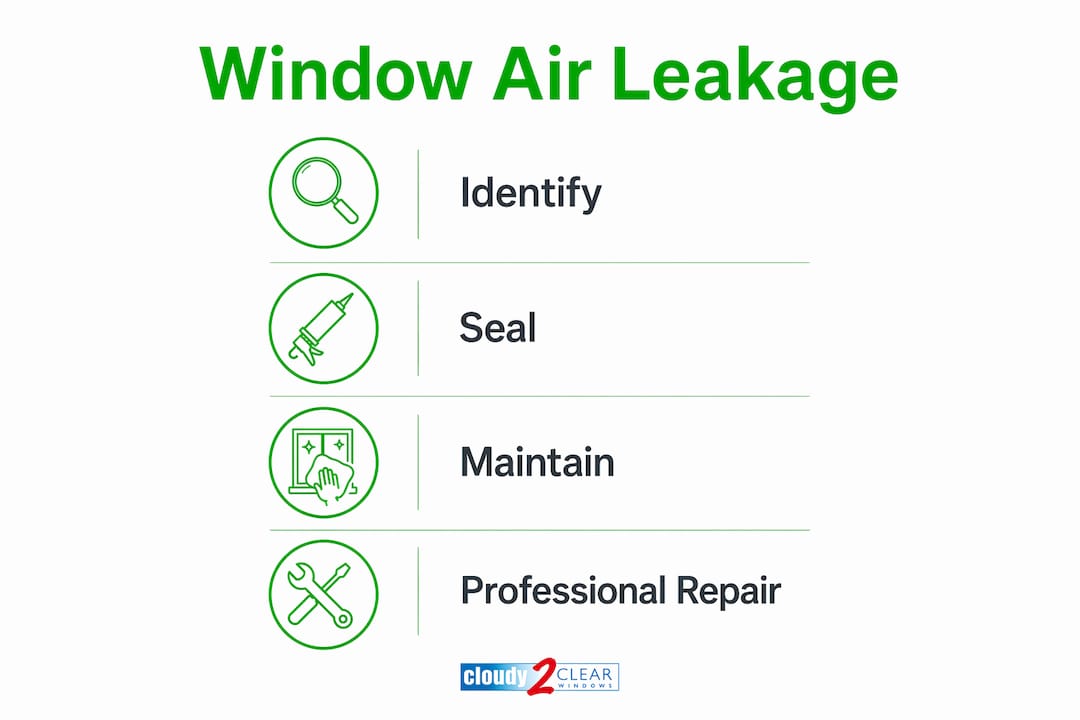
Core checklist for preventing window leaks

After introducing the need for a preventative mindset, let’s break down the essential steps into a practical checklist you can follow regularly. These steps are straightforward, require no specialist tools for the most part, and can genuinely save you hundreds or even thousands of pounds in repairs if followed consistently.

  1. Inspect your window seals twice a year. Regularly inspect seals for cracks, gaps, shrinkage, or brittleness every spring and autumn. Run your finger along the perimeter seal where the frame meets the wall and where the glass meets the frame. Any seal that feels hard, cracked, or has visible gaps needs attention. Soft, pliable, unbroken sealant is your first line of defence against rainwater entry.
  2. Clean drainage channels and weep holes. Weep holes are small openings built into uPVC and aluminium frames that allow rainwater to drain away rather than pool and seep inside. Clean drainage channels and weep holes one to two times per year. Use a thin tool such as a matchstick or cotton bud to clear compacted dirt. Pay particular attention after winter when debris can build up or after any exterior painting work, as paint is a common culprit for blocked weep holes.
  3. Lubricate moving parts annually. Hinges, locks, and handles that stiffen over time can stop your window from closing fully and creating a proper seal. Lubricate hinges and locks annually using a silicone-based lubricant rather than oil-based products, which can attract dirt and damage rubber seals. A few minutes with a can of silicone spray keeps everything moving smoothly and ensures your window closes snugly every time.
  4. Check frames for warping, paint failure, and loose hardware. Check for frame warping and peeling paint, and tighten any loose screws in hinges or handles. A warped frame, even slightly, can create a gap through which wind-driven rain enters. Wooden frames in particular can expand and contract with seasonal changes, making this check especially important for older properties.
  5. Test your windows for draughts. On a windy day, hold your hand around the window frame edge. Any cool air movement indicates a gap in the seal. You can also use a lit incense stick; if the smoke wavers near the frame, air is getting through. Where air gets in, water will follow.
  6. Examine the external mastic or silicone bead. The external bead is the thin line of sealant applied where the frame meets the brickwork or render. Over time, UV exposure and thermal movement cause this to crack or shrink away from the surface. Reapplying external sealant is a straightforward DIY task if the gap is small, but for larger failures, professional fixing window leaks may be necessary.
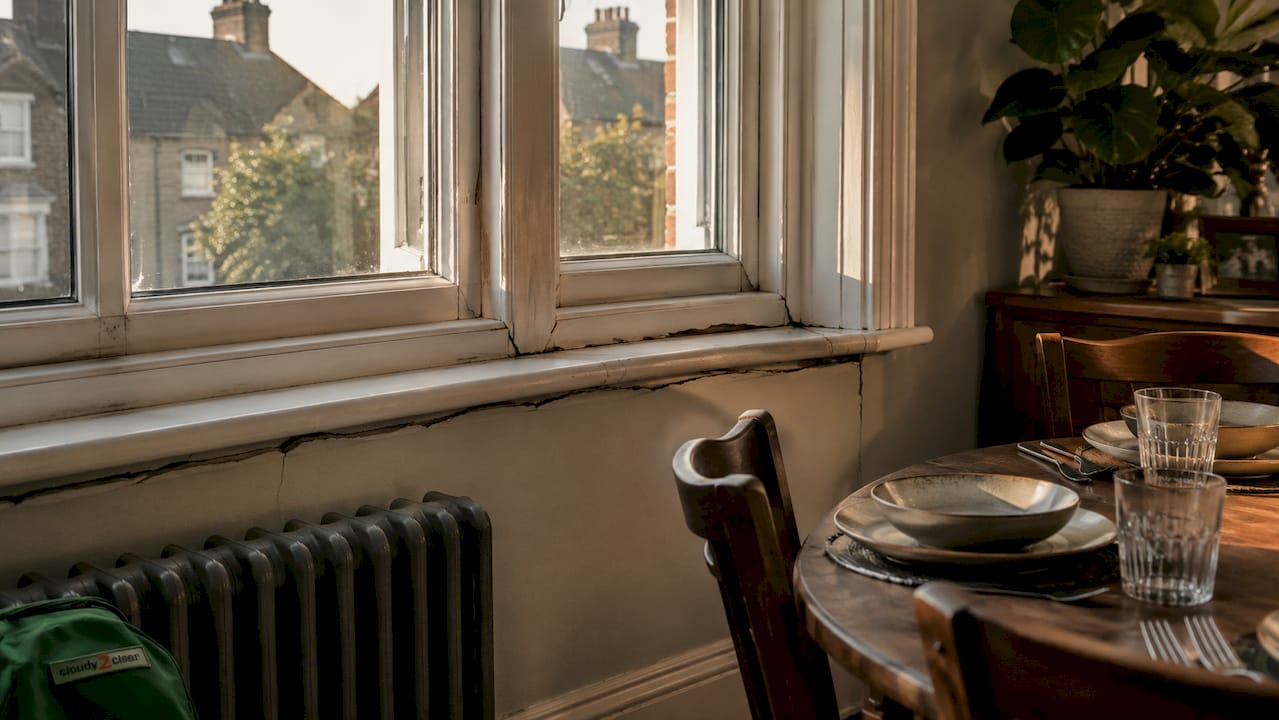
  7. Inspect for signs of water ingress internally. Look at walls and window boards below and around your windows for water staining, bubbling paint, or soft plasterboard. These are indicators that detecting water leaks may already be happening behind the surface, even if no puddle is visible.

Pro Tip: Add these checks to your spring cleaning and autumn maintenance routines so they become habits. Setting a recurring reminder on your phone takes seconds and could save you a significant repair bill down the line.

Recognising the warning signs of leaks

Once you know what to check, it is equally important to spot the symptoms of trouble in time. Many leaks give clear signals well before they become serious problems, and catching them early makes all the difference.

  • Puddles or water trails near windows after rain. Even small amounts of water collecting on an internal window sill after heavy rain are not normal and warrant investigation.
  • Condensation between the two panes of glass. This is a very specific symptom. If you see misting or droplets between the panes rather than on the surface, the sealed unit’s internal seal has failed. Read more about condensation and double glazing to understand what this means for your windows.
  • Black mould, musty smells, or peeling paint around frames. These are signs of persistent moisture sitting in or around the frame. Mould is a health concern as well as a structural one.
  • Whistling or draughts near windows during strong wind. A draught is essentially a seal failure. If your window whistles in the wind, it is not closing properly and is vulnerable to water entry.
  • Apparent leaks that appear only after painting. This is a specific issue with uPVC and aluminium windows. Decorators sometimes inadvertently block weep holes with paint, causing water to back up and enter the frame. Blocked weep holes are common in the UK, and condensation between panes indicates a failed IGU (insulated glass unit) seal, not something you can fix with a tube of sealant.

Worth remembering: Many symptoms of window leaks look like general damp problems. Before spending money on damp-proofing treatments, always rule out window faults first. Addressing spotting window damage early is nearly always less expensive than treating the downstream effects.

Comparing maintenance priorities: what matters most?

Now that you know how to spot problems, you may wonder where to focus your efforts depending on the windows you have. The type of frame material and the age of your windows both affect how much maintenance attention they need. This table gives you a clear, practical guide.


Window type Seal inspection Drainage cleaning Paint or frame care Lubrication Inspection frequency
uPVC High priority Very high priority Low (no paint needed) Annual Twice yearly
Aluminium High priority Very high priority Low Annual Twice yearly
Timber High priority Medium priority Very high priority Annual Three times yearly
Windows over 10 years old Critical Critical High Every 6 months Three times yearly
Previously leaking units Critical Critical High Every 6 months Quarterly


Proper installation prevents leaks from poor sealing, but even well-installed windows need consistent upkeep to remain effective. uPVC and aluminium frames are low-maintenance in many respects, but their drainage channels collect debris efficiently and need clearing regularly. Timber frames require a more hands-on approach: paint or preservative must be kept intact to prevent moisture absorption into the wood, which leads to swelling, warping, and eventual seal breakdown.

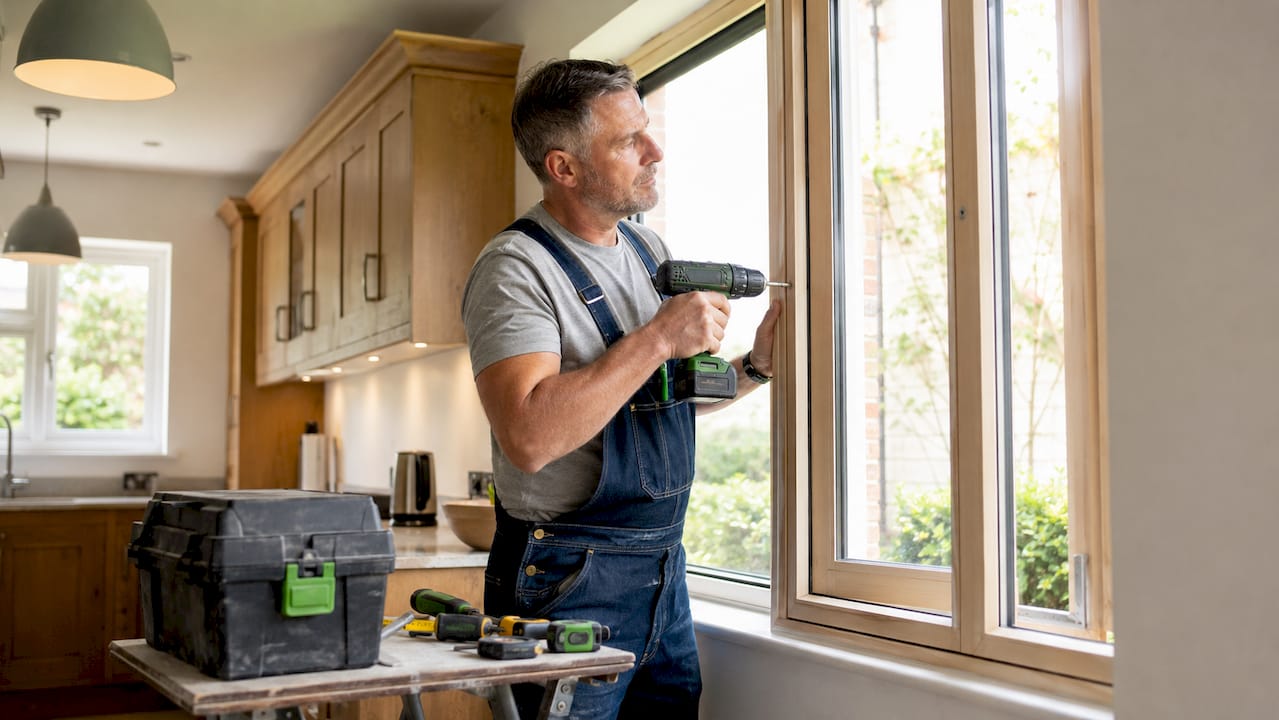
Window maintenance tools and checklist on table


Understanding window seal lifespan is also key. Most sealed glass units are designed to last between 10 and 25 years, but exposure to UV, temperature swings, and poor installation can significantly shorten this. If your windows are approaching or past the 10-year mark without any professional inspection, it is worth booking one. Similarly, learning about window seal failure causes helps you identify risks before they become repair jobs.

Pro Tip: If you have windows over 10 years old, or if you have had previous leaks, double up your inspection frequency. The cost of time spent checking is infinitely smaller than the cost of replacing a water-damaged window frame, subframe, or internal wall.

Maintenance checklist for businesses vs. homes

For business owners and managers, taking a commercial approach means considering a few additions to the core checklist. The fundamental principles of seal inspection, drainage cleaning, and lubrication apply equally, but commercial properties often present added complexity.

Commercial windows may have more complex hardware and cleaning regimes, but the fundamentals of seals and drainage remain the same. Here is how the priorities shift in a commercial context:


Task Residential Commercial
Seal inspection Twice yearly, owner-led Twice yearly, assign to facilities staff
Drainage and weep hole cleaning DIY with basic tools May require professional cleaning for high or large windows
Lubrication of hardware Annual, DIY Annual, may need specialist hardware knowledge
Scheduled professional inspection As needed Annually or per compliance requirements
Record-keeping Not essential Strongly recommended for liability and insurance
Locking mechanism checks Basic May involve complex multi-point or access-control systems


Key considerations for business owners:

  • Assign responsibility clearly. Designate a member of building or facilities staff to carry out and log routine checks. Consistency matters far more than perfection.
  • Consider your compliance obligations. Some commercial leases and insurance policies require evidence of regular maintenance. Keeping a simple log of inspections protects you in the event of a dispute.
  • Arrange professional cleaning for inaccessible windows. High-level windows in commercial buildings often require specialist access equipment for proper cleaning and inspection.
  • Do not delay repairs. A leaking window in a commercial premises can lead to stock damage, slip hazards, and reputational issues with customers or clients.

Protecting your commercial property from water damage is not just about windows. Reviewing guidance on preventing water damage gives useful broader context for how window maintenance fits into an overall property protection strategy. For tailored advice on keeping your business premises in good shape, our commercial maintenance tips cover the topic in detail.

Reviewing common window and door faults is also a useful habit for facility managers, as many faults that lead to leaks start as minor, easily corrected issues.

Why most window leaks go unnoticed — and what actually works long-term

We have covered the practical steps. But what do most people actually get wrong, and what is the honest picture of keeping windows dry year-round?

In our experience, the biggest mistake people make is waiting for a visible puddle before taking action. By the time water is sitting on your window sill, it has likely been travelling through a gap or degraded seal for weeks, possibly months. Water follows the path of least resistance, which means it moves slowly through gaps, along surfaces, and into cavities. The damage it causes in the meantime is silent: softening timber, corroding metal fixings, feeding mould, and degrading insulation.

The UK’s climate makes this worse. We do not have weeks of heavy, consistent rain that makes leaks immediately obvious. Instead, we have wind-driven drizzle, intermittent downpours, and freeze-thaw cycles in winter. This combination is particularly brutal on window seals and frames. A weep hole blocked by a summer’s worth of dust and pollen becomes a serious liability by November. And yet, clearing weep holes takes less than five minutes per window.

One misconception we encounter frequently is the idea that condensation between panes can be fixed by resealing the outside of the frame. It cannot. Condensation between panes means the full glass unit needs replacement, not just resealing. The sealed cavity between the panes has been compromised, and no amount of external sealant will restore its integrity. Recognising this distinction saves you from spending money on a repair that will not solve the problem. Understanding why window seals matter goes beyond just leak prevention; it connects directly to your heating costs and overall comfort.

The most effective approach is always the same: small, regular actions consistently applied. A twice-yearly inspection, annual lubrication, and keeping drainage clear will prevent the vast majority of leaks. This is not complicated advice, but it is the kind that makes a measurable difference over the life of your windows.

Get help with persistent leaks or repairs

If your own checks reveal deeper problems, or if you simply want peace of mind, professional assistance can make a significant difference. Preventative maintenance handles most issues, but there are times when a seal has failed completely, a unit has fogged internally, or a frame has warped beyond adjustment. In those cases, a professional repair or replacement is the right step.

https://www.cloudy2clearwindows.co.uk


At Cloudy2Clear Windows, we have been helping homeowners and business owners across England and Scotland resolve window problems since 2005. Whether you need a single failed glass unit replaced, a full seal repair, or a professional assessment of your entire property’s windows, our experienced team is ready to help. We specialise in replacing just the glass within existing frames where possible, saving you the cost and disruption of a full window replacement. Visit our website to find your nearest team and get the support your windows need before a small issue becomes an expensive problem.

Frequently asked questions

How often should I check window seals and drainage to prevent leaks?

You should inspect seals twice a year, ideally every spring and autumn, and clear drainage channels at the same time to prevent blockages from causing water ingress.

What does condensation inside double glazing mean?

Condensation between the panes indicates that the internal IGU seal has failed, meaning the sealed glass unit requires full replacement rather than external resealing.

Can blocked weep holes cause window leaks?

Yes, blocked weep holes from paint or accumulated dirt are a common cause of apparent leaks in the UK; clearing them regularly prevents water from pooling and backing up into the frame.

Do commercial windows require a different leak prevention approach?

The core steps are the same, but commercial windows may involve more complex hardware and benefit from scheduled professional inspections alongside assigned staff responsibility for routine checks.

Is annual lubrication necessary for all window types?

Yes, lubricating hinges and locks annually with a silicone-based product keeps all moving parts functioning correctly and ensures windows close fully to maintain a proper weather seal.

Window ironmongery explained: enhance your windows

Window ironmongery is one of those terms that trips people up. Most homeowners and business owners think of window hardware as just locks, maybe handles if they’re being thorough. But the reality is far broader, and those gaps in knowledge lead to poor purchasing decisions, avoidable repairs, and missed opportunities to improve how your property looks and performs. This article breaks down exactly what window ironmongery means, which parts matter most, how to choose the right finish, and how to keep everything in good working order for years to come.

What is window ironmongery and why does it matter?

Window ironmongery is the collective term for all the metal fittings and hardware components attached to a window. That includes everything involved in opening, closing, securing, and ventilating a window. Handles, hinges, locks, stays, restrictors, and trickle vents all fall under this category. If it moves, fastens, or seals a window, it’s ironmongery.

“Window fittings are one part of the wider category of metal items used in buildings for decoration and function.”

People often assume ironmongery is just about security. That’s understandable. Locks are the most visible and talked-about component. But ironmongery also shapes ventilation, accessibility, child safety, and even the fire escape compliance of your building. Getting it wrong doesn’t just look bad. It can create real problems with insurance claims, building regulations, and the long-term durability of your windows.

Here’s why window ironmongery matters so much for your property:

  • Security: Locks and multi-point locking systems protect your home or business from forced entry.
  • Weatherproofing: Correctly fitted hinges and seals keep wind and rain out.
  • Ventilation: Trickle vents and stays allow controlled airflow without compromising safety.
  • Accessibility: Lever handles and low-force mechanisms improve usability for all occupants.
  • Compliance: Building regulations in England and Scotland require specific hardware in certain settings, particularly around fire escape windows and child safety.
  • Property value: Quality fittings signal a well-maintained property to buyers and tenants.

If you’ve ever struggled with a window that won’t close properly or a lock that sticks, you’ve already experienced what happens when window ironmongery is worn, mismatched, or low quality. Exploring common window faults can help you identify whether the hardware is the root cause before spending money on the wrong fix.

Now that we’ve cleared up what window ironmongery is, let’s look at the specific types involved and how they work in practice.

Hierarchy infographic of window ironmongery parts Hands fixing window handle and hinge

Types of window ironmongery: parts you need to know

Understanding the individual components helps you make confident decisions when replacing, upgrading, or specifying hardware. Here are the main parts you’ll encounter:

  • Handles: The most visible piece of ironmongery. They come in cockspur, espagnolette, and tilt-and-turn styles depending on window type. Cockspur handles are common on older uPVC casement windows, while espagnolette handles engage multi-point locking systems.
  • Locks: Including surface-mounted sash locks, window restrictors with locks, and key-operated systems. The right lock depends on your window profile and security requirements.
  • Hinges: Hold the window in place and determine how it opens. Friction hinges are standard on modern casement windows and can be adjusted to control how far the window opens.
  • Stays: Also called casement stays or window stays. These bar-shaped fittings prop open a window at a fixed position and can double as a restriction device.
  • Trickle vents: Small, slot-based ventilators built into the frame or glazing bead that allow a controlled flow of fresh air even when the window is closed. They are increasingly required under Part F of the Building Regulations.
  • Restrictors: Limit how far a window opens, typically to 100mm for child safety in upstairs rooms. Some restrictors can be overridden by an adult in a fire emergency.


Component Primary function Compliance note
Handle Operation and locking Should suit window profile
Lock Security and intruder resistance Meets insurance requirements
Hinge Supports sash movement Must match window weight/size
Stay Ventilation control Can restrict opening width
Trickle vent Background ventilation Often required under Building Regs
Restrictor Child safety Required at heights over 2m


Each of these parts interacts with the others. A stiff hinge puts more strain on a handle. A worn restrictor means a stay takes on more load than it should. Thinking of window ironmongery as a system, not a collection of individual parts, is the mindset that leads to better outcomes.

When you’re selecting hardware, it’s essential to match ironmongery to your window material. Timber, uPVC, and aluminium frames all have different profiles, screw spacings, and surface requirements. Getting advice on choosing window frames before committing to hardware can save you from costly mismatches. You’ll also find it useful to review the wider window materials guide to understand how material choice shapes your ironmongery options.

Pro Tip: Before ordering replacement ironmongery, photograph every existing component and note the screw spacing, handle spindle size, and frame thickness. These measurements are often more reliable than visual identification alone.

Having covered the types of window ironmongery you’ll encounter, it’s important to understand how different styles and finishes influence both performance and design.

Function comes first, but finish and style matter more than most people realise. The wrong finish can look out of place on a period property or seem dated in a newly renovated commercial space. The right one ties your windows together with your doors, architraves, and interior hardware.

Popular finishes currently available in the UK include:

  • Polished chrome: Clean, modern, and easy to maintain. Suits contemporary homes and offices particularly well.
  • Satin chrome: A softer, less reflective version of chrome. Versatile and widely used in both residential and commercial settings.
  • Matte black: Very popular right now, especially in modern and industrial style interiors. Works well with grey window frames and minimalist design schemes.
  • Antique brass: A warm, traditional finish that suits Georgian, Victorian, and Edwardian properties. Requires occasional polishing to maintain its appearance.
  • Antique bronze: Darker than brass and highly popular for heritage restorations. More forgiving on maintenance than polished brass.
  • Polished brass: Striking but high maintenance. Better suited to formal or period settings where regular upkeep is feasible.

Statistic callout: Interior design surveys consistently show that matte black hardware finishes have seen a significant rise in demand across UK residential projects over the past five years, driven largely by the growth of contemporary and Scandi-inspired interiors.


Finish Style suitability Maintenance level Corrosion resistance
Polished chrome Modern, contemporary Low High
Satin chrome Modern, transitional Low High
Matte black Industrial, minimalist Medium Medium
Antique brass Period, traditional High Medium
Antique bronze Heritage, rustic Medium Medium
Stainless steel Commercial, coastal Very low Very high


Coastal properties in particular need to prioritise corrosion resistance. Salt air accelerates the deterioration of lower-quality finishes, and you can find yourself replacing ironmongery far sooner than expected if you choose style over suitability. Stainless steel and high-grade chrome are often the wiser choice in those environments.

For period properties, it’s worth researching which styles would have been used originally and selecting reproductions or sympathetic modern alternatives. A Georgian sash window fitted with a sleek chrome cockspur handle loses a great deal of its character. Browsing modern window styles can help you understand which hardware trends fit which architectural contexts. You should also consider how the finish interacts with frame materials by reading about window frame efficiency, and if sustainability matters to you, it’s worth exploring sustainable window hardware options.

Once you’ve chosen the right look and material for your window ironmongery, regular maintenance is key to keeping everything working and looking its best.

Care and maintenance: keeping your window ironmongery working for years

Well-chosen ironmongery can last decades. Poorly maintained ironmongery, regardless of quality, can fail in a handful of years. The good news is that basic upkeep takes very little time and prevents the vast majority of problems.

“Ironmongery that covers both decorative and functional roles in buildings needs regular attention to maintain safe and effective performance.”

Here is a straightforward routine maintenance process you can follow:

  1. Clean all surfaces. Use a damp, soft cloth and mild detergent to remove dirt and grease from handles, locks, and hinges. Avoid abrasive cleaners, which scratch protective coatings.
  2. Lubricate moving parts. Apply a light machine oil or specialist ironmongery lubricant to hinges, lock mechanisms, and any sliding components. Do this every six months at minimum.
  3. Check and tighten fixings. Screws in handles and hinge plates work loose over time with repeated use. A quick check with a screwdriver takes minutes and prevents bigger problems later.
  4. Inspect for corrosion. Look closely at exposed metal surfaces for early signs of rust or pitting, particularly after winter. Catching it early means treating rather than replacing.
  5. Test each component’s operation. Open, close, and lock every window. If anything feels stiff, grates, or doesn’t seat properly, investigate before it worsens.
  6. Check restrictors and stays. Ensure child safety restrictors engage correctly and that stays hold the window open at the intended angle without slipping.

Common issues to watch for include:

  • Sticking handles: Often caused by a worn spindle or a locking mechanism that needs lubrication.
  • Windows that won’t close flush: Usually a hinge alignment problem or a worn keep (the strike plate the lock engages with).
  • Corroding hinges: Frequently a sign that moisture is getting in around the frame, or that the finish was poorly suited to the environment.
  • Rattling windows: Often a stay that’s no longer holding, a worn handle, or a seal problem rather than a glass issue.

Pro Tip: Take a seasonal approach to maintenance. Check everything in autumn before cold weather arrives, and again in spring after winter stress. Two rounds of upkeep per year is far more effective than occasional irregular attention.

For more detailed guidance, our advice on maintaining double-glazed windows covers the broader picture. If your locks specifically need attention, step-by-step advice on repairing window locks is available, and for hands-on repairs covering locks, hinges, and handles together, our lock, hinge and handle repair service is there when you need professional support.

Understanding maintenance leads naturally into expert perspectives. Let’s reveal what most guides miss about window ironmongery choices in the UK.

The truth most guides miss about window ironmongery

Most articles about window ironmongery talk about style and price. That’s where the conversation usually ends. But in our experience at Cloudy2Clear, the properties that end up with the most ironmongery problems are those where the original choices were made based purely on appearance or budget.

Here’s what we see repeatedly: a homeowner fits cheaper handles and hinges to save money during a renovation. Within three years, the hinges are sagging, the locks are stiff, and the handles are pitting. The replacement cost, including labour and repeat disruption, easily exceeds what quality hardware would have cost in the first place.

The more overlooked issue is future-proofing. UK building regulations around ventilation, fire escape windows, and accessibility requirements do evolve. If you install ironmongery today that meets current standards, but choose the bare minimum, you may find it needs replacing sooner than expected when regulations tighten. Insurers are also increasingly scrutinising window security standards, and sub-standard locks can affect your cover.

Our honest advice: look at lifespan and warranty before anything else. A reputable brand offering a ten-year guarantee on ironmongery is almost always a better investment than a cheaper alternative with no warranty. You should also consider certifications such as Secured by Design accreditation for locks and hardware, which is recognised by police forces and insurers across England and Scotland.

Understanding window materials also plays into this. The ironmongery that performs best over the long term is always specified with the frame material in mind. Mismatched combinations cause accelerated wear, galvanic corrosion where dissimilar metals meet, and operational problems that become frustrating daily realities.

Think of ironmongery as an investment in the smooth running of your property, not an afterthought once the glass is fitted.

Get expert help with your window ironmongery

Knowing what you need is a strong start. But matching the right hardware to your specific windows, frames, and compliance requirements takes experience that goes beyond a product catalogue.

https://www.cloudy2clearwindows.co.uk


At Cloudy2Clear Windows, we’ve been helping homeowners and businesses across England and Scotland with window repairs, replacements, and upgrades since 2005. Whether your ironmongery is worn out, non-compliant, or simply not doing its job, our team can assess the situation and recommend the right solution. Our commercial window repairs service handles everything from single handles to full-building hardware upgrades. If you’re based in the Midlands, our Milton Keynes glazing repairs team is ready to help locally. Get in touch with us to talk through your options with someone who knows windows inside and out.

Frequently asked questions

What does window ironmongery include?

Window ironmongery covers all the metal fixtures and fittings on a window, including handles, locks, hinges, stays, trickle vents, and restrictors. Each component plays a role in the window’s function, safety, and appearance.

Why is quality important in window ironmongery?

High quality ironmongery ensures secure operation, long-term durability, and compliance with building regulations, all of which reduce the total cost of ownership. As metal items used in buildings for both function and decoration, the right choice protects your investment.

How often should window ironmongery be maintained?

Check and lubricate your window ironmongery at least twice a year, ideally in spring and autumn, to prevent sticking and extend the lifespan of all moving parts.

Is window ironmongery suitable for all window types?

Yes, but selection must match your window’s material and profile. There are ironmongery options for timber, uPVC, and aluminium windows, each with specific sizing, fixing, and finish requirements.

Energy saving windows: reduce energy bills and boost comfort

Many homes and businesses across England and Scotland lose significant heat through their windows every single day, yet the owners assume their glazing is doing its job. The uncomfortable reality is that not all energy saving windows perform equally, and the wrong combination of glass and frame can silently drain your heating budget for years. Heat loss through windows accounts for a substantial portion of a building’s total energy waste, yet upgrading with the right knowledge can prevent 60 to 70% of that loss compared with single glazing. This guide walks you through exactly what makes windows truly energy efficient, which types suit different properties, and how to act on that knowledge today.

How energy saving windows work: the science and impact

Understanding what sits behind the term “energy efficient” helps you make smarter purchasing decisions. Windows lose heat in three main ways: conduction (heat passing directly through the glass and frame), convection (warm air circulating inside the sealed unit and transferring heat outward), and radiation (heat energy escaping through the glass surface). The U-value of a window measures how quickly heat passes through it. A lower U-value means better insulation. Single glazed windows typically carry a U-value of around 5.0 W/m²K, while modern A-rated double glazed units can achieve 1.2 W/m²K or below.

The glass itself is only part of the story. The space between panes, usually filled with argon or krypton gas, acts as an insulating barrier. Low-emissivity (low-e) coatings applied to the glass surface reflect heat back into the room rather than allowing it to escape. These two features together, combined with the frame material and seals, determine whether a window genuinely performs or simply looks like it does.

The impact is significant. Upgrading to energy efficient windows delivers multiple benefits at once:

  • Lower heating bills, as your boiler works less to maintain a comfortable temperature
  • Reduced draughts and cold spots, improving the feeling of warmth throughout the room
  • A higher Energy Performance Certificate (EPC) rating, which directly affects property value and mortgage options
  • Less condensation, which protects walls and window frames from moisture damage
  • Quieter interiors, as energy efficient glazing also reduces external noise

The heat loss reduction science behind modern double glazing is well established. According to the Energy Saving Trust, double glazing reduces heat loss by 60 to 70% compared with single glazing, triple glazing achieves a further 20 to 30% reduction beyond double, and secondary glazing achieves 50 to 65%. These are meaningful figures for your energy bills. Our window energy efficiency guide goes into further detail on how performance is measured and rated.

“For most UK properties, well-installed A-rated double glazing provides outstanding thermal performance at a realistic price point. Chasing the finest glass specification without considering frame quality and installation airtightness is one of the most common and costly mistakes homeowners make.” — Cloudy2Clear Windows, glazing specialists since 2005.

Comparing window options: double, triple, secondary, and advanced glazing

Now that we know why glazing matters, let’s see how the main window types stack up for different needs and budgets. The market offers several distinct options, each with real strengths and genuine limitations.

Window type Typical U-value (W/m²K) Heat loss reduction Noise reduction Best use case
Single glazing 4.5 to 5.0 Baseline Low Heritage or listed only
A-rated double glazing 1.0 to 1.6 60 to 70% Good Most UK homes and businesses
Triple glazing 0.6 to 0.8 80 to 90% Very good Exposed, very cold, or noisy sites
Secondary glazing 1.8 to 2.8 50 to 65% Excellent Listed buildings, flats
Vacuum glazing As low as 0.1 Up to 95% Good Specialist or heritage projects


The triple glazing suitability question comes up regularly, and the honest answer is that the extra cost rarely pays back quickly in most parts of England and Scotland. The Energy Saving Trust confirms that upgrading from single to A-rated double glazing saves between £140 and £285 per year in a typical semi-detached house, while triple glazing adds only around £20 to £40 extra annual saving at significantly higher upfront cost.

Secondary glazing deserves more attention than it gets. If you live in a listed building or a conservation area where replacing original frames is restricted, secondary glazing savings can be impressive, reducing heat loss by more than half while also delivering exceptional noise insulation. It works by fitting a secondary frame and panel inside the existing window, creating a large air gap that insulates well.

Vacuum glazing is worth a mention for specialist situations. Vacuum glazing U-values can reach as low as 0.1 W/m²K, making it the most thermally efficient glass available, but it remains a niche product with a price to match.

Key takeaways when comparing your options:

  • Double glazing is the right choice for most homes and commercial properties
  • Triple glazing makes sense for properties in very exposed positions, properties near motorways or airports, or new builds targeting very low energy standards
  • Secondary glazing is the best solution for listed buildings and flats where exterior changes are not permitted

Pro Tip: Investing in high-quality double glazing with a good frame and professional installation consistently delivers better value than spending more on triple glazing in a standard UK climate. The payback period on triple is simply too long for most properties.

Choosing window frames: materials and their energy efficiency

Glazing is not everything. Frames can make or break your investment in energy saving windows. A beautifully specified glass unit fitted in a poor-quality frame with inadequate seals will perform well below its potential.

Worker checks window frame for drafts


Frames contribute to the overall U-value of the window unit, and they also determine long-term airtightness. Draughts around poorly sealed or warped frames are one of the most overlooked causes of heat loss in older properties. Understanding which frame materials deliver the best results helps you spend wisely.

Frame material Typical U-value contribution Thermal performance Maintenance Cost
uPVC multi-chamber Excellent Very high Low Good value
Timber (certified) Very good High Moderate Moderate to high
Aluminium with thermal break Good High Very low High
Aluminium without thermal break Poor Low Very low Moderate


The frame materials efficiency article on our website explores this in detail, but here is a practical summary:

  • uPVC multi-chamber frames are the most popular choice across England and Scotland for good reason. The hollow chambers inside the profile trap air and insulate effectively. They require virtually no maintenance and last for decades.
  • Timber frames are naturally insulating and carry a lower carbon footprint when sourced from certified sustainable forests. They suit traditional and period properties particularly well and, when properly maintained, perform exceptionally over long periods.
  • Aluminium frames are slim, strong, and modern in appearance, which suits contemporary commercial buildings and extensions. However, they must include a thermal break (an insulating barrier within the frame profile) to prevent them from conducting cold directly into the building.

The Energy Saving Trust is clear that uPVC multi-chamber frames deliver the best value for cost and insulation, timber is naturally insulating, and aluminium must have thermal breaks to perform adequately. Choosing the best frame types for UK homes depends on your property type, planning constraints, and priorities.

If environmental impact matters to you, sustainable window frames made from certified timber or recycled uPVC offer a lower-footprint route to energy efficiency.

Pro Tip: Insisting on multi-chamber uPVC or FSC-certified timber frames, rather than accepting the cheapest available frame, ensures you do not lose the energy savings you have paid for through the very structure holding the glass in place.

Upgrading windows: installation, compliance, and grants for England and Scotland

Once you have chosen the right glass and frame combination, upgrading involves some practical steps. Getting those steps right protects both your investment and your legal compliance.

Here is how to approach a window upgrade effectively:

  1. Assess your current windows. Note which rooms feel coldest, where condensation appears, and whether frames are draughty or visibly deteriorating. This helps you prioritise replacements rather than replacing everything at once unnecessarily.
  2. Compare suppliers and specifications. Request window energy ratings (WERs) from suppliers. A-rated windows are the minimum worth considering. Ask for U-values for the whole window unit, not just the centre-pane glass.
  3. Select an accredited installer. This is critical for legal compliance. FENSA or CERTASS accredited installers self-certify that replacement windows meet current building regulations, saving you the cost and effort of applying for separate planning consent. Choosing an unaccredited installer could leave you with a compliance problem when you come to sell the property.
  4. Check available grants and funding. Several schemes currently support window upgrades in England and Scotland. ECO4 (Energy Company Obligation 4) assists low-income households and those with EPC ratings of D to G. The Warm Homes Local Grant supports eligible households in England. Home Energy Scotland offers grants and interest-free loans for Scottish homeowners, sometimes covering up to £15,000 of improvement costs. Eligibility depends on income, property type, and current energy performance.
  5. Plan installation and certification. A good installer will manage the whole process, from removing old frames cleanly to ensuring new units are airtight and correctly finished. Always receive your FENSA or CERTASS certificate on completion.

Regarding costs, a window installation for energy savings project covering a full semi-detached house typically costs around £12,000 before grants. Savings of up to £285 per year mean a payback period of roughly 30 to 40 years on the pure energy saving alone. However, when you factor in improved comfort, higher property value, and reduced maintenance on ageing frames, the real-world return is considerably better than the headline payback figure suggests.

Businesses should also consider the commercial benefits. Lower energy overheads, a more comfortable working environment, and improved building EPC ratings all contribute to operational savings and can satisfy increasingly strict sustainability requirements from clients and landlords alike.

The truth most experts won’t tell you about energy saving windows

The glazing industry often defaults to a simple message: more panes equals better performance. In reality, this is an oversimplification that leads many property owners to overspend on specifications they do not need while underinvesting in the factors that genuinely make the biggest difference.

Research published in MDPI Sustainability is clear that airtight installation and SHGC balance matter far more than simply adding extra panes of glass. SHGC stands for Solar Heat Gain Coefficient, which measures how much of the sun’s heat passes through the window. In the UK, where passive solar gain during winter is genuinely valuable, windows facing south should ideally allow more solar heat in rather than blocking it entirely. Choosing maximum insulation specification without considering orientation can actually increase heating costs in certain situations.

The uncomfortable truth is this: a perfectly installed A-rated double glazed unit with a quality multi-chamber frame will outperform a shoddily installed triple glazed unit every single time. Gaps, poor seals, and inadequate frame quality create air infiltration that no glass specification can compensate for.

For properties with complex needs such as listed buildings, properties near airports, or exposed rural homes in Scotland, the calculation changes. Secondary glazing for listed properties, or triple glazing for genuinely exposed sites, makes real sense. But for the majority of homes and businesses across England and Scotland, modern double glazing with quality frames, installed by a commercial glazing efficiency specialist or domestic professional, is the optimal solution.

Our advice, built on nearly two decades of experience, is straightforward. Do not let a salesperson convince you to pay a premium for triple glazing if your property is a standard suburban home in the Midlands or central Scotland. Focus your budget on quality glass units, quality frames, and a genuinely skilled and accredited installation. That combination delivers results you will feel immediately and measure clearly on your energy bills.

Upgrade your windows with trusted local specialists

If you are ready to stop losing heat through underperforming windows, the next step is getting expert advice tailored to your specific property and location.

https://www.cloudy2clearwindows.co.uk


At Cloudy2Clear Windows, we have been helping homeowners and businesses across England and Scotland improve their glazing since 2005. Whether you need a double glazing replacement service for your home or a commercial window repair for your business premises, our local specialists provide honest advice, quality products, and fully accredited installation. If you are in the Milton Keynes area, our Milton Keynes double glazing repairs team is ready to help. Contact your nearest Cloudy2Clear branch for a no-obligation assessment and find out exactly which upgrade will deliver the best return for your property.

Frequently asked questions

How much will I save by upgrading to energy saving windows?

You could save between £140 and £285 per year on your heating bills by replacing single glazing with A-rated double glazing in a typical semi-detached house, depending on your heating fuel and property size.

Do I need triple glazing or is high-quality double glazing enough?

For most properties in England and Scotland, high-quality double glazing is sufficient. Triple glazing provides only marginal extra saving at considerably higher cost and is best reserved for very cold, exposed, or particularly noisy sites.

Are there grants for window upgrades in England and Scotland?

Eligible households may access schemes including ECO4, the Warm Homes Local Grant, or Home Energy Scotland, with support potentially reaching £15,000 depending on your circumstances, property type, and current EPC rating.

How do I ensure my window installation meets current regulations?

Choose installers accredited by FENSA or CERTASS, who self-certify that your replacement windows comply with current building regulations, removing the need for separate local authority approval.

What’s the typical cost to upgrade to energy saving windows?

A full set of A-rated double glazed windows for a semi-detached house costs around £12,000 before any grants, though funding schemes may significantly reduce what you pay out of pocket.

Upgrade security with the right glass for your property

When most people think about home or business security, their minds jump straight to deadbolts, alarm systems, and CCTV cameras. Yet the most accessible entry point for an intruder is often a simple pane of glass. Whether it is a ground-floor window, a glazed back door, or a shop front, the glass you choose can be the difference between a foiled break-in and a costly intrusion. This guide walks you through exactly how modern glass technology and double glazing work together to significantly strengthen the security of properties across England and Scotland.

Understanding the vulnerabilities: Why standard glass falls short

Standard glass, known in the industry as annealed glass, is surprisingly fragile. It is the most basic form of flat glass, produced without any additional tempering or treatment, and it shatters on impact with very little force. A single strike with a common tool is often enough to create a gap large enough for entry.

Many break-ins occur by simply shattering a window pane, with standard glass offering little resistance. This is not a rare edge case. It is one of the most frequently exploited vulnerabilities in residential and commercial properties alike. Opportunistic intruders do not need specialist skills or equipment. They rely on the weakness of the glass itself.

There are several common tactics that exploit standard glass:

  • Smash and grab: A quick blow to a single pane creates immediate access, particularly through doors and sliding windows.
  • Glazing attacks on door panels: Many composite or timber doors include a narrow glass panel beside the lock. Break the glass, reach in, and turn the handle from the inside.
  • Corner strikes: Striking the corner of a pane requires even less force than a centre hit, and most homeowners are unaware of this.
  • Silent tape techniques: Tape applied before striking reduces shattering noise and the mess that might attract attention.

“The glass in your windows and doors is not just a cosmetic feature — it is a critical part of your security layer. Treating it as an afterthought leaves a significant gap in your defences.”

The problem is that most property owners only realise this after an incident has occurred. When a window is newly fitted or recently repaired, people understandably assume it is secure. But unless you specifically request types of safety glass designed to resist impact, you are likely getting standard annealed glass that provides little more than a weather barrier.

Advanced security glass: Types and technology explained

Once you understand why standard glass poses a risk, the next step is to explore the options available to you. Modern security glass comes in several forms, and each works in a different way to resist attack.

Here is a comparison of the main types:

Glass type How it works Best used for
Toughened (tempered) glass Heat-treated to be 4 to 5 times stronger; shatters into small blunt pieces Doors, shower screens, roof glazing
Laminated glass Layers of glass bonded with a plastic interlayer (PVB resin); stays intact when broken Ground-floor windows, shop fronts, overhead glazing
Wired glass Steel wire mesh embedded within the pane; holds together on impact Fire-rated applications, older commercial buildings
Double glazed security units Two panes (toughened or laminated) with an air or gas gap in between Residential windows, commercial premises


Laminated and toughened glass, alongside double glazing, significantly improve resistance to forced entry. Here is how each option performs in a real security scenario:

  1. Toughened glass resists the initial strike far better than annealed glass. If it does break, the granular fragments it produces are far less likely to injure someone and do not leave large, jagged shards that allow easy access.
  2. Laminated glass is arguably the strongest option for sustained attacks. Even when cracked or struck repeatedly, the interlayer holds the pieces in place. An intruder cannot simply reach through. They have to work at it, and that takes time.
  3. Double glazed units with security glass combine the physical strength of either toughened or laminated glass with the added depth and resistance of a multi-pane construction.
  4. Acoustic and security film overlays can be applied to existing glass to improve resistance without full replacement. This is a lower-cost option for adding a basic layer of protection.

Pro Tip: If you are upgrading windows near door locks or accessible ground-floor entry points, always specify laminated glass rather than toughened. Toughened glass resists the initial strike, but laminated glass holds firm even after repeated impacts, giving you a much better chance of delaying entry.

Reviewing safety glass types and uses before making any purchase decisions is well worth your time. The right specification depends on your property’s layout, exposure to risk, and budget.

Double glazing for security: More than just insulation

Most people think of double glazing as an energy-saving upgrade. Warmer rooms, lower energy bills, less condensation. All of that is true. But double glazing also delivers meaningful security benefits that are frequently overlooked.

Properly installed double glazing can delay forced entry, making it far harder for would-be burglars. The reason comes down to the physical structure of a double glazed unit. You have two separate panes of glass, each of which must be overcome independently. Between them sits a gap, typically filled with argon gas or dry air, which adds further resistance by absorbing and distributing the force of an impact.

Window installer measures double glazing thickness


Consider how this compares to a single pane:

Feature Single glazed Double glazed with standard glass Double glazed with laminated glass
Panes to breach 1 2 2
Interlayer protection None Gas/air gap Gas/air gap plus PVB resin
Time to breach (approximate) Seconds 30 to 60 seconds Several minutes or more
Noise generated Minimal Moderate High (deters intruders)
Post-break access Immediate Delayed Significantly delayed


The importance of glazing thickness cannot be understated here. Thicker individual panes within a double glazed unit require considerably more force to compromise. A standard double glazed unit uses 4mm glass on each pane. Upgrading to 6mm toughened glass on each side makes an enormous practical difference to how long a break-in attempt takes, and time is the greatest deterrent of all.

Practical security benefits of double glazing for homes and businesses include:

  • Noise deterrence: Breaking a double glazed unit creates significantly more noise than breaking a single pane. Criminals rely on speed and silence, and a noisy attempt draws attention.
  • Visible credibility: Double glazed frames are physically deeper and more substantial, giving the impression of a well-secured property.
  • Lock integration: Modern double glazed frames are designed to work alongside multi-point locking systems, so the frame and glass work together as a unified barrier.
  • Reduced thermal sighting: Solid, insulated windows make it harder for someone outside to identify occupants’ routines and patterns.

If your property has older single-glazed windows, this is likely your most impactful and cost-effective security upgrade. Even a standard double glazing repairs or full replacement project delivers immediate, tangible improvements to your protection.

Choosing the best glass for your security needs

Understanding the technical side of glass security is useful. Knowing how to apply that knowledge to your specific situation is even more valuable. Not all windows and doors need the same type of security glass — choices can be tailored for cost and risk. Here is a practical framework for working through your options.

Infographic comparing standard and security glass types


Step 1: Identify your highest-risk entry points

Start by walking around your property and noting every glazed entry point. Then rank them by accessibility and vulnerability:

  • Ground-floor windows, particularly those hidden from the street or neighbours
  • Glazed panels in doors, especially those close to locks or handles
  • Side returns, conservatory doors, and garage windows
  • First-floor windows accessible via a flat roof, extension, or drainpipe

Step 2: Match glass type to threat level

  • High-risk points (door panels, accessible ground-floor windows): laminated glass or double glazed units with laminated inner panes
  • Medium-risk points (visible ground-floor windows, rear elevation): toughened glass in double glazed units
  • Lower-risk points (upper floors, non-accessible windows): standard double glazing as a minimum, with toughened glass as a sensible upgrade

Step 3: Consider your budget strategically

You do not need to replace everything at once. Prioritise by risk and work through upgrades systematically. Replacing the glass in a door panel or fitting a laminated inner pane in your most exposed window costs relatively little compared to the cost of dealing with a break-in.

Step 4: Review your existing window and door hardware

Pro Tip: Glass and locks work as a system. If you upgrade your glass but leave worn or poorly aligned locks in place, you are still leaving a gap. Review your window lock and handle repairs at the same time as any glass upgrade to make sure every component is working correctly together.

Step 5: Consult a professional installer

Some glass upgrades are straightforward, but others require precise measurement, specialist cutting, and correct sealing to maintain both security and thermal performance. An experienced glazier can assess your frames, recommend the right specification, and confirm whether the existing frame can accept the new glass safely.

Key questions to ask when consulting a professional:

  • Is my existing frame suitable for thicker security glass?
  • Should I specify toughened or laminated glass for this particular window?
  • Does the double glazed unit include a full perimeter seal to prevent frame attacks?
  • What is the security rating of the unit being installed?

The overlooked power of glass: An industry perspective

After nearly two decades of working with homeowners and businesses across England and Scotland, we have seen a consistent pattern. People invest in sophisticated alarm systems and premium door locks, then leave their ground-floor windows fitted with single glazing from the 1980s. The alarm goes off after the break-in. The lock held firm. But the window did not.

Locks and alarms are only as effective as the glass they are installed behind. A five-lever mortice lock on a door with a thin glazed panel beside the handle is not a secure door. It is a secure lock on an insecure opening. This distinction matters enormously, and it is one that traditional security advice rarely addresses head-on.

The industry is beginning to shift. Security experts increasingly recommend starting risk assessments with an inspection of existing glazing rather than hardware. The logic is simple. If you can breach the glass faster than the alarm triggers, the alarm is irrelevant for that entry event.

We have seen cases where straightforward glass upgrades made a decisive difference. A commercial premises in the north of England replaced its shop front single glazing with laminated double glazed units. Within months, an attempted smash-and-grab was foiled simply because the glass refused to give way quickly enough. The intruders abandoned the attempt. No alarm was needed. No police intervention was required. The glass did the work.

The case for reviewing your glazing first, before spending money on any other security retrofit, is compelling. Reviewing expert advice on safety glass is a useful starting point for understanding what your property currently has and what it genuinely needs.

How Cloudy2Clear can help protect your property

Taking the right steps to secure your home or business through better glazing does not need to be complicated, and you do not need to navigate it alone.

https://www.cloudy2clearwindows.co.uk


At Cloudy2Clear Windows, we have been helping homeowners and business owners across England and Scotland improve their properties since 2005. Our experienced local teams can assess your existing glazing, advise on the right security glass specification for your situation, and carry out repairs or full replacements to a high standard. Whether you need a single door panel replacing with laminated glass or a complete commercial reglaze, we work across both residential and commercial premises with the same care and attention to detail. Get in touch with your nearest Cloudy2Clear team to arrange a consultation and take the first practical step toward genuinely stronger security.

Frequently asked questions

What is the difference between laminated and toughened glass for security?

Laminated glass provides a safety layer that remains intact even when cracked, whereas toughened glass shatters into small blunt pieces. For sustained resistance to forced entry, laminated glass is the stronger choice.

Does double glazing always use safety glass?

Different types of double glazed units use different glasses, so double glazing does not automatically mean safety glass. Always check the specification and request toughened or laminated glass if security is your priority.

How does glazing thickness affect security?

Proper thickness improves both insulation and intrusion protection by requiring greater force to breach the glass and extending the time it takes for an intruder to gain access.

Can old windows be upgraded for better glass security?

Upgrading glass in existing frames is a viable option for many properties, provided the frame is structurally sound. A professional assessment will confirm whether your current frames can accommodate modern security glass.

Step-by-step guide to reglazing windows for lasting results

Cracked or failed window glazing costs UK homeowners far more than most people realise. Beyond the draughts and rattling frames, poorly glazed windows can add hundreds of pounds to annual heating bills, undermine your property’s kerb appeal, and cause ongoing damp problems. Whether you own a Victorian terrace in Edinburgh or a commercial unit in Manchester, knowing how to reglaze windows correctly is a genuinely useful skill. This guide walks you through when reglazing is the right choice, what you will need, how to carry out the work step by step, and how to finish it properly so the result lasts for years.

Understanding when and why to reglaze windows

Now that you understand the risks of leaving damaged windows untreated, let’s clarify when reglazing is the right approach.

Reglazing means replacing the glass pane within an existing frame, leaving the frame itself in place. It is not the same as full window replacement, which involves removing the entire frame and fitting a new unit. That distinction matters enormously, particularly in older properties across England and Scotland where conservation laws protect the original fabric of buildings.

Common signs your windows need reglazing include:

  • Persistent draughts even when the window is fully closed
  • Rattling glass in the frame, especially in windy weather
  • Condensation forming between panes in a sealed double-glazed unit
  • Cracked, chipped, or broken glass
  • Visible gaps where putty has shrunk, cracked, or fallen away
  • Discolouration or fogging that will not clean off

If your windows show any of these signs, reglazing can restore their thermal performance and appearance without the cost or disruption of full replacement.

For period and listed properties, reglazing is often the only legally acceptable option. As the Glasgow Design Guide explains, reglazing improves insulation and aesthetics without full replacement, which is ideal for period properties, since full replacement may violate heritage rules. If your property sits within a conservation area or is listed, you should check with your local planning authority before ordering new glass.

Energy efficiency is another key driver. Window energy regulations set minimum U-values (a measure of how much heat passes through a material per square metre) for replacement glazing. In England, that threshold is 1.6 W/m²K; in Scotland, the standard is tighter at 1.4 W/m²K. Reglazing with a modern sealed unit or specialist slim double-glazed unit can bring even older frames up to these standards.

Reglazing is often the smarter investment. You preserve original joinery, avoid planning complications, and still achieve meaningful energy savings at a fraction of the cost of new windows.

If you are considering reglazing older windows in a period property, getting the glazing choice right from the outset avoids repeat work and potential compliance problems later.

What you need: Tools, materials, and compliance essentials

With a clear understanding of why and when to reglaze, let’s move on to what you’ll need before starting.

Essential window reglazing tools on workbench


As flolondon.co.uk explains, reglazing windows involves replacing the glass pane in an existing frame, typically a timber sash or casement, using glazing putty and points for single glazing or sealed units for modern upgrades. Your exact toolkit will depend on which method you are using.

Item Timber/single glazing Modern sealed unit
Glass or sealed unit Single pane, measured to rebate Slim double or triple glazed unit
Glazing putty Linseed oil putty Neutral-cure silicone sealant
Glazing points or sprigs Yes, to pin glass in frame Glazing beads (plastic or timber)
Putty knife or hacking knife Yes Useful for bead removal
Glass cutter If cutting to size on site Rarely needed (factory cut)
Suction cups Helpful for larger panes Essential for heavier units
Tape measure and pencil Always Always
Safety gloves and goggles Essential Essential


Compliance checklist before you begin:

  • Safety glass (toughened or laminated) is required for any pane below 800mm from floor level, in doors, and in side panels next to doors
  • If your property is listed, you may need listed building consent before changing the glazing specification
  • Replacement glazing must meet current U-value requirements: 1.6 W/m²K in England, 1.4 W/m²K in Scotland
  • Work in conservation areas may also require prior approval, so always check with your local authority

For detailed guidance on the regulatory side, understanding building regulations before you buy your glass will save you considerable trouble later.

Pro Tip: Always measure the glass rebate (the channel inside the frame that holds the glass) in at least three places. Timber frames can distort over time, so the top, middle, and bottom measurements may all differ slightly. Order glass to the smallest dimension and leave a 2mm gap all round for expansion.

How to reglaze: Step-by-step process

Once you have your materials and compliance factors ready, it’s time to start the reglazing itself.

Infographic of main window reglazing steps


The process varies slightly between the traditional putty-and-points method and the modern sealed-unit approach. Here is a comparison to help you choose:

Stage Traditional (putty and points) Modern (sealed unit)
Glass type Single pane Factory-made sealed unit
Fixing method Glazing points hammered into frame Timber or plastic glazing beads
Sealing Linseed oil putty, shaped and painted Silicone sealant around beads
Drying/curing time 2 to 4 weeks before painting 24 hours for silicone
Best for Period timber frames, listed properties Modern frames, energy upgrades


As described by flolondon.co.uk, the traditional method uses linseed oil putty while the modern method uses slim double glazing units. Both are valid, but choosing the wrong one for your frame type can cause premature failure.

Step-by-step reglazing process:

  1. Protect your workspace. Lay a dust sheet below the window and wear safety gloves and goggles throughout.
  2. Remove the old glass. Score around the old putty with a hacking knife, then carefully lever out the glass. Remove all old glazing points with pliers.
  3. Clean the rebate. Scrape away all remaining putty and paint flakes. Sand the rebate smooth and apply a coat of primer if the timber is bare. Let it dry fully.
  4. Inspect and repair the frame. This is your opportunity to fix minor rot with a suitable wood filler, add draught-proofing strips to the sash or casement, and reinforce any loose joints.
  5. Bed the glass. For putty glazing, press a thin layer of putty into the rebate first. For sealed units, fit plastic setting blocks at the bottom of the rebate to support the unit’s weight.
  6. Place the new glass. Press the pane firmly into the putty bed or onto the setting blocks. For single panes, hammer in glazing points every 150 to 200mm to secure the glass.
  7. Apply finish putty or beads. Angle the putty at 45 degrees using a putty knife for a clean, weather-shedding profile. For sealed units, click or pin the glazing beads into place and seal with silicone.
  8. Clean excess putty or sealant. Dampen your finger or a cloth to smooth silicone. Trim excess putty cleanly with the knife.

Pro Tip: When upgrading to double glazing units in a timber sash, always order slim-profile sealed units (typically 14mm to 20mm overall thickness) to ensure they fit within the original rebate depth without requiring frame alteration.

Finishing touches and troubleshooting common issues

After placing the new glass and securing your window, proper finishing makes all the difference.

For putty-glazed windows, allow the putty to skin over for at least 14 days before applying an oil-based primer and then a topcoat. Painting over fresh putty traps moisture and causes cracking. For silicone-sealed units, you can paint the beads after 24 hours, though always check the sealant manufacturer’s guidance.

Finishing checklist:

  • Check the glass sits flush and level in the rebate, with no rocking
  • Ensure putty or sealant forms a continuous, unbroken seal on all four sides
  • Open and close the window several times to confirm it moves freely without binding
  • Inspect from outside for any visible gaps where weather could enter
  • Wipe the glass clean with a lint-free cloth

Common DIY mistakes and how to fix them:

  • Putty cracks after drying: Usually caused by applying putty over bare, unpainted timber that absorbed the oil. Strip the putty back, prime the rebate, and re-apply.
  • Glass feels loose or rattles: Add extra glazing points or check that beads are fully seated and clipped in.
  • Sash sticks after reglazing: The frame may have swollen due to moisture absorbed during work. Allow it to dry out, then lightly sand and repaint.
  • Condensation returns between panes: The sealed unit has failed and needs replacing. This cannot be fixed by resealing externally.

As noted by flolondon.co.uk, rotten timber must be repaired before reglazing, draught-proofing should be added during the reglaze, heritage properties may require like-for-like single glass or slimlite double, and safety glass is mandatory for panes below 800mm from floor level.

If your work reveals significant frame rot, major structural movement, or complex listed building requirements, carry out your final compliance checks and consider calling a specialist rather than proceeding alone.

Expert perspective: Why frame integrity and the right glazing method matter most

Stepping back, here is what years of restoration experience reveal about reglazing priorities.

Most beginners fixate on sourcing the right glass. That is understandable but slightly misguided. In our experience, the vast majority of reglazing failures trace back to the frame, not the glass. Skipping the primer coat, ignoring a soft timber corner, or forcing an oversized unit into a shallow rebate will undo even perfect glazing work within a season or two.

The choice between putty and sealed units is not purely a technical one. It is a question of character. A slim sealed unit can sit beautifully in a Victorian sash and deliver modern performance without altering the window’s appearance. But fit an over-thick modern unit and you change the sight lines, the weight balance, and the feel of the original window entirely.

Careful preparation genuinely prevents repeat repairs. An hour spent cleaning, priming, and inspecting saves you from redoing the job in three years. And sometimes, the savviest move is to bring in a specialist. If your frames need structural work or if your reglazing double glazing project falls under listed building rules, professional expertise is not a cost. It is a safeguard.

Need help or professional reglazing? We’re here

If you are still weighing DIY against hiring a specialist, here is how expert support can help.

At Cloudy2Clear Windows, we have been repairing, reglazing, and upgrading windows for homeowners and businesses across England and Scotland since 2005. Whether you need a straightforward glass replacement or specialist support for a listed property, our teams are equipped to handle it properly and in compliance with current regulations.

https://www.cloudy2clearwindows.co.uk


For situations where compliance, heritage, or structural concerns make DIY too risky, our broken window repair services cover everything from single pane replacements to full sealed unit upgrades. If you are based in Oxfordshire, our team offering double glazing repairs in Oxford is ready to help. Get in touch and we will make sure the job is done right the first time.

Frequently asked questions

Can I reglaze my windows myself or do I need a professional?

Confident homeowners can manage ground-floor reglazing using the right tools and materials, but heritage properties and upper floors are best left to professionals with the relevant safety equipment and compliance knowledge.

What regulations apply to window reglazing in England and Scotland?

In England, replacement glazing must achieve a U-value of 1.6 W/m²K or better; in Scotland, the requirement is 1.4 W/m²K. Safety glass is mandatory for low-level panes, and listed buildings may require consent before any glazing changes.

What’s the difference between using putty and sealed units for reglazing?

Glazing putty and sprigs are the traditional single-glazing method, suited to period timber frames, while factory-made sealed units deliver better insulation and are fixed with glazing beads rather than putty.

Do I need to completely remove rotten timber before reglazing?

Yes. Any rotten or soft timber must be properly repaired before the new glass goes in, because rotten timber undermines the fix and causes the glazing to work loose well before its expected lifespan.