• USP Logo Icon
    25 Year Guarantee
  • USP Leaf Icon
    Latest ECO Friendly Technology
  • USP Pointer Icon
    National Coverage
Get a FREE quote

Glazing Bars: Impact on Window Style and Efficiency

Upgrading windows in urban England often brings a blend of excitement and concern about maintaining the distinct style of your property while improving efficiency. Choosing glazing bars can transform a window’s appearance, but myths still linger about their effect on energy performance and period authenticity. This guide clarifies how glazing bars shape heritage character and energy efficiency and helps you navigate common misconceptions and regulations for a smooth, satisfying renovation.

Defining Glazing Bars and Common Misconceptions

Glazing bars are the wooden or metal strips that divide window panes into smaller sections. They’re sometimes called muntins or glazing beads, and they’ve been a feature of windows for centuries. If you’re looking at Victorian or period properties across England, you’ll see them everywhere.

These bars serve more than just an aesthetic purpose. When exploring double glazing options, it’s helpful to understand how glazing bars contribute to both the visual character and performance of your windows.

What Glazing Bars Actually Are

Glazing bars sit between the glass panes or on the surface of the window frame. They create a grid pattern that divides the window into smaller rectangular sections. The bars themselves are typically thin strips made from timber, aluminium, or composite materials.

The main types you’ll encounter include:

  • Horizontal bars running left to right across the window
  • Vertical bars running top to bottom
  • Decorative grilles with more intricate crossing patterns
  • Through-bars that run between glass panes inside the sealed unit

Each type affects both how your window looks and performs in terms of insulation and maintenance.

Common Misconceptions About Glazing Bars

Most homeowners believe glazing bars dramatically reduce energy efficiency. This isn’t entirely accurate. Modern bars made from low-conductivity materials have minimal impact on thermal performance.

Another widespread myth is that all glazing bars are the same. They’re not. The material, design, and installation method vary significantly between options.

Many people also think glazing bars must be authentic wood to suit period homes. Actually, high-quality uPVC or aluminium bars can replicate the appearance perfectly whilst offering superior durability and lower maintenance.

Modern glazing bars need not sacrifice efficiency for aesthetics—the right design delivers both.

Some homeowners worry that removing glazing bars permanently damages their property value. In reality, the choice depends on your home’s character and your personal preference. A Georgian townhouse benefits from traditional bars, but a modern extension might not.

One final misconception: that glazing bars are impossible to keep clean. Modern through-bars sit inside sealed units, meaning no dirt accumulates between panes. This makes them far easier to maintain than older designs.

Pro tip: When considering glazing bar options, request samples installed in a test window on your home first—you’ll see exactly how they change your property’s appearance in real light conditions before committing.

Types of Glazing Bars in UK Windows

Glazing bars come in several distinct varieties, each suited to different home styles and requirements. Understanding the options helps you make an informed choice that balances aesthetics with performance. The type you select will define how your windows look and function for decades to come.

Traditional Glazing Bars

Timber glazing bars are the classic choice found on period properties throughout the UK. They sit on the surface of the glass, creating authentic divisions that suit Georgian, Victorian, and Edwardian homes perfectly.

The appeal of timber is obvious: they look genuinely period-correct and age beautifully. However, they require regular maintenance, including repainting every 5-7 years to prevent rot and weathering.

Timber bars work best on heritage properties where authenticity matters. If you live in a conservation area, your local authority might require wooden bars for listed buildings.

Modern Alternatives

uPVC glazing bars replicate the timber appearance without the maintenance burden. They’re factory-finished, moisture-resistant, and rarely need attention beyond occasional cleaning.

Aluminium bars offer a sleek, contemporary look suitable for modern extensions and new builds. They’re incredibly durable and conduct heat slightly more than other materials, though modern thermal breaks minimise this impact.

Contemporary home with aluminium-framed glazing bars


Composite bars blend the best features of both timber and synthetic materials. They provide authentic wood appearance with low-maintenance synthetic durability.

Here’s how the main types compare:

Here’s a comparison of the main glazing bar materials and their typical applications:

Material Maintenance Level Typical Use Case Visual Authenticity
Timber High (regular painting) Heritage and listed properties Excellent, period-accurate
uPVC Low (easy cleaning) Modern homes, low upkeep Very good imitation
Aluminium Very low (wipe clean) Contemporary builds, extensions Sleek, modern look
Composite Very low (minimal attention) Versatile, both period and new builds Realistic, wood-like finish
  • Timber: Authentic, beautiful ageing, high maintenance, requires regular repainting
  • uPVC: Low maintenance, realistic wood finishes available, durable in UK weather
  • Aluminium: Contemporary styling, excellent durability, minimal thermal conductivity impact
  • Composite: Hybrid approach, wood-like appearance, easy care

Through-Bars vs Surface-Mounted Bars

The placement method matters as much as the material. Through-bars sit between the glass panes inside the sealed unit, eliminating cleaning challenges and improving thermal performance.

Surface-mounted bars sit on the outside of the glass, creating authentic period appearance but trapping dust between glass and bars. Understanding different window materials helps you assess how each type performs with various glazing systems.

Through-bars offer practical advantages for modern living whilst maintaining period aesthetics when designed correctly.

Surface bars suit heritage properties where internal appearance matters less than external authenticity. Through-bars work better for everyday homes where maintenance and cleaning convenience take priority.

Pro tip: Request samples of different bar styles installed temporarily on your home before deciding—viewing them in natural light and from different angles reveals how they’ll look permanently rather than relying on small showroom samples.

How Glazing Bars Enhance Aesthetics and Heritage

Glazing bars are far more than functional window dividers—they define the visual character of period properties. The right glazing bar style can transform your home’s appearance, enhance its heritage value, and ensure it fits seamlessly within its architectural context. For homeowners in conservation areas, choosing appropriate bars often becomes a planning requirement rather than optional.

The Visual Impact of Glazing Bars

Glazing bars create distinctive patterns that immediately signal architectural period. A Georgian townhouse with slim, evenly-spaced bars looks entirely different from a Victorian villa with bolder proportions. These patterns aren’t accidental—they reflect authentic design choices made centuries ago.

The grid pattern created by bars draws the eye vertically and horizontally, affecting how light and shadow play across your façade. When sunlight hits the bars at different angles, they create dynamic visual interest that plain glass simply cannot achieve.

Here’s what glazing bars contribute visually:

  • Create authentic period character matching your home’s age
  • Add depth and shadow play to window openings
  • Define proportion and scale of the building façade
  • Enhance curb appeal and street presence
  • Break up large glass areas into manageable visual sections

Heritage Authenticity Matters

Glazing bar styles evolved across different architectural eras. Georgian properties typically feature slim Lambs Tongue bars, whilst Victorian and Edwardian homes use more substantial Ovolo styles. Using the wrong bar style on a period property can undermine its historical authenticity.

In listed buildings and conservation areas, local authorities often specify which glazing bar styles are acceptable. Getting this wrong risks planning enforcement action or refusal of window replacement applications. Selecting period-correct glazing bars isn’t just about aesthetics—it’s about preserving your home’s architectural integrity and heritage value.

Authentic bars also tell a property’s story. Visitors immediately recognise the architectural period through these visual markers, reinforcing your home’s historical significance.

Enhancing Curb Appeal

Glazing bars significantly impact how neighbours and potential buyers perceive your property. Homes with appropriate traditional bars appear more established, characterful, and valuable than those with plain modern glass.

When you renovate windows with quality glazing bars, you’re investing in lasting visual appeal. This investment protects your home’s street presence and contributes positively to your neighbourhood’s character.

UPVC and composite bars now replicate timber authenticity perfectly, allowing you to enhance heritage appeal without high maintenance demands.

Pro tip: Before committing to glazing bar styles, photograph neighbouring period properties to understand what’s authentic for your street—this research prevents costly mistakes and ensures your windows harmonise with local architectural character.

Energy Efficiency and Performance Factors

Glazing bars affect window performance more subtly than most homeowners realise. They don’t dramatically reduce efficiency, but they do influence how heat moves through your windows. Understanding this relationship helps you make choices that balance aesthetics with thermal performance.

How Glazing Bars Impact Thermal Performance

Traditional surface-mounted glazing bars create small thermal bridges where materials connect to the glass. Heat flows slightly more readily along metal or timber bars than through glass, though the effect is minimal on modern windows.

Through-bars sit inside the sealed unit between glass panes, eliminating this thermal bridge problem entirely. They allow heat to flow uniformly across the window without material interruption.

The real thermal performance comes from what surrounds the bars, not the bars themselves. Modern window energy ratings incorporate low-emissivity glass coatings, argon gas fills, and insulated spacer bars that vastly outweigh the minimal impact of glazing bar material.

Infographic of glazing bar types and efficiency factors

Key Efficiency Features That Matter More

When evaluating window efficiency, focus on these primary factors:

  • Low-emissivity coatings on glass reduce radiative heat loss
  • Argon or krypton gas fills between panes provide superior insulation
  • Insulated spacer bars prevent heat loss at the glass edge
  • Quality frame construction maintains airtightness around the entire window
  • Proper installation sealing prevents air infiltration

Glazing bars rank below all these elements in terms of thermal impact. A window with basic bars but excellent glass coatings outperforms one with no bars and poor glazing specs.

This summary shows how bars and glass features impact energy efficiency:

Feature Effect on Energy Efficiency Practical Importance
Glazing Bar Material Minimal impact if modern Secondary to glass spec
Low-Emissivity Coating Greatly improves performance Most important glass factor
Gas Fill (Argon/Krypton) Enhances insulation Major efficiency influence
Sealed Unit (Through-Bar) Prevents thermal bridging Strong positive effect

Window Energy Ratings and Glazing Bars

Window Energy Ratings (WER) in the UK assess overall window performance on a scale from A++ (best) to E (poorest). These ratings account for heat retention, solar heat transmittance, and air infiltration across the entire window assembly.

Your rating depends primarily on glass quality and frame insulation, not glazing bar choice. Two windows with identical frames and glass but different bar styles will receive the same WER rating.

This means you can achieve excellent energy efficiency whilst maintaining period authenticity through glazing bars. The two goals aren’t mutually exclusive. Glazing bars have negligible impact on overall window efficiency when combined with modern glass technology and proper installation.

Making the Right Choice

Select glazing bars based on your home’s aesthetic requirements first. Then ensure your window supplier uses high-performance glass and framing to meet your energy targets.

Through-bars in sealed units offer the best combination: authentic appearance with eliminated thermal bridging concerns and easier maintenance.

Pro tip: Request full Window Energy Rating details for any window with glazing bars before purchase—compare the WER rating to simpler windows to verify that bar style hasn’t compromised efficiency, and confirm your chosen option meets current Building Regulations standards.

Regulations, Costs, and Installation Mistakes to Avoid

Window installation isn’t a free-for-all. UK Building Regulations govern thermal performance, safety, and structural requirements. Getting this wrong creates legal headaches, failed property inspections, and difficulty selling your home. Understanding the rules and common pitfalls protects your investment.

UK Building Regulations and Compliance

All window replacements must meet strict Building Regulations standards. These focus on thermal performance, safety glazing, ventilation, and structural integrity. Properties built before recent updates must be brought up to current U-value standards during replacement.

Building Regulations window installations require Competent Person certification through schemes like FENSA. Accredited installers can self-certify compliance, providing certificates essential for legal assurance and property sales.

Skipping proper certification creates serious consequences:

  • Enforcement actions from local authorities
  • Rejection of glazing bar designs in conservation areas
  • Inability to sell your property without costly remediation
  • Void warranties on non-compliant installations
  • Increased insurance liability

Always verify your installer holds current FENSA or equivalent accreditation before work begins. Request full certification documents before final payment.

Cost Factors and Budget Planning

Glazing bars add cost to window replacement, but less than many homeowners expect. Costs vary based on bar material, placement method, and number of windows.

Typical cost additions:

  • uPVC through-bars: £50–£150 per window
  • Aluminium bars: £100–£200 per window
  • Timber bars: £200–£400 per window (heritage work)

Through-bars cost slightly more than surface-mounted versions but offer better long-term value through reduced maintenance and superior thermal bridging elimination. The cost of authentic glazing bars is minimal compared to the aesthetic and heritage value they provide to period properties.

Obtain detailed quotes specifying bar type, material, and placement method. Compare quotes from multiple FENSA-accredited installers to ensure competitive pricing for comparable specifications.

Common Installation Mistakes

Most glazing bar problems stem from poor installation rather than design flaws. Watch for these frequent errors:

Inadequate sealing around bar attachment points allows water infiltration and thermal bridging. Proper installation requires silicone sealant and backing rods throughout.

Incorrect bar proportions for your property’s age destroy authenticity. Installing thick modern bars on a Georgian townhouse creates jarring visual discord.

Moisture trapped between panes indicates failed sealed unit installation. Through-bars must sit perfectly sealed within the unit without condensation.

Poor ventilation consideration during installation blocks air flow your home requires. Modern windows need adequate background ventilation to prevent damp.

Pro tip: Before signing an installation contract, request references from at least three previous glazing bar projects, verify FENSA accreditation directly with the scheme, and confirm the installer provides Building Regulations certification as standard—not as an expensive add-on.

Enhance Your Home’s Style and Efficiency with Expert Glazing Bar Solutions

Choosing the right glazing bars is essential for balancing authentic period style with modern energy efficiency. If you want to preserve your home’s architectural character while benefiting from advanced window technology, trusted expertise makes all the difference. At Cloudy2Clear Windows, we understand the challenges of maintaining heritage appeal alongside thermal performance and low maintenance.

https://www.cloudy2clearwindows.co.uk


Discover our tailored window solutions that offer:

  • Authentic timber, uPVC, aluminium, or composite glazing bars
  • Expert installation meeting UK Building Regulations for safety and energy
  • Superior double glazing options designed to enhance efficiency without compromising style

Do not leave your home’s comfort and curb appeal to chance. Visit Cloudy2Clear Windows today to explore how we can help you achieve the perfect combination of tradition and innovation. Learn more about our double glazing options and how to choose the right window materials to suit your property. Take the first step towards smarter, stylish windows—contact us now for expert advice and a free consultation.

Frequently Asked Questions

What are glazing bars and what purpose do they serve?

Glazing bars are the wooden or metal strips that divide window panes into smaller sections. They serve both aesthetic and functional purposes, impacting the visual character of windows while also influencing insulation performance.

How do traditional timber glazing bars compare to modern materials like uPVC and aluminium?

Traditional timber glazing bars offer authentic aesthetics and period accuracy but require high maintenance, including regular painting. Modern uPVC and aluminium options replicate the appearance of wood with lower maintenance needs, providing durability and moisture resistance.

Do glazing bars significantly affect the energy efficiency of my windows?

Glazing bars do not significantly reduce energy efficiency when modern materials and technologies are used. The primary factors impacting thermal performance are the overall window construction, including the type of glass and frame, rather than the glazing bars themselves.

What are the differences between through-bars and surface-mounted bars?

Through-bars are located between the glass panes in a sealed unit, offering advantages like easier cleaning and improved thermal performance. Surface-mounted bars sit on the outside of the glass, providing authentic aesthetics but may trap dust and dirt between the glass and the bars.

How to Fix Window Leaks for a Draught-Free Home

Leaking windows are more than an annoyance for many homeowners in England. Hidden moisture can quietly undermine your home’s comfort, increase energy costs, and damage property value. Locating the true source of leakage is often more complicated than spotting obvious cracks. This guide uncovers the most effective ways to diagnose and fix persistent window leaks with clear, practical steps suited to British homes.

Step 1: Diagnose window leak sources

Finding where water is actually entering your home is the first critical step. Many homeowners assume leaks come from obvious cracks, but the truth is more complex. Water can travel along frames, sills, and seals before pooling in unexpected places.

Start by examining the interior window sill during or after rain. Look for wet patches, discolouration, or soft wood that feels spongy when you press it. Check the corners and edges where the frame meets the wall, as these are common weak points.

Next, inspect the exterior condition carefully.

  • Look for visible cracks in the frame or glass
  • Check if the sealant around the frame is cracked, peeling, or missing entirely
  • Examine the cill (the external sill) for blockages or damage
  • Feel along rubber seals for hardening or gaps
  • Look for common window and door faults that might explain persistent moisture problems

Water damage tells a story. Staining on walls below windows, paint bubbling, or mould growth all point to active leaks. Pay attention to which direction the stains travel, as water rarely falls straight down. The source of a leak is often several inches away from where you see water pooling inside. Trace the path backwards by following wet marks and damp patches.

On dry days, you can also perform a simple water test. Pour water slowly along the exterior frame and seals while watching inside for drips. This reveals exactly where water penetrates.

Here’s a summary of possible leak sources and their typical indications:


Suspected Leak Source Typical Signs Indoors Typical Signs Outdoors
Window frame joints Damp or softened plaster Cracked or peeling sealant
Sill or cill Spongy wood, discolouration Blockages, green algae growth
Rubber or silicone seals Mould near corners Hardened or missing seal sections
Wall-frame connection Paint bubbling, damp stains Gaps at wall junction


Pro tip: Use a moisture meter (available from most hardware shops for under £20) to identify damp areas in frames before visible damage appears—catching problems early saves pounds in repairs.

Step 2: Prepare windows and gather proper materials

Before you start any repair work, you need the right tools and materials on hand. Proper preparation saves time and frustration, and ensures you can complete the job without multiple trips to the shops.

Begin by clearing the work area. Remove curtains, blinds, and furniture away from the windows. This gives you full access and protects your belongings from water and dust. Open windows fully so you can reach both the interior and exterior comfortably.

Gather these essential materials for most leak repairs:

  • Silicone sealant (100 percent silicone works best for window frames)
  • A sealant gun for smooth, controlled application
  • Caulking tool or plastic spatula for smoothing the sealant
  • Clean cloths or paper towels for wiping excess sealant
  • Masking tape to create clean edges
  • Wire brush or old toothbrush for removing old, loose sealant
  • Rubbing alcohol or white spirit for cleaning surfaces
  • Safety glasses and disposable gloves

You’ll also need to assess your specific window type, as different materials require slightly different approaches. Understanding different types of window materials helps you choose the right sealant and repair method. Quality silicone sealant is worth the extra cost. Cheap alternatives often fail within months and create more work later.

Before starting, clean the affected area thoroughly. Remove old, crumbling sealant with a wire brush, then wipe the surface with rubbing alcohol on a cloth. Allow it to dry completely before applying new sealant. A dry surface ensures the sealant adheres properly and forms a waterproof bond.

Check your weather forecast. You’ll need at least 24 hours of dry conditions for sealant to cure properly. Applying sealant during rain or high humidity compromises the seal.

Pro tip: Buy sealant from a specialist builder’s merchant rather than general hardware shops—they stock professional-grade products and staff can advise on the best option for your specific window frames.

Step 3: Seal gaps and apply appropriate repairs

Now you’re ready to apply the repair. This is where you seal the gaps and create a waterproof barrier that stops leaks from returning. The key is applying sealant correctly and allowing sufficient curing time.

Sealant applied to cracked window frame


Start by applying masking tape on both sides of the gap you’re sealing. Place it about 6 millimetres away from the crack or joint. This creates clean, professional edges and makes cleanup easier. Tape protects the surrounding area from accidental sealant smears.

Load your sealant into the gun and cut the nozzle at a 45-degree angle. Practice on a scrap surface first if you’ve never used a sealant gun before. Position the nozzle into the gap and apply steady, continuous pressure as you move along the crack. The sealant should fill the entire gap without gaps or air pockets.

Use your caulking tool or plastic spatula to smooth the sealant immediately after application. Work in one smooth motion to create an even surface. This helps the sealant bond properly and improves the waterproof seal.

For some window issues, you may find that repairing failed double glazing requires more than sealant alone. If moisture is trapped between panes or the seal has completely failed, professional replacement may be your best option.

Compare different window repair approaches and when to use them:


Method Suitable For Advantages Limitations
Sealant application Small cracks, minor gaps Quick, low cost Not for major damage
Double glazing repair Moisture between panes Restores insulation Needs professional service
Full frame replacement Severe wood rot, structural failure Long-lasting solution High expense, disruptive


Never skip the curing time. Sealant needs at least 24 hours before exposed to water, even light rain or condensation.

Remove masking tape while the sealant is still slightly tacky, usually within 15 to 30 minutes. This prevents the tape from tearing the cured sealant. Keep the area dry during the full curing period—close windows and avoid rain.

Pro tip: Apply sealant in warm, dry conditions between 5°C and 25°C if possible. Cold temperatures slow curing dramatically, whilst extreme heat can cause the sealant to set too quickly and crack.

Step 4: Test windows for effective leak prevention

Once your repairs have cured fully, it’s time to verify they actually work. Testing confirms your sealant has sealed properly and your windows are now protected from water ingress. This step gives you confidence in your repair work.


Infographic showing main window leak repair steps


Wait a minimum of 24 hours after applying sealant before testing. The sealant needs this time to cure completely and bond with the frame. Testing too early can compromise the seal you’ve just created.

Perform a visual inspection first. Look at the sealant you applied—it should be smooth, continuous, and free from cracks or gaps. Check that it’s fully adhered to both sides of the joint. Run your finger along it gently to feel for any irregularities.

Next, conduct a water test during dry weather. Pour water slowly along the exterior frame and seals you’ve repaired whilst watching the interior closely. Look for any drips, seepage, or moisture appearing inside. If water gets through, you’ve identified an area needing additional sealant.

Here are the key areas to test thoroughly:

  • Bottom corners where the frame meets the sill
  • Along the entire length of frame seals
  • Around any cracks or joints you’ve repaired
  • Where the frame connects to the wall
  • Along the sill where water naturally pools

Waiting for natural rain provides the best long-term test. Monitor your windows during the next rainfall to see if any dampness appears inside. This real-world test reveals problems that controlled water tests might miss.

Proper leak prevention also involves understanding draught proofing your windows, which addresses both moisture and thermal efficiency in your home. A successful repair stays dry for weeks and months, not just the first few days. Keep observing your windows through different seasons.

If water still appears during testing, don’t panic. You’ve identified exactly where the leak persists. Apply additional sealant to that specific area and repeat testing after 24 hours.

Pro tip: Paint over dried sealant with exterior-grade paint matching your frame colour. This protects the sealant from UV damage, which can cause it to degrade and crack within a few years.

Protect Your Home from Window Leaks with Expert Help

If you are struggling with persistent window leaks and worrying about damp patches or spongy wood as highlighted in our guide on how to fix window leaks for a draught-free home you are not alone. Leaks can cause lasting damage and disrupt your comfort but you do not have to face these challenges alone. At Cloudy2Clear Windows we combine decades of experience with quality materials and professional repair techniques to ensure your windows stay sealed and your home stays warm and dry.

https://www.cloudy2clearwindows.co.uk


Do not wait until minor cracks turn into costly repairs. Benefit from our expert installation and double glazing repair services which go beyond simple sealant fixes. Visit our Cloudy2Clear Windows homepage now and discover how a trusted partner can help you achieve a draught-proof and leak-free home. Restore your peace of mind today with clear answers and reliable solutions for your windows. Learn more about our approach and see why thousands trust us to uplift their homes at Cloudy2Clear Windows.

Frequently Asked Questions

How can I diagnose the source of a window leak?

To diagnose the source of a window leak, start by inspecting the interior window sill for damp patches or discolouration, especially after rain. Examine the frame’s joints and seals for cracks or gaps, and perform a water test to pinpoint where water might be entering.

What materials do I need to fix window leaks effectively?

You will need silicone sealant, a sealant gun, a caulking tool, clean cloths, and masking tape. Gather these materials before starting your repairs to ensure you can complete the work without interruptions.

What steps should I follow to apply sealant to fix a window leak?

To apply sealant, first, clean the affected area and remove any old sealant. Then, load the sealant into the gun, apply it steadily along the gap, and smooth it out with a caulking tool. Always remove masking tape while the sealant is slightly tacky to maintain clean edges.

How do I test if my window repairs have been successful?

After letting the sealant cure for at least 24 hours, perform a visual inspection to look for any cracks or gaps. Then, conduct a water test by pouring water along the exterior frame and checking for any leaks inside.

What should I do if water still leaks after I have sealed the windows?

If water still leaks after sealing, identify the exact area where it is coming through and apply additional sealant to that specific spot. Repeat the testing process after 24 hours to ensure the new application has resolved the leak.

How can I maintain my windows to prevent future leaks?

To maintain your windows, regularly check for signs of wear around the seals and frames, and clean any debris that may block drainage. Consider applying exterior-grade paint over dried sealant to protect it from UV damage, as this can prolong its life significantly.

What Is a Glazing Unit? Key Benefits for Homes

Many homeowners in England spot cloudy patches in their double glazed windows and wonder if energy is slipping away. Understanding glazing units matters because the right choice can make your home warmer, quieter, and more cost-effective to run. With options ranging from standard double glazing to advanced coatings and gases, this guide clears up myths and explains how modern glazing units improve energy efficiency and reduce condensation hassles—helping you get the most value from your windows.

Glazing Units Defined and Common Myths

A glazing unit is the glass component of your window system that controls how much light, heat, and sound pass through. It’s the part you look through, and it’s far more sophisticated than a single pane of glass.

Most modern glazing units in UK homes consist of two or three panes of glass separated by spacer bars, creating an air gap between them. This gap is where the energy-saving magic happens—it acts as insulation, trapping air that slows heat loss in winter and heat gain in summer.

What Makes Up a Glazing Unit

A complete glazing unit contains several key components working together:

  • Glass panes: Usually toughened or laminated for safety and durability
  • Spacer bars: Aluminium or plastic strips that maintain consistent distance between panes
  • Desiccant material: A moisture-absorbing substance sealed inside the spacer bar to prevent condensation between panes
  • Sealant: Butyl or polysulphide compounds that create an airtight seal around the perimeter

The overall frame around the glazing unit—made from uPVC, aluminium, or timber—is separate, though homeowners often confuse the two. The glazing unit itself is just what you see when you look at your window.

Understanding Different Types

Different glazing units serve different purposes. Double-glazed units with sealed air gaps represent the standard across most English homes, offering a reliable balance between cost and thermal performance.

Triple-glazed units add a third pane for superior insulation, whilst low-emissivity (low-E) coatings reflect heat back into your home. Some units use argon or krypton gas instead of regular air—these heavier gases perform better but cost more upfront.

Common Myths About Glazing Units

Myth 1: All glazing units are the same.

This couldn’t be further from the truth. The quality of seals, the type of glass, the gas filling, and the spacer construction all vary significantly between manufacturers and products. A premium unit will outperform a basic one by years.

Myth 2: Condensation between panes means the unit has failed.

Yes, condensation between the glass panes indicates the seal has broken and moisture has entered. However, condensation on the inside of your windows (between the glass and your room) is usually caused by humidity in your home, not a faulty unit.

Myth 3: Thicker glass always means better insulation.

The air gap thickness matters far more than glass thickness for thermal performance. A 4mm-12mm-4mm unit typically performs better than a 6mm-6mm-6mm one, despite the thinner outer panes.

Myth 4: You must replace the entire frame if the glazing unit fails.

Incorrect. The glazing unit can be removed and replaced independently from the frame in most cases. This is why Cloudy2Clear specialises in glazing unit replacement rather than full window replacement. A faulty glazing unit is a simple repair—don’t let anyone convince you otherwise. The unit itself can be replaced without touching your frames.

Pro tip: When inspecting your windows for issues, check the spacer bars around the edges of the glass. If you can see discoloured desiccant material or condensation, that unit needs replacing soon before moisture damage spreads.

Types of Glazing Units and Their Functions

Not all glazing units perform the same way. The type you choose depends on your home’s location, age, budget, and specific needs—whether that’s energy savings, noise reduction, or heritage preservation.

Understanding the different types helps you make an informed decision rather than accepting whatever a surveyor recommends. Each type serves distinct functions and offers different performance levels.

Double-Glazed Units

Double glazing remains the most common choice in UK homes. It consists of two glass panes with an air gap (typically 16mm) between them sealed by spacer bars and sealant.

This design works because the air gap creates an insulating layer. Heat struggles to pass through air, so your warmth stays inside during winter and external heat stays out in summer.


Double-glazed window panes and spacer bar


Double-glazed units with quality seals provide adequate thermal performance for most homes at a reasonable cost. They also reduce external noise by around 30%, making them practical for busy roads or urban areas.

Triple-Glazed Units

Triple glazing adds a third pane and another air gap, doubling the insulating layers. This extra barrier delivers superior thermal performance—typically 20-30% better than double glazing.

The trade-off is cost. Triple glazing units are significantly more expensive upfront. However, the energy savings build over time, especially in poorly insulated older homes or homes in cold regions.

Triple glazing also excels at noise reduction, making it ideal if you live near airports, motorways, or train lines. The additional glass and air gaps create multiple barriers to sound waves.

Low-Emissivity (Low-E) Coated Units

Low-E coatings are thin, invisible metallic layers applied to glass surfaces. They reflect heat back into your home whilst allowing light through—essentially making your windows smarter.

This coating particularly benefits winter heating. In summer, you can select coatings that reflect external heat, reducing cooling demands. Many modern double and triple units include low-E technology as standard.

Secondary Glazing Units

Secondary glazing systems offer reversible energy improvements without removing original windows. These are single or double-glazed panels installed on the inside of existing frames, leaving historic windows untouched.

This matters for listed buildings or period properties where heritage rules restrict replacement. Secondary glazing can improve thermal performance by up to 40% whilst preserving character.

Specialist Units for Specific Needs

Some glazing units address particular requirements:

  • Laminated glass: Holds together if broken, ideal for ground floors or commercial properties
  • Toughened glass: Extra-strong, often required by building regulations for safety-critical areas
  • Solar control glazing: Tinted or reflective coatings for properties with excessive solar gain
  • Acoustic glazing: Laminated units with special interlayers that absorb sound vibrationsDifferent types serve different purposes. The “best” glazing unit depends on your home’s specific situation, not on cost alone.

Pro tip: When comparing glazing units, ask about the spacer bar material and sealant type. Warm-edge spacers and flexible sealants perform better than older aluminium designs and will extend your unit’s lifespan by several years.

To help you compare common glazing unit types, refer to the table below:

Glazing Unit Type Typical Insulation (U-Value) Noise Reduction Ideal Use Case
Double-glazed Around 1.3–1.5 W/m²K Medium (approx. 30%) Most family homes
Triple-glazed As low as 0.8–1.0 W/m²K High Busy roads, cold climates
Low-E coated 1.0–1.3 W/m²K with coatings Medium-High Max energy-saving needed
Secondary glazing Varies (improvement up to 40%) Low-Medium Heritage or listed buildings

How Glazing Units Improve Energy Efficiency

Your windows are responsible for significant heat loss in winter. A single-glazed window loses roughly three times more heat than a modern glazing unit, which is why upgrading makes such a tangible difference to your energy bills.

Glazing units work by trapping air between panes. This trapped air acts as an insulating barrier, preventing heat from escaping your home and keeping cold draughts at bay. It’s simple physics with profound financial benefits.


Glazing unit benefits infographic for homes

How the Air Gap Creates Insulation

The space between glass panes is the secret ingredient. Air naturally resists heat transfer—it moves slowly compared to solid materials like glass or metal.

When you seal air between two panes, you create a thermal buffer. Heat from your radiator hits the inner pane and transfers through it, but then encounters the air gap where movement slows dramatically. By the time heat reaches the outer pane, significantly less energy remains to escape outside.

Thicker air gaps work better, but only up to a point. A 16mm gap is optimal; beyond 20mm, air movement inside the gap actually reduces efficiency. That’s why manufacturers have standardised this dimension.

The Role of Gas Filling

Some premium glazing units use argon or krypton gas instead of regular air. These gases are heavier and slower-moving than air, making them superior insulators.

Argon gas improves thermal performance by approximately 10% compared to air-filled units, whilst krypton performs even better. The downside is cost—gas-filled units cost more upfront, though the energy savings justify the investment over time.

Low-Emissivity Coatings Boost Performance Further

Low-E coatings are where modern glazing becomes truly clever. These invisible metallic layers reflect infrared radiation—essentially heat—back into your home.

In winter, they act like a thermal mirror, bouncing your heating energy inward. This alone can improve efficiency by 15-20%. Many contemporary glazing units combine air gaps, quality gas, and low-E coatings for maximum performance.

Real-World Energy Savings

Improved glazing reduces heat loss substantially and cuts energy bills significantly. Homeowners replacing single glazing with modern double-glazed units typically see heating cost reductions of 10-15% annually.

For homes with poor insulation elsewhere, this saving compounds. High-quality glazing units work alongside loft insulation and cavity wall filling to create a comprehensive energy-efficient home.

Why Condition Matters

Even excellent glazing units deteriorate over time. Seals degrade, allowing air to escape and moisture to enter. A failed unit loses much of its insulating benefit—the air gap fills with moisture, turning your window into poor insulation.

This is why unit replacement, not frame replacement, makes financial sense. Cloudy2Clear replaces failed units whilst keeping your existing frames, delivering energy efficiency gains without unnecessary expense. Modern glazing units typically perform 70-80% better than single glazing. That performance degrades gradually as seals fail, making timely replacement essential.

Pro tip: Check your windows on a cold day. If you see condensation between the glass panes (not on the inside surface), your seal has failed and you’re losing significant insulating benefit. That’s your signal to arrange a replacement.

Condensation, Repairs, and Cost Implications

Condensation between glass panes signals a failed seal. Moisture has breached the glazing unit’s perimeter, and the desiccant inside can no longer absorb it. This fogging reduces visibility and insulation performance dramatically.

Unlike condensation on your windows’ interior (caused by indoor humidity), condensation between panes indicates a structural problem with the unit itself. It’s a repair signal, not a cleaning issue.

Understanding the Condensation Problem

When a seal fails, two things happen simultaneously. Air pressure inside the unit equalises with outside pressure, allowing moisture to enter. The desiccant becomes saturated and stops working.

Over time, this moisture collects between the panes, creating visible fogging. Your window becomes cloudy, and more importantly, the air gap loses its insulating properties. You’re essentially paying for double glazing that performs like single glazing.

Repair Options and Their Limitations

Resealing or replacing the sealed unit are the main repair approaches. Resealing attempts to create a new seal around the perimeter, but this temporary fix often fails within months because the internal desiccant remains saturated.

Full unit replacement is more reliable. The entire glazing unit is removed and a new one installed, restoring full insulation and clarity. This is what Cloudy2Clear specialises in.

Cost Breakdown for Repairs

Blown window repair costs vary depending on pane size and damage severity, ranging from approximately £50 to £600 per unit. Several factors influence the final price:

  • Unit size: Larger panes cost more to replace
  • Glazing type: Low-E or specialist coatings increase expense
  • Frame type: uPVC costs less than aluminium or timber
  • Number of units: Multiple failed units add up quickly

Typical costs for a standard double-glazed unit average around £500, with installation taking approximately one day. This is considerably cheaper than replacing entire window frames.

Here’s a quick overview of cost factors and what influences glazing repair value:


Cost Factor Impact on Price Long-Term Value
Pane size Larger increases cost Bigger units save more energy
Specialist features Low-E, gas fill add cost Higher energy bill reduction
Frame condition Good frames save money Avoids unnecessary expenses
Number of units Bulk work costs more Multi-unit savings accumulate

Why Full Replacement Might Be Better

Partial repairs can extend window life, but replacement guarantees better long-term performance and energy efficiency. A repaired unit might fail again within years; a new unit comes with manufacturer warranties lasting 10-15 years.

Consider your window’s age. If frames are damaged, rotting, or difficult to operate, replacing just the unit leaves other problems unsolved. A full window replacement might offer better value over time.

The Cost-Benefit Analysis

A £500 unit replacement saves roughly £80-120 annually on heating costs. That unit pays for itself within 4-6 years through energy savings alone. Beyond that, you’re banking pure savings.

Delaying repair costs more. Failed units worsen insulation continuously, bleeding money through heat loss month after month. Failed glazing units don’t improve with age. Every month you delay replacement costs real money in wasted heating energy.

Pro tip: Get multiple quotes from installers before deciding. Prices vary significantly, and some installers include extended warranties or guarantee their workmanship beyond manufacturer terms, making them better value despite higher initial cost.

Your glazing unit isn’t just a purchase—it’s subject to UK Building Regulations. These rules ensure your windows meet safety, thermal, and ventilation standards. Understanding them helps you make compliant choices and protects your home’s legality.

Building Regulations apply to new installations, replacements, and major renovations in England and Wales. Scotland and Northern Ireland have separate standards, but the principles remain similar.

Thermal Performance Requirements

Modern Building Regulations set U-values (thermal transmittance) that windows must achieve. A lower U-value means better insulation. Current standards typically require double-glazed units to achieve U-values around 1.4 W/m²K or better.

This sounds technical, but it’s straightforward: your glazing unit must insulate to a minimum standard. Older single-glazed windows typically have U-values around 5.0 W/m²K, which is why they lose so much heat.

When replacing glazing units, installers must ensure new units meet current standards. This usually happens automatically with modern units, but it’s worth verifying during specification.

Safety Glass and Location Requirements

Building Regulations cover safety glass requirements and specify where tempered or laminated glazing is mandatory. Certain positions require specialist glass:

  • Ground-floor windows: Laminated or toughened glass within 1.5m of doors
  • Bathrooms and wet rooms: Robust glazing to resist impacts
  • Sloped glazing: Reinforced units to prevent falls
  • Balcony and stairwell glazing: Safety glass rated for structural demands

Your installer should identify these locations automatically and specify appropriate glass. Cloudy2Clear ensures compliance during unit selection.

Ventilation and Escape Routes

Building Regulations require adequate ventilation to prevent condensation and maintain indoor air quality. Windows must provide sufficient opening area for natural ventilation unless mechanical systems exist.

For bedrooms, escape routes must include openable windows. These requirements prevent situations where sealed units create uninhabitable spaces or safety hazards.

Competent Person Schemes and Self-Certification

Registered installers under Competent Person Schemes can self-certify compliance, streamlining the approval process. This means no local authority inspection is needed—the installer’s certification proves compliance.

Cloudyto Clear’s registration ensures installations meet standards without additional bureaucratic steps. You get compliance assurance without paperwork delays.

Listed Buildings and Conservation Areas

Historic properties face additional restrictions. Double glazing for listed buildings often requires specialist conservation glazing that replicates original styles whilst meeting thermal standards.

Planning permission or Conservation Area Consent may be required before installation. This isn’t Building Regulations—it’s heritage protection. Check with your local authority first.

Why Compliance Matters

Non-compliant installations create legal liability. If you sell your home without proper certification, buyers can sue for remedial work costs. Insurance claims may be denied if installations violate regulations. Non-compliance isn’t just inconvenient—it creates legal and financial exposure when selling your home.

Pro tip: Always request a Building Regulations Completion Certificate or Competent Person Self-Certification documentation from your installer. File these with your home records—you’ll need them when selling or making future claims.

Enhance Your Home’s Comfort with Expert Glazing Unit Solutions

Understanding what a glazing unit is and the key benefits it brings to your home is just the first step. The real challenge lies in addressing issues such as failed seals, condensation between panes, and declining energy efficiency — problems that impact your comfort and increase heating costs. With terms like “low-emissivity coatings,” “argon gas filling,” and “sealed air gaps” highlighting the technology behind energy-saving glazing units, it becomes clear that professional replacement and repair services are essential for maintaining these critical features.

At Cloudy2Clear, we share your goal to improve your space by restoring the full benefits of modern glazing systems. Our skilled team specialises in replacing blown or failed glazing units without disturbing your existing frames, ensuring reduced heat loss, clearer views, and enhanced noise reduction. Discover how our decades of experience can transform your home by visiting Cloudy2Clear.


https://www.cloudy2clearwindows.co.uk


Take control of your home’s energy efficiency today. Contact Cloudy2Clear to schedule a glazing unit inspection and experience the difference of expertly replaced double or triple glazing. Don’t let condensation or failing seals cost you more in the long term. Visit Cloudy2Clear to explore how we can help you uplift your living space with trusted glazing solutions.

Frequently Asked Questions

What is a glazing unit?

A glazing unit is the glass component of a window system that controls light, heat, and sound transmission. It typically consists of two or three panes of glass separated by an air gap for insulation.

What are the benefits of double-glazed units compared to single-glazed units?

Double-glazed units provide better thermal insulation, reducing heat loss during winter and heat gain in summer. They also lower external noise levels and can lead to significant energy cost savings.

How do low-emissivity (low-E) coatings enhance glazing unit performance?

Low-E coatings reflect heat back into the home while allowing light to pass through, improving energy efficiency by reducing heating and cooling demands in both winter and summer.

Can you replace just the glazing unit without changing the entire window frame?

Yes, in most cases, the glazing unit can be replaced independently from the frame, making for a simpler and more cost-effective repair when a seal fails.

Why Replace Window Seals – Energy, Comfort, Cost

Foggy double-glazed windows can leave your home feeling chilly and looking worn, especially during unpredictable British weather. Damaged seals let in moisture and air, which undermines insulation and leads to higher energy bills as your heating system struggles to keep up. By understanding the critical role of window seals and recognising the signs of failure, you can restore both the visual appeal and comfort of your home. Discover why replacing seals is key to improved energy efficiency and lasting aesthetics.

Inspecting double glazing window seals


Table of Contents

Key Takeaways

Point Details
Importance of Window Seals Window seals are crucial for maintaining insulation, preventing heat loss, and avoiding condensation between double-glazed panes.
Signs of Seal Failure Key indicators of failing seals include condensation between panes, drafts, and visible mould or discoloration.
Cost of Replacement Professional window seal replacement typically costs between £150 and £500 per window, dependent on size and location.
DIY vs Professional Help While minor repairs can be DIY, full seal replacements are best handled by professionals to ensure proper installation and warranty protection.

What Window Seals Do In Double Glazing

Window seals are the unsung heroes of your double-glazed windows. They sit at the edges where the two glass panes meet and work tirelessly to keep your home insulated and your windows in good condition.

Think of window seals as the guardians of your double glazing unit. They perform several critical functions that directly affect your home’s comfort and energy bills.

The core job of window seals:

  • Keep the insulating gas trapped between the glass panes (usually argon)
  • Maintain airtightness to prevent drafts and heat loss
  • Block water and moisture from entering the unit
  • Prevent condensation from forming between the panes
  • Sustain the overall thermal performance of your windows

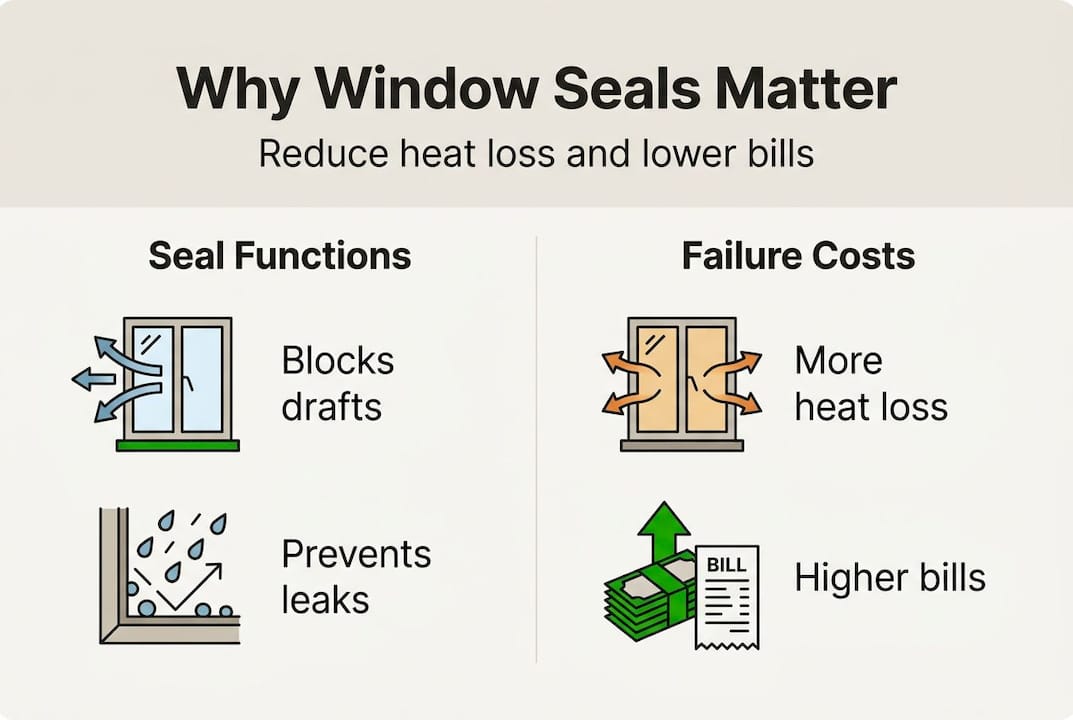
Double-glazed windows work by trapping insulating gas between glass panes, and your seals are what keep that gas from escaping. Without proper seals, the argon gas gradually leaks out, and your windows lose their ability to insulate effectively.

Without intact seals, your double glazing becomes single glazing—and you lose roughly 30% of its insulating value.

Moisture and water are the biggest threats to window seals. When seals fail, water can seep into the gap between panes, creating that foggy appearance you might already be noticing. This condensation forms because the airtight unit is no longer sealed, allowing moisture-laden air to contact the colder glass surfaces.

Your seals also prevent air leaks around the window frame. A failing seal means cold air can slip past, creating draughts and uncomfortable temperature variations near your windows. You’ll notice this especially on winter mornings.

The lifespan of window seals typically ranges from 10 to 20 years, depending on climate, window maintenance, and installation quality. British weather—with its temperature fluctuations and moisture—puts real stress on seals, causing them to become brittle and fail more quickly than in drier climates.

When seals deteriorate, you lose both comfort and money. Your heating system works harder to compensate for heat loss, and you might find yourself adjusting the thermostat more often. Over time, this costs considerably more than replacing the seals.

Damaged seals can sometimes be repaired depending on the extent of the failure, though replacement is often the more practical solution for failed double glazing.

Pro tip: Check your windows on a cold morning—if you spot condensation or fogging between the panes, your seals have likely failed and should be assessed by a professional.

Types Of Window Seals And Common Failures

Not all window seals are created equal. Your double-glazed windows rely on specific seal types, each designed to do different jobs. Understanding what you have—and what can go wrong—helps you spot problems early.

Double glazing uses several seal types working together to keep your windows performing well. The main categories include primary seals and secondary seals, each with distinct purposes.

Types of window seals:

  • Primary seals sit between the glass panes and the spacer bar, trapping the insulating gas
  • Secondary seals form the outer edge of the unit, blocking moisture and air from entering
  • Intumescent seals expand when exposed to heat, providing fire resistance and airtightness
  • Compound seals combine materials to protect against both thermal and fire risks

The primary seal is your first line of defence against gas leakage. Without it, argon escapes and your insulation collapses. The secondary seal acts as a backup, preventing water and air infiltration when the primary seal weakens.

Here is a summary of common double glazing window seal types and their unique characteristics:

Seal Type Location & Function Key Benefit
Primary seal Between panes and spacer bar Retains insulating gas
Secondary seal Around outer edge of the unit Blocks moisture and air
Intumescent seal Within glazing or frame Provides fire resistance
Compound seal Combination inside and around glazing area Combines protection types

Intumescent fire seals and other glazing seals are particularly important in newer buildings or where building regulations demand extra safety. These expand under heat to block smoke and flames, adding layers of protection beyond simple insulation.

Common seal failures happen because they lose flexibility over time, crack from temperature swings, or get damaged during installation.

British weather creates harsh conditions for seals. Temperature fluctuations cause expansion and contraction, which gradually weakens the seal material. UV exposure from sunlight makes seals brittle, especially on south-facing windows.

Moisture is another culprit. When seals fail, water enters the gap between panes and creates that foggy condensation you notice. This usually appears first at the bottom corners where moisture accumulates.

Poor installation also causes premature failure. If seals aren’t applied correctly or the frames aren’t properly prepared, they can fail within just a few years instead of their normal 10 to 20-year lifespan.

You might also see common window and door faults that indicate seal problems: visible condensation between panes, cold spots on glass, or water pooling on the windowsill.

Seal failure doesn’t happen overnight. Signs develop gradually—first you might notice a slight haze, then thicker condensation. By the time fogging becomes obvious, the seal has typically been failing for weeks or months.

Pro tip: Inspect your window seals annually in spring and autumn when temperatures fluctuate—these seasons stress seals most and make problems visible.

How Damaged Seals Affect Home Efficiency

When window seals fail, your home’s energy performance suffers immediately. The impact ripples through your comfort, your utility bills, and your wallet. Understanding what happens inside a failed unit helps explain why seal replacement matters so much.

Condensation from failed window seals

Your heating system becomes your biggest enemy when seals fail. Once seals break, damaged or failed window seals cause loss of inert gas like argon, which significantly reduces the unit’s insulation properties. Without that protective argon layer, your double glazing performs almost like single glazing.

Heat loss accelerates dramatically. The gap between panes that once trapped warm air now allows it to escape freely. Your boiler works overtime trying to maintain comfortable temperatures, burning more fuel and driving up your energy bills considerably.

What happens when seals fail:

  • Argon gas leaks out, stripping away most of the window’s insulating value
  • Cold draughts develop around window frames, creating uncomfortable temperature zones
  • Condensation forms between the panes, creating that foggy, misted appearance
  • Heat loss increases by roughly 30 per cent or more
  • Energy bills rise as your heating system compensates for lost insulation

Condensation between panes is the visible sign of seal failure. When seals let moisture in, water vapour condenses on the cold inner glass surfaces. Unlike condensation on the outside of windows, this interior misting cannot be wiped away because it sits inside the sealed unit.

Failed seals don’t just waste energy—they compromise your comfort and the structural integrity of your home.

Moisture infiltration creates additional problems beyond aesthetics. Water trapped between panes can cause mineral deposits on glass, reducing visibility and light transmission. Over time, moisture can also affect window frame materials, potentially causing rot in wooden frames or corrosion in metal components.

Your home’s thermal comfort suffers noticeably. Cold spots develop near windows on winter days, making nearby rooms feel drafty despite central heating running. You’ll find yourself adjusting the thermostat upward to compensate, which compounds the energy waste.

Air infiltration is another consequence. Compromised seals reduce airtightness and increase heat loss, which directly impacts your ability to maintain stable indoor temperatures. This also allows external pollutants and noise to enter more easily.

Infographic showing window seal failure effects

The longer you delay replacement, the worse it becomes. Small seal failures progress to larger ones, and energy waste compounds. A window that loses 30 per cent of its efficiency initially may lose 50 per cent within a couple of years.

Replacing failed seals with new ones restores how double glazing reduces heat loss through proper gas retention and airtightness. This brings your energy consumption and comfort levels back to where they should be.

Pro tip: Calculate your potential savings by comparing energy bills from the past two winters—a spike often coincides with when seals begin failing, making the case for replacement financially clear.

Signs You Should Replace Window Seals

Your windows send clear signals when seals are failing. Learning to recognise these warning signs means you can act before damage spreads throughout the unit. Most people miss early indicators, only noticing problems when they become severe.

The most obvious sign is condensation or misting between the glass panes. This fog appears on the inner surfaces where you cannot wipe it away. It forms because moisture has penetrated the failed seal and condenses on the cold glass inside the unit.

Signs that window seals need replacing include condensation or misting between the glass panes, spot discoloration or mould growth on seals, drafts felt near the window, or difficulty opening and closing the window. These indicators show the sealed unit is compromised.

Key warning signs to watch for:

  • Condensation between panes that appears on cold mornings
  • Visible mould or discoloration on the window frame or seal edges
  • Cold draughts near windows despite doors being closed
  • Difficulty opening or closing windows smoothly
  • Water pooling on windowsills or frames
  • Reduced visibility from mineral deposits on interior glass
  • Visible cracks or brittleness in the sealant material

Drafts are another telltale sign. Feel around the window frame on a winter day—cold air flowing in indicates the seal has failed. You might also notice uneven heating in rooms with compromised windows.

If you spot condensation between panes, your seal has already failed and replacement cannot wait.

Mould or discoloration on seals suggests moisture has been infiltrating for some time. This fungal growth appears as dark spots or streaks along the seal edges. Once mould appears, structural damage may already be occurring in the frame.

Difficulty opening or closing windows often accompanies seal failure. Moisture absorption causes frames to swell slightly, creating friction. If windows suddenly feel sticky or stiff, this warrants investigation.

Water seeping into the windowsill is a serious sign. Puddles or dampness around the base of the frame indicate water is no longer being blocked by the seal. This can lead to wood rot or other structural problems if ignored.

Mineral deposits on the interior glass create a hazy, streaked appearance that differs from regular dust. These deposits form when water trapped between panes evaporates, leaving minerals behind. This usually indicates long-term moisture exposure.

Spots of deteriorating sealant material indicate physical breakdown. Common indicators for replacing window seals include visual deterioration, such as cracked or brittle sealant or water ingress. Cracked sealant cannot provide effective protection.

Don’t wait for all signs to appear before acting. Even one warning sign warrants professional assessment. Early replacement prevents secondary damage and keeps your home more comfortable and efficient.

Pro tip: Create a simple inspection checklist and test your windows quarterly—condensation in autumn usually means seals failed during summer, giving you time to schedule replacement before winter heating costs spike.

Cost, Process And DIY Versus Professional Choice

Window seal replacement involves real money and important decisions. Understanding the actual costs, what the process involves, and whether DIY makes sense helps you make the right choice for your home. Most homeowners find professional replacement the safer route despite the upfront cost.

Costs vary significantly based on several factors. Window size, frame material, seal type, and whether you need one unit or multiple windows all affect pricing. On average, professional seal replacement costs between £150 and £500 per window in England, though larger units or complex jobs cost more.

Factors affecting seal replacement costs:

  • Window size (larger units cost considerably more)
  • Number of windows needing replacement
  • Frame material (aluminium, timber, UPVC)
  • Seal type and materials used
  • Access difficulty (ground floor versus upper floors)
  • Geographic location in England
  • Labour rates of your local glazier

The replacement process itself is relatively straightforward when handled professionally. A glazier removes the sealed unit from the frame, measures precisely for a replacement, and installs the new unit with fresh seals. The entire job typically takes 30 minutes to 2 hours per window depending on complications.

Professional seal replacement costs more upfront but protects your warranty and guarantees proper installation.

DIY possibilities exist but come with real limitations. Repairing or replacing window seals involves assessing the condition of existing seals, carefully removing damaged seals without harming glazing or frame, and fitting new seals or sealant. Minor repairs or draft-proofing work suit DIY approaches.

Full seal replacement is another matter entirely. Replacing window seals on double glazed units typically involves removing the sealed unit from the frame, measuring precisely for a replacement, and installing a new sealed unit, which demands precision and specialised tools. Most homeowners lack the equipment and experience to do this safely.

DIY risks include damaging the window frame during removal, installing units incorrectly (compromising seals), misaligning the glazing, or voiding your window warranty. A botched job often costs more to fix professionally than hiring someone initially would have.

Professional benefits extend beyond just installation. Glaziers guarantee their work, provide warranties on replacement units, have proper tools and experience, and often spot additional problems you might miss. Reducing the cost of double glazing installation and repair is possible through professional consultation and proper planning.

Cloudy2Clear Windows offers professional seal replacement with decades of installation experience. You receive quality workmanship, proper warranties, and peace of mind knowing your windows are restored correctly.

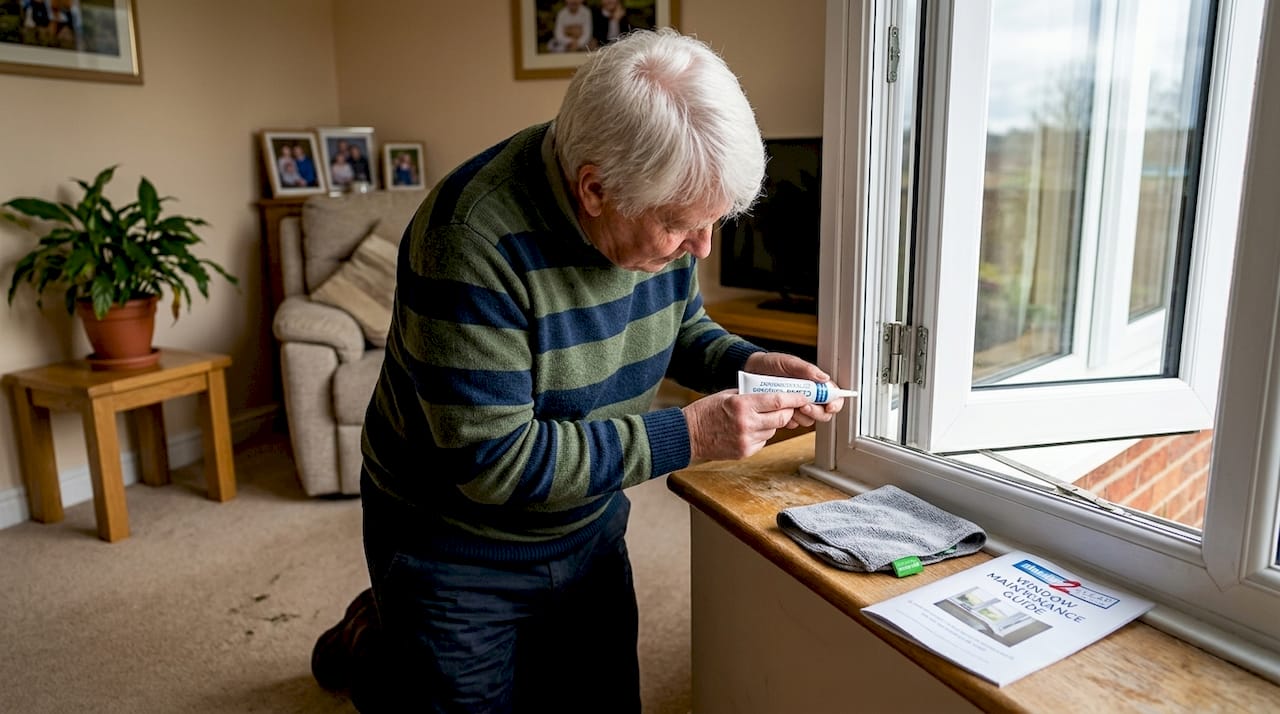
Minor repairs like applying fresh sealant around frame edges can be DIY projects. Major seal replacement inside the unit absolutely warrants professional help.

To help you gauge the most cost-effective window seal replacement path, here is a comparison of DIY and professional approaches:

Aspect DIY Replacement Professional Replacement
Cost Range Lower upfront, possible extra costs £150–£500 per window (England)
Skill Required Advanced skills & precision needed No skills required by homeowner
Typical Risks Frame/glass damage, misalignment Minimal, work is guaranteed
Warranty Impact Usually voids window warranty Warranty typically preserved
Time Investment Several hours, may require repeats Typically 30 minutes–2 hours

Pro tip: Get quotes from three different glaziers before committing—prices vary significantly, but cheapest often means corner-cutting, so compare warranties and guarantees alongside cost.

Restore Comfort and Cut Costs with Expert Window Seal Replacement

If you have noticed condensation between your double-glazed window panes or are struggling with cold draughts and rising energy bills, your window seals may be failing. These seals are vital for keeping insulating gas trapped, blocking moisture, and maintaining your home’s thermal efficiency. Ignoring failing seals means discomfort and higher heating costs.

https://www.cloudy2clearwindows.co.uk

At Cloudy2Clear Windows, we combine decades of experience with expert craftsmanship to restore your windows’ performance and your home’s comfort. Whether you need full double glazing replacement or professional window seal repairs, our team offers reliable solutions tailored to your specific needs. Don’t let damaged seals ruin your home’s energy efficiency and peace of mind. Visit Cloudy2Clear Windows to learn more or arrange a consultation today. Your home deserves the best protection against energy loss and damp.

Find out how replacing window seals can reduce heat loss and why professional repair beats DIY every time to safeguard your investment.

Frequently Asked Questions

Why is it important to replace window seals?

Replacing window seals is crucial because failing seals lead to significant heat loss, drafts, and increased energy costs. They also compromise your home’s comfort and can lead to condensation issues between glass panes.

How can I tell if my window seals need replacing?

Signs that window seals need replacing include condensation or misting between glass panes, visible mould on the seals, cold drafts near windows, and difficulty in opening or closing the windows smoothly.

What is the cost of replacing window seals?

The cost for professional window seal replacement typically ranges between £150 and £500 per window, depending on factors such as window size, frame material, and the number of windows needing attention.

Can I replace window seals myself, or should I hire a professional?

While minor repairs may be suitable for DIY, full seal replacement is best handled by professionals due to the precision required and risks of damaging the window frame. A professional guarantees their work, ensuring proper installation and preservation of warranties.

Top tips: How to improve ventilation in your home this summer

In the UK, we long for sunshine most of the year. But in true Brit style when summer does finally arrive and temperatures soar, we’re not so happy when our homes can quickly become hot and stuffy.

Unfortunately, most UK houses aren’t built for hot weather, so when the temperature creeps up it’s important to take simple steps to improve airflow and keep your home cool.

If you’re wondering how to increase ventilation in your house, or whether to keep windows open or closed in summer, these tips will help you boost air circulation, reduce indoor heat, and create a more comfortable living environment.

1. Open and close your windows at the right time of day

The most common question in hot weather is: Should I keep my windows open or closed in summer? And the answer? Well, both. But it’s timing that’s key.

It may seem logical to crack your windows opening during the day when the sun is at its hottest. However, opening your windows lets hot air flood in, and actually makes your home even warmer.

Instead, keep your windows closed and curtains drawn to block out the heat. Then, once the outside temperature drops in the evening or early morning, open your windows to let cooler air flow in and refresh your space – perfect for making bedtime more bearable.

2. Use the chimney effect to boost air circulation

The chimney effect is a simple but effective way to improve ventilation in your home, and it’s been used in hot climates for centuries. This technique relies on the natural movement of air: cool air enters at a low point and pushes warm air up and out through higher openings.

How to create a chimney effect at home:

  1. Open a window on the coolest, lowest side of your home.
  2. Open another window on the hottest, highest side; ideally upstairs or near the ceiling.
  3. Place a fan pointing outward in the upper window to help draw warm air out.

This creates a steady, natural flow of fresh air, which is just what you need on warm, still days.

3. Close curtains or blinds on south-facing windows

South-facing rooms get the most sunlight throughout the day. While this is great in winter, in the summer it can quickly turn into an uncomfortable problem.

Large south-facing windows and conservatories end up acting like greenhouses, trapping hot air inside.

To help reduce this effect you can:

  • Close your curtains or blinds during the hottest part of the day.
  • Invest in some blackout blinds or thermal-lined curtains for extra insulation.
  • If you’re making home improvements, consider switching to solar control glass to help reflect additional heat.

4. Check your windows and doors for repairs

If your windows and doors are poorly sealed or stiff, it can unintentionally hinder airflow and make it difficult to properly ventilate your home.

If your windows don’t open fully, won’t stay open safely, or let in draughts during winter, it might be time for repairs. Fixing hinges, seals, or frames not only helps improve summer ventilation but also boosts insulation and energy efficiency year-round.

5. Make the most of trickle vents (if you have them)

Many modern windows include trickle vents; small openings at the top of the frame that allow a low level of fresh air into your home, even when the windows are closed.

These are a godsend in summer when you want a constant background airflow without fully opening windows (ideal for security or if you live on a noisy road). If your windows don’t have trickle vents, you could explore retrofit options or upgrades when the time comes to replace them.

Improving air circulation at home doesn’t need to be complicated. With the right techniques, from opening windows at the right time to using natural airflow methods like the chimney effect, you can reduce stuffiness, improve indoor air quality, and keep your home cooler throughout the summer months.

FAQs

Should I leave my windows open or closed during a heatwave?
Keep them closed during the hottest hours of the day to block warm air, and open them in the evening when it’s cooler outside.

How can I improve airflow in a house with poor ventilation?
Use the chimney effect, keep internal doors open, install extractor fans where needed, and make use of trickle vents.

What are the benefits of opening windows at home?
Opening windows helps reduce indoor humidity, expel stale air and pollutants, and bring in fresh air, especially when timed correctly.